¶ Sonos
Since the launch of SONOS S2, pairing with SONOS should be done via your SONOS account.
Go to your Ubie's details screen in the control panel (click on the cog in the top left corner, then Installations and click on your Ubie device here).

Click on Add Application
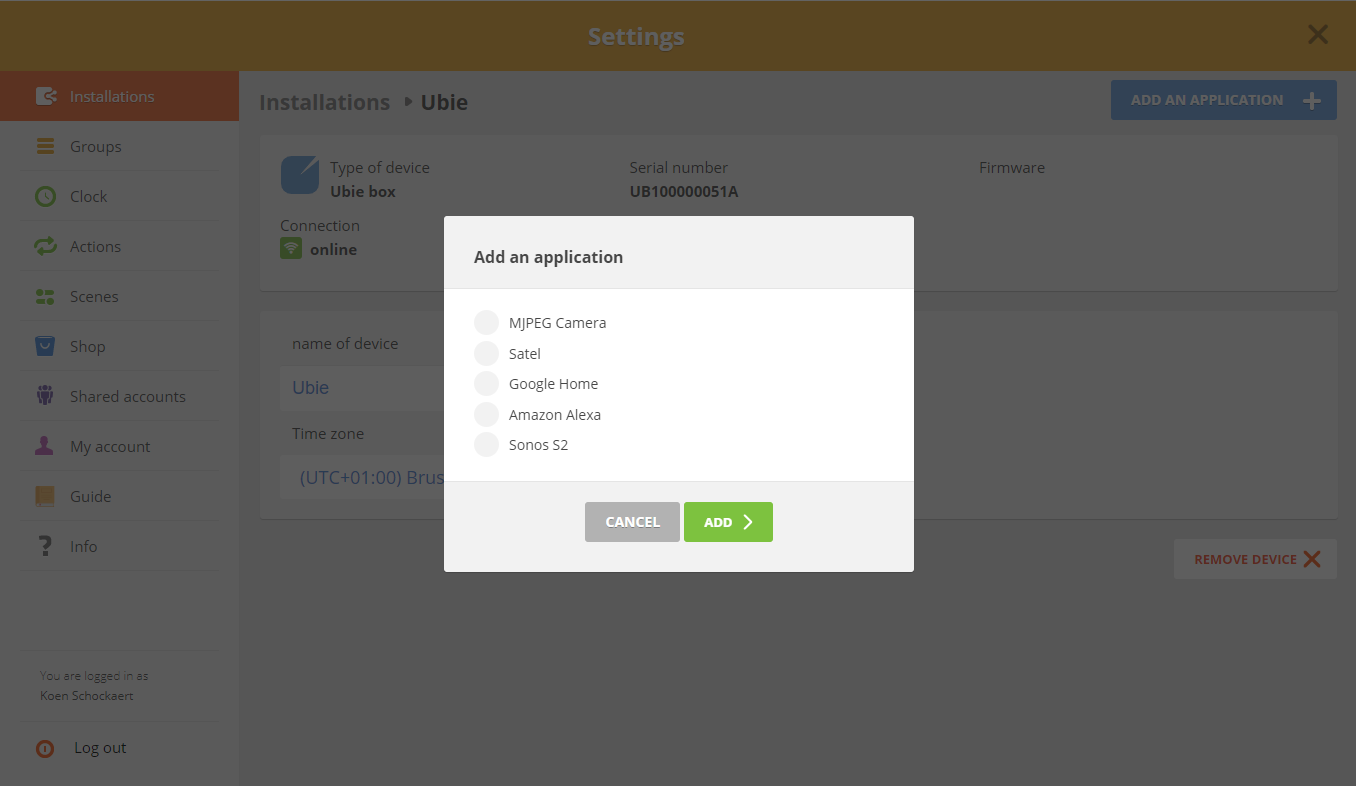
Select Sonos S2 from the pop-up screen and then Add >.
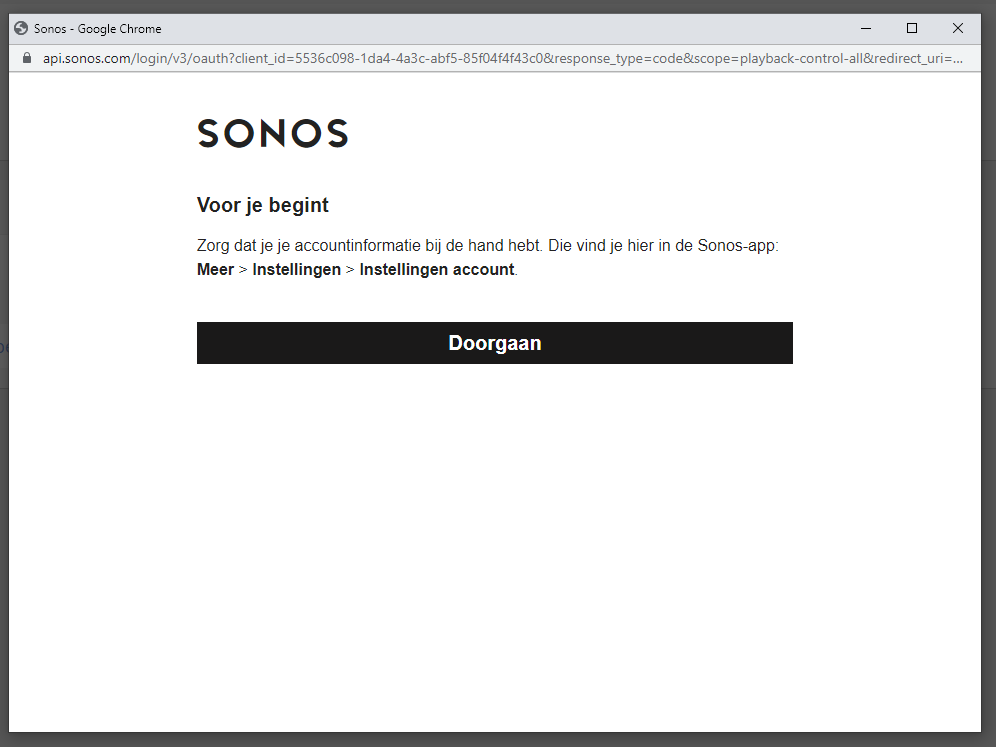
Click Continue

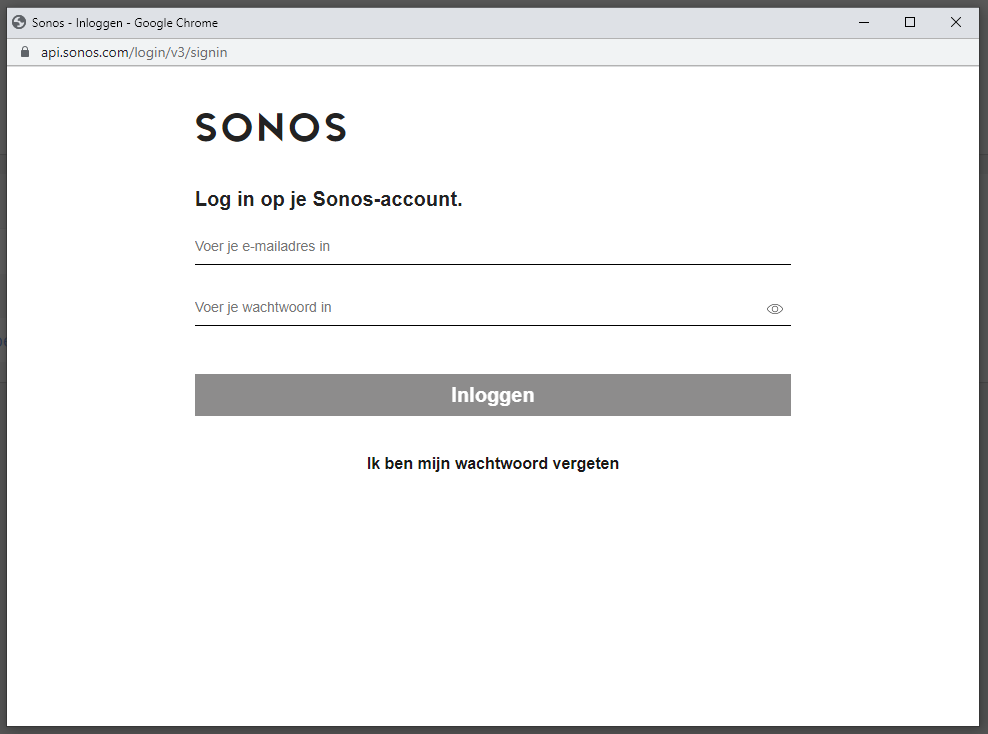
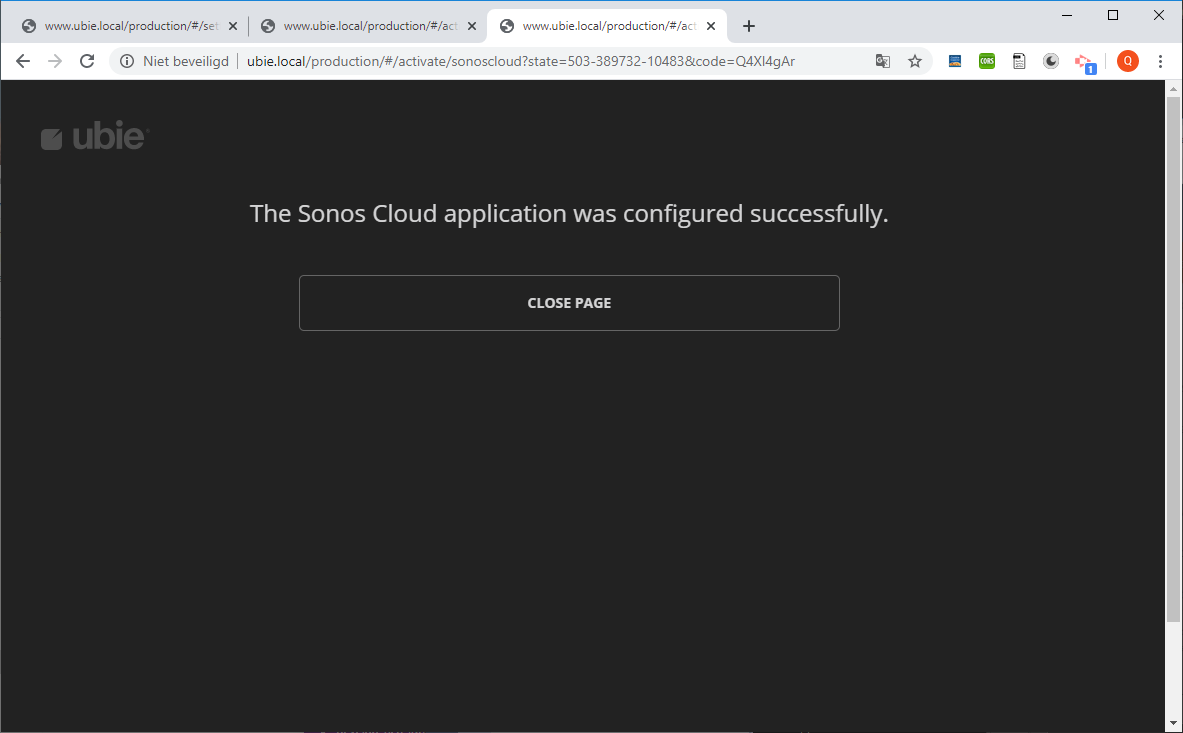
Enter the details of your Sonos account and give Ubie access to your account.
After activation, you will get an activation status back. If successful, your Sonos system will show up in the list of your paired devices under your Ubie.

Remark
There are 2 software versions for Sonos, namely S1 and S2.
If you have added your Sonos (S1) to the Ubie in the past and recently performed the firmware upgrade of your Sonos, it is also necessary to update the Ubie application for Sonos.
If you have the S1 version on your Ubie and the S2 version on your Sonos, you will receive the message below.

To install the S2 application on your Ubie you will have to go through the installation process again. See above.
¶ Symfonisk
Symfonisk players are SONOS players in their underpinnings. They are therefore found in an identical way to a SONOS player.
Go to your Ubie's details screen in the control panel (click on the cog in the top left corner, then Installations and click on your Ubie device here).
Click on Add Application
Select Sonos S2 from the pop-up screen and then Add >.

Click Continue
Enter the details of your Sonos account and give Ubie access to your account.
After activation, you will get an activation status back. If successful, your Sonos system will show up in the list of your paired devices under your Ubie.
¶ Bose
Bose SoundTouch players are automatically activated for you and can be operated immediately.
¶ Denon
Go to your Ubie's details screen in the control panel (click on the cog in the top left corner, then Installations and click on your Ubie device here).
Click on Add Application
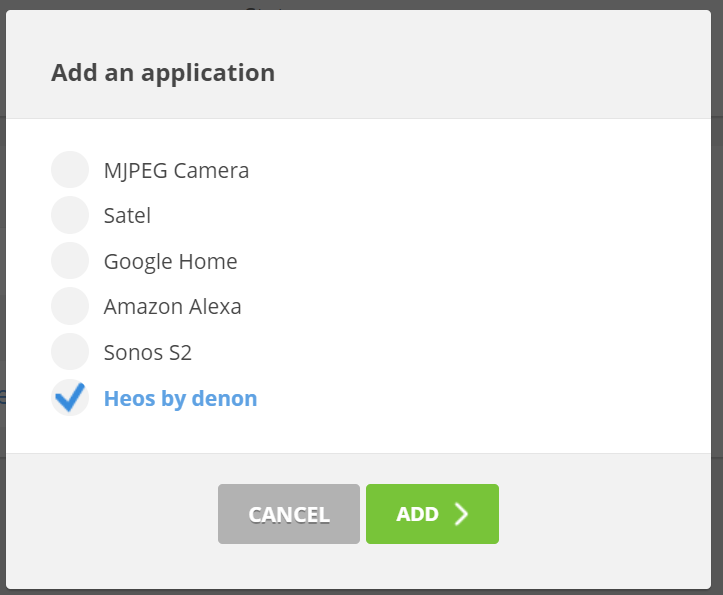
Select Heos by Denon from the pop-up screen and then ADD >.
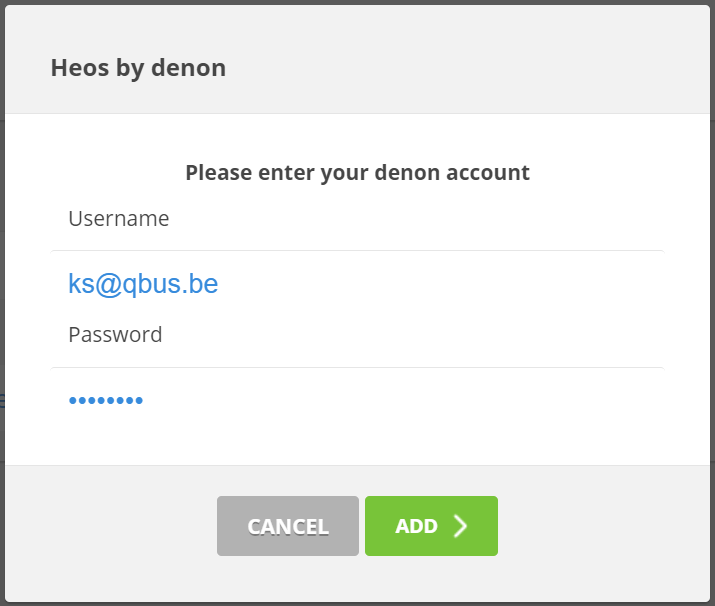
Enter your Username and Password from your Denon account.
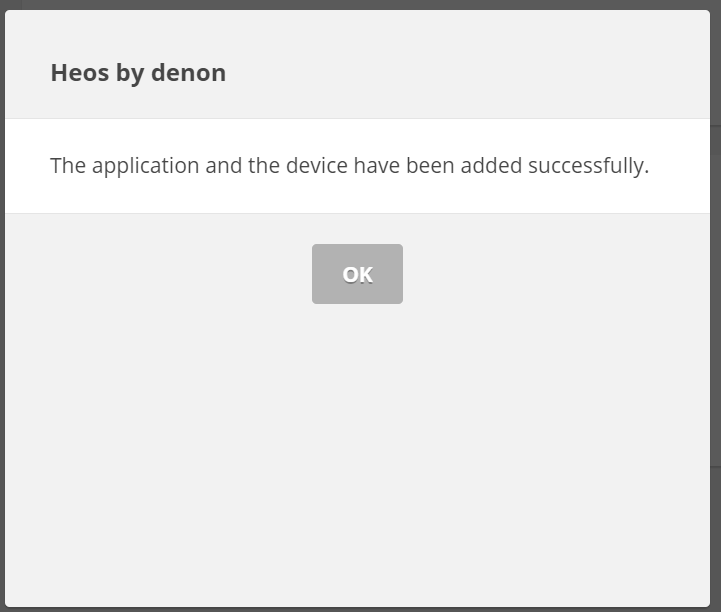
Click on OK to add your device.
¶ Artsound
Click on Add Application

Select Artsound Smart Family in the pop-up screen and ADD >.
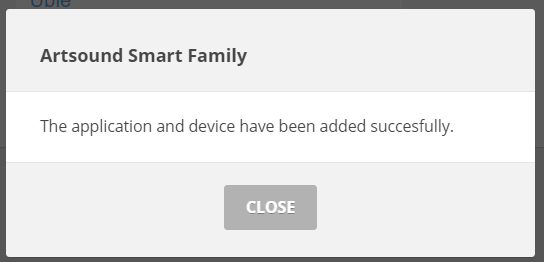
Click on CLOSE to add your device.
¶ Qbus
Qbus installations must be activated before use.
- On UbieCloud, go to "Installations" in your settings.
- Click on the Qbus installation to go to the detail of this installation.
- Click on the green "Activate Controller" button.
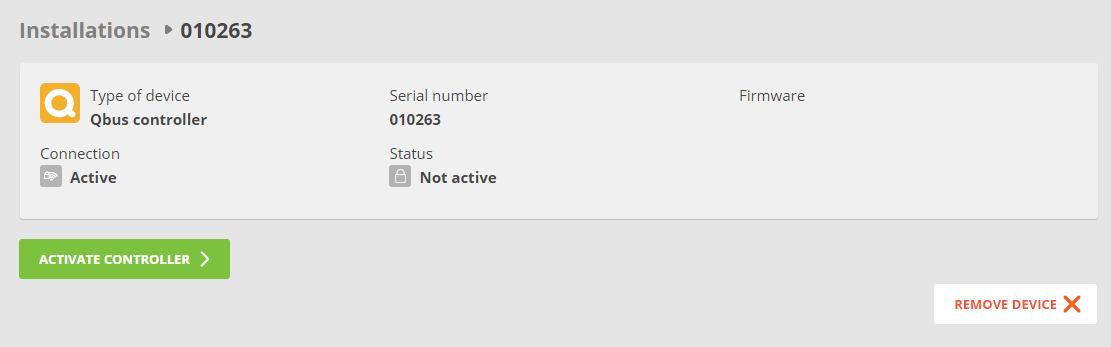
Note! Due to possible updates, this may take a while.
¶ KNX
To configure KNX for Ubie, you will need your KNX configuration file and a good background knowledge of KNX.
Log on to https://www.qbuscontrol.com/admin or click the green button KNX Configure in the settings of your KNX installation on your Qbus Control Cloud.

You get an overview of your devices.
Click on the Ubie for which you want to configure KNX.
You get a detail of all devices linked to the Ubie.
Click the blue Configure button to the right of the KNX device.
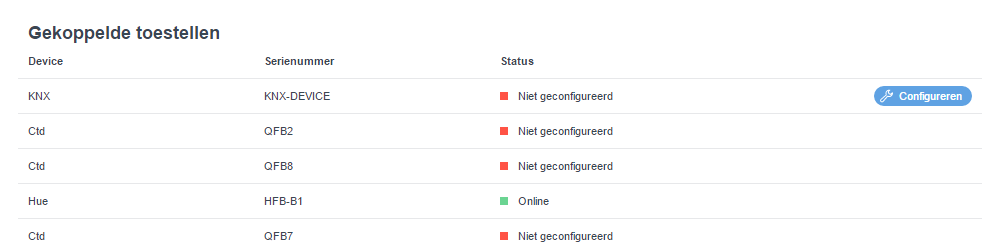
You get a detail of all devices linked to the Ubie.
Click the blue Configure button to the right of the KNX device.
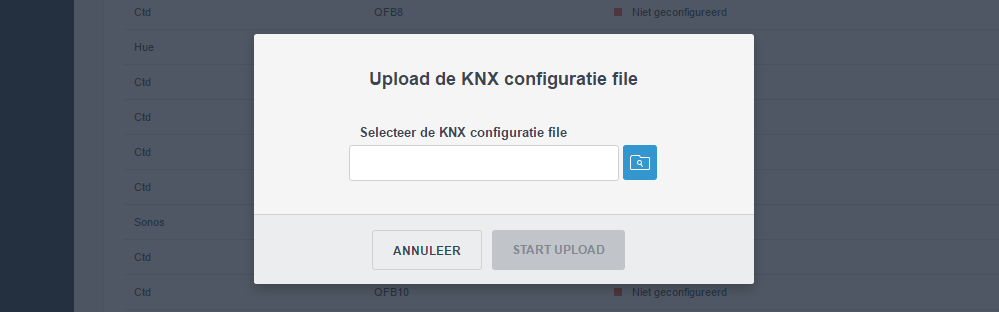
Load up your KNX configuration file.
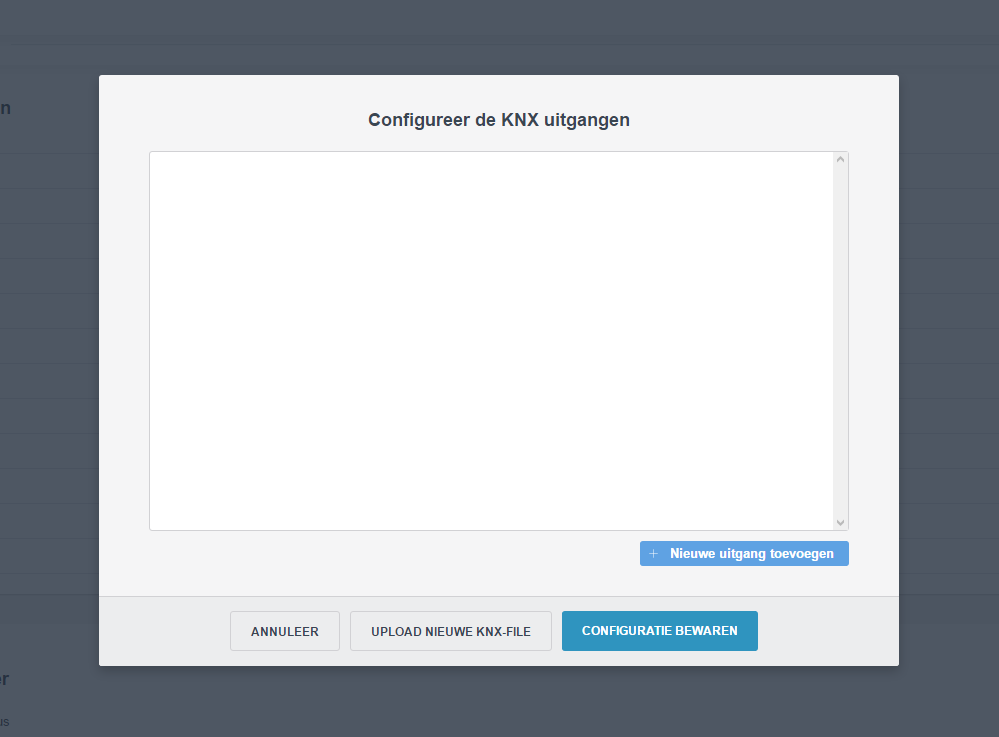
After charging, you can add outputs. Click Add new output.
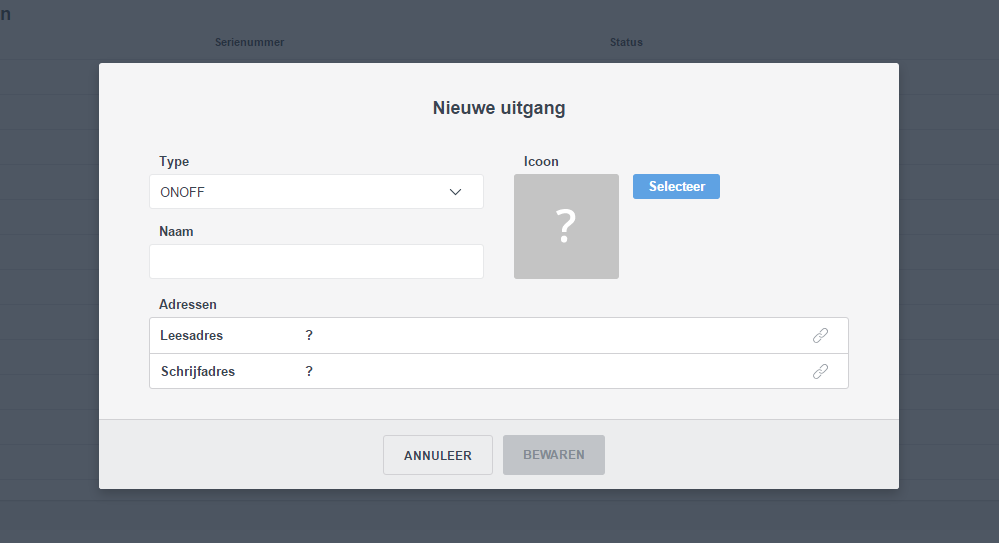
Fill in all the details correctly and click BEARING.

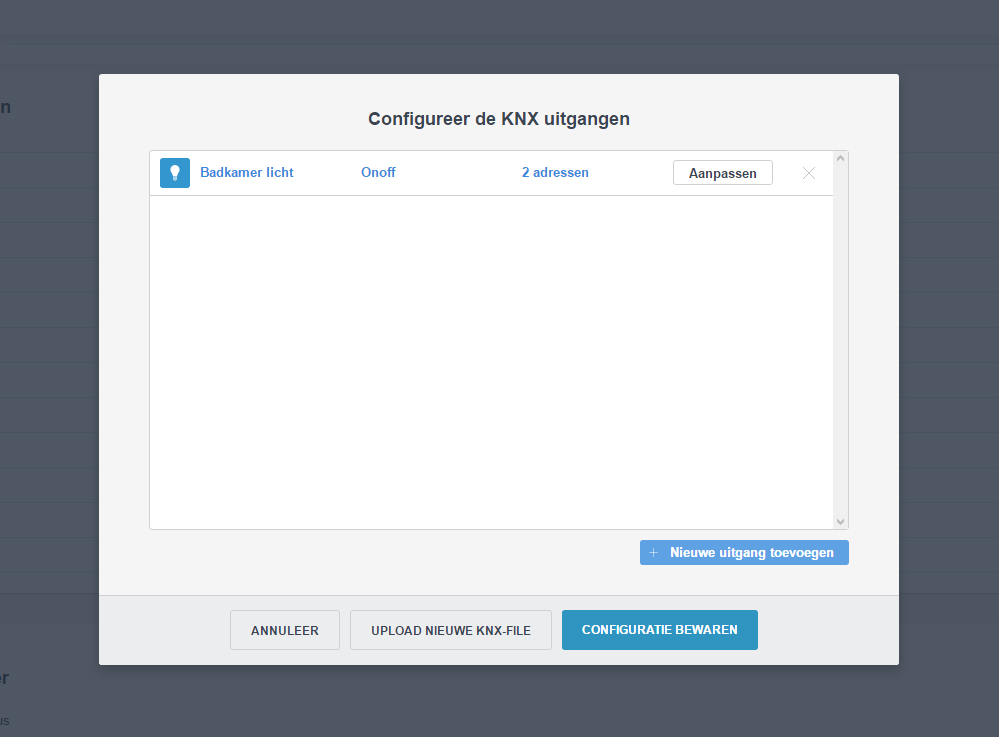
In the overview with the created outputs, click CONFIGURATION SAVE to save all settings.
¶ Hue
To control Hue via Ubie, you need to have a Hue bridge for this and have configured it via the Philips Hue app.
Once everything is configured properly via the Hue app, this Hue bridge will automatically be found in the network by Ubie and display it in the list of products.
On Qbus Control, go to Installations in your settings.
Click on the Hue device to go to the detail of this device.
Click the green Activate button.
A window will appear urging you to push the button on your Hue Bridge. Do this.
Your Hue device is activated.
¶ Satel
To use this application, you need a Satel INTEGRA system with integrated ETHM -1 , or ETHM-1 Plus communication module.
Unfortunately, a Satel alarm system cannot be automatically detected by your Ubie. Follow these steps to add the Satel alarm system to your Qbus Control:
Go to your Ubie detail screen in the control panel (click on the cog in the top-left corner of your Ubie Cloud application).
Click on Add Application
Then click on Satel in the pop-up screen.
Note that Satel is a paid application and must be purchased first. After payment, a settings page is displayed where you can enter all the details for your alarm system.
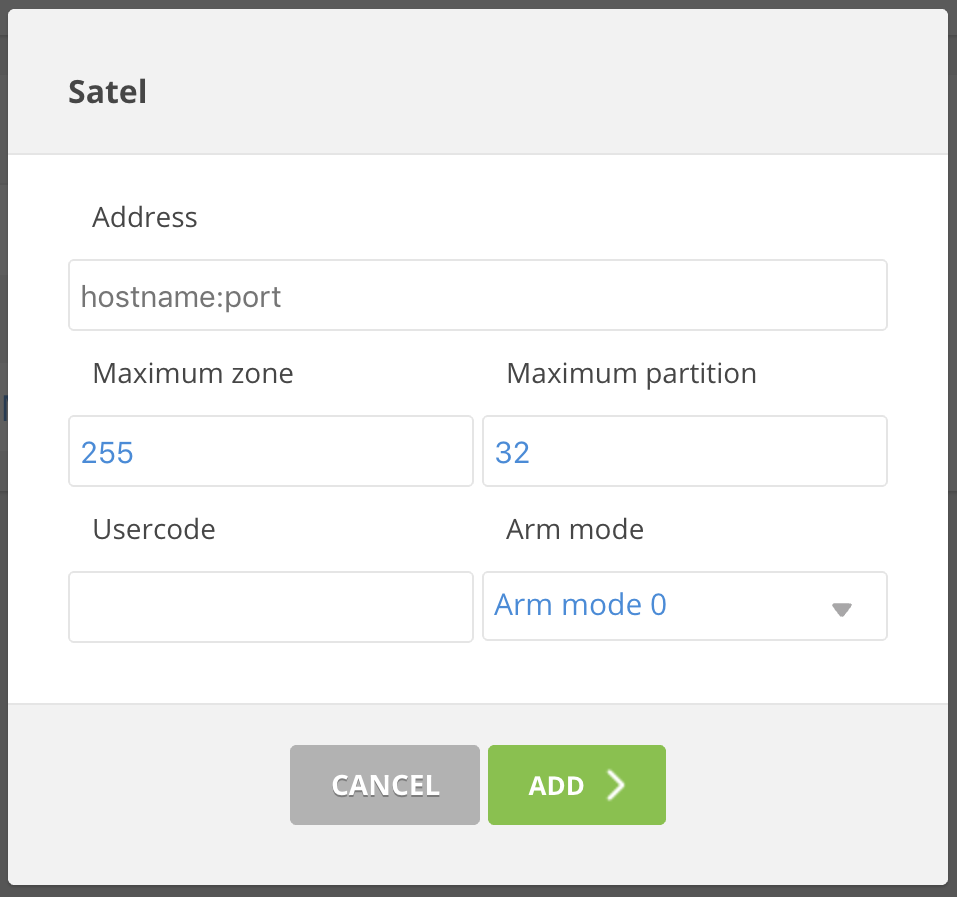
Address: your local IP address of your Satel alarm system. E.g. '192.168.1.150: 7094 '
Maximum zone: the number of zones configured in your installation. Reducing this number speeds up the initialisation process.
Maximum partition: the number of partitions in your installation. Reducing this number will speed up the initialisation process.
User code: this is the code required by Ubie to enable the alarm system. We strongly recommend adding a separate Ubie user to the alarm system with a unique user code.
Enable mode: this defines which type of armed mode is used when switching on the system from Ubie:
- Enable mode 0: Fully enabled mode.
- Enable mode 1: Fully enabled and, in addition, the zones for which the BYPASS IF NOT EXIT option is enabled are bridged.
- Enable mode 2: INTERIOR DELAY zones are not enabled; EXTERIO zones activate a silent alarm; Other zones activate an audible alarm.
- Enable mode 3: Same as enable mode 2, but delayed zones act as immediate zones.
¶ Camera
Ubie supports up to 2 MJPEG IP cameras. To add an MJPEG IP camera to your Qbus Control, follow these steps:
Go to your Ubie's details screen in the control panel (click on the cog in the top left corner, then Installations and click on your Ubie device here).
Click on Add Application
Select MJPEG Camera from the pop-up screen and then Add >.
Then fill in the form:
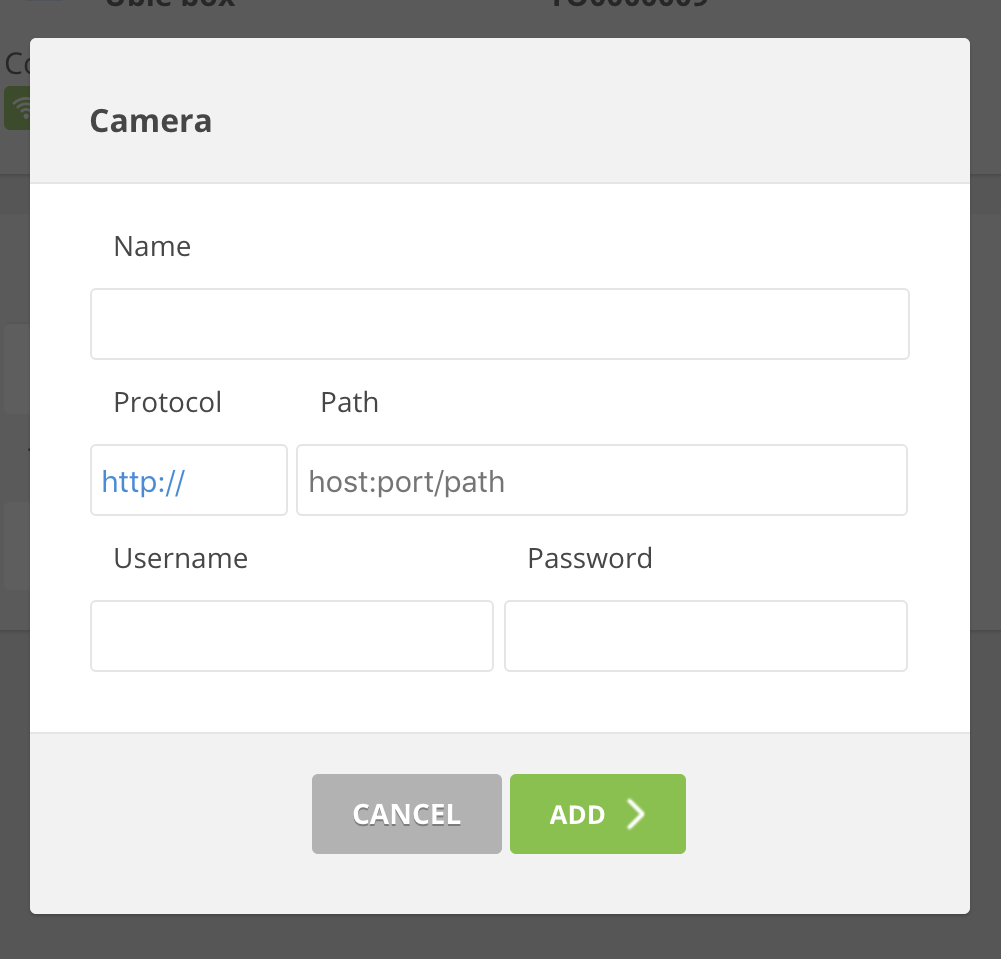
- Name: The name you wish to give to your camera
- Pad: This is your camera's local streaming URL. B.v.: '192.168.1.150/video.cgi'. Check the manual for the correct format.
- Username/Password: These are your camera's login details.
Note: Ubie supports up to 2 cameras with a total bit-rate of 2Mb/s. If your camera has a higher bit-rate, you can limit it by adding a resolution to the URL stream. Check your camera's manual for the correct format.
¶ Alexa
To use Alexa, you must already have the Alexa app installed on your smartphone. If not, go to your App store or Google Play on your smartphone to install the Alexa app.
To avoid that you have to re-configure Alexa, it's best to configre your groups in System Manager III ManagingGroups
Attention, it is not possible to activate Alexa and Google Home together on 1 account!
To pair Alexa with your Ubie installation, follow all the steps in the Alexa app.
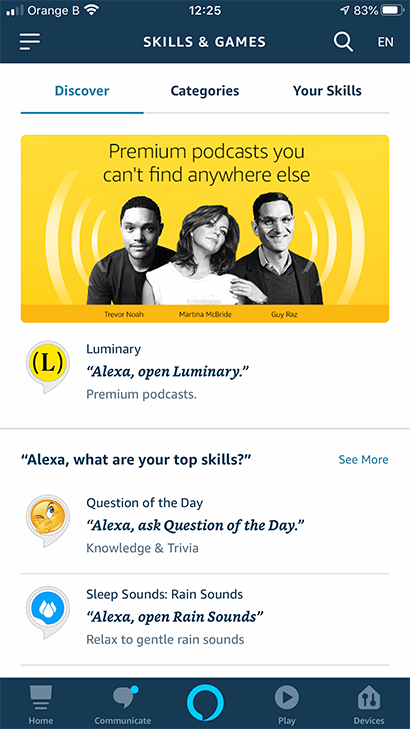
Open the Alexa app and go to the menu. 'Skills & Games'.
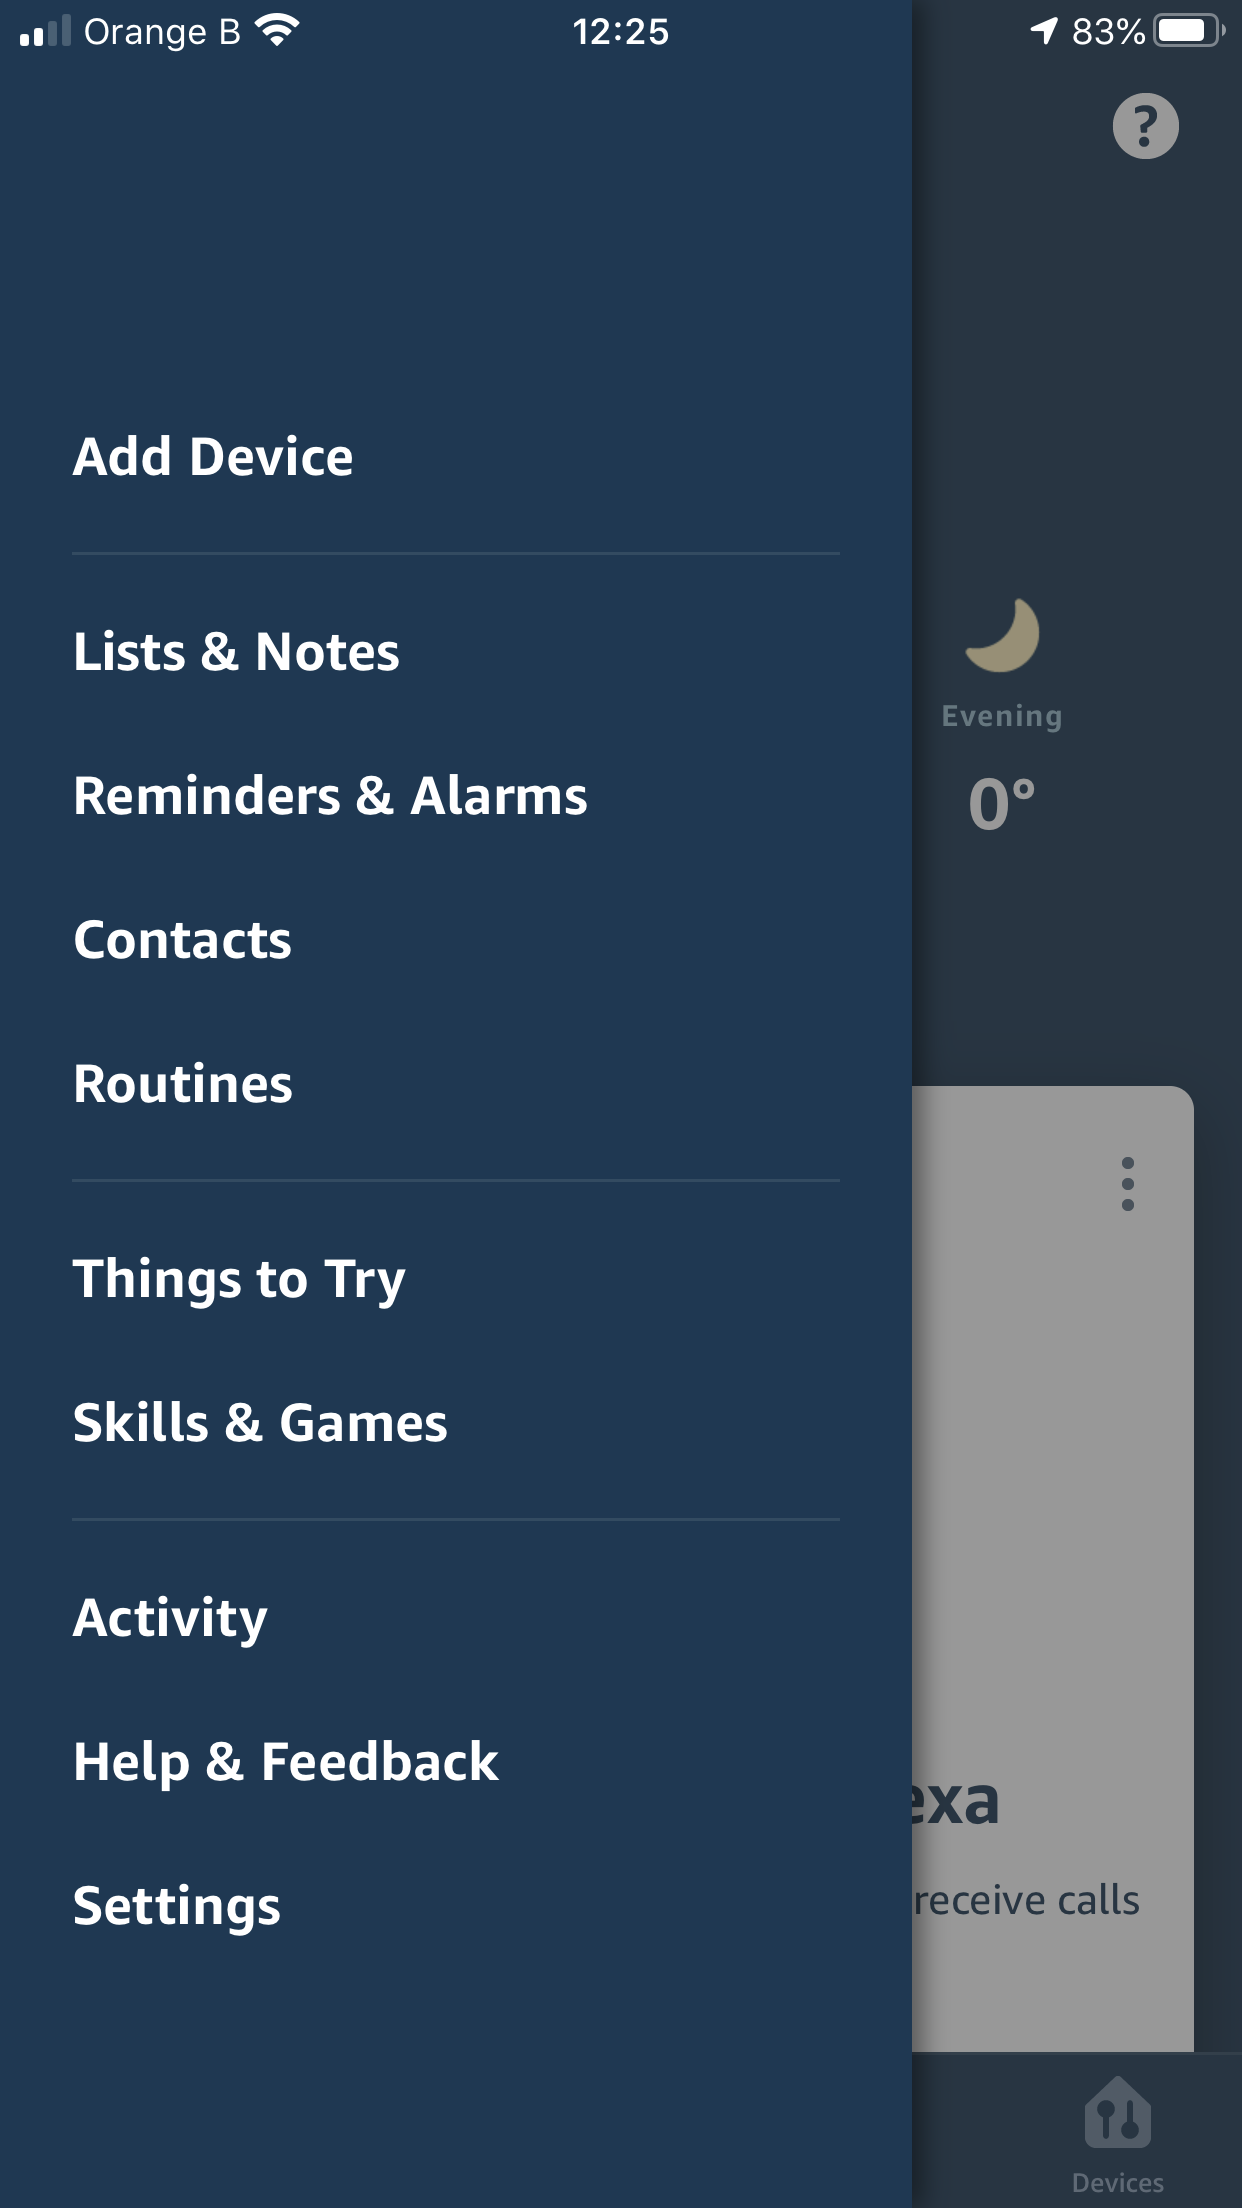
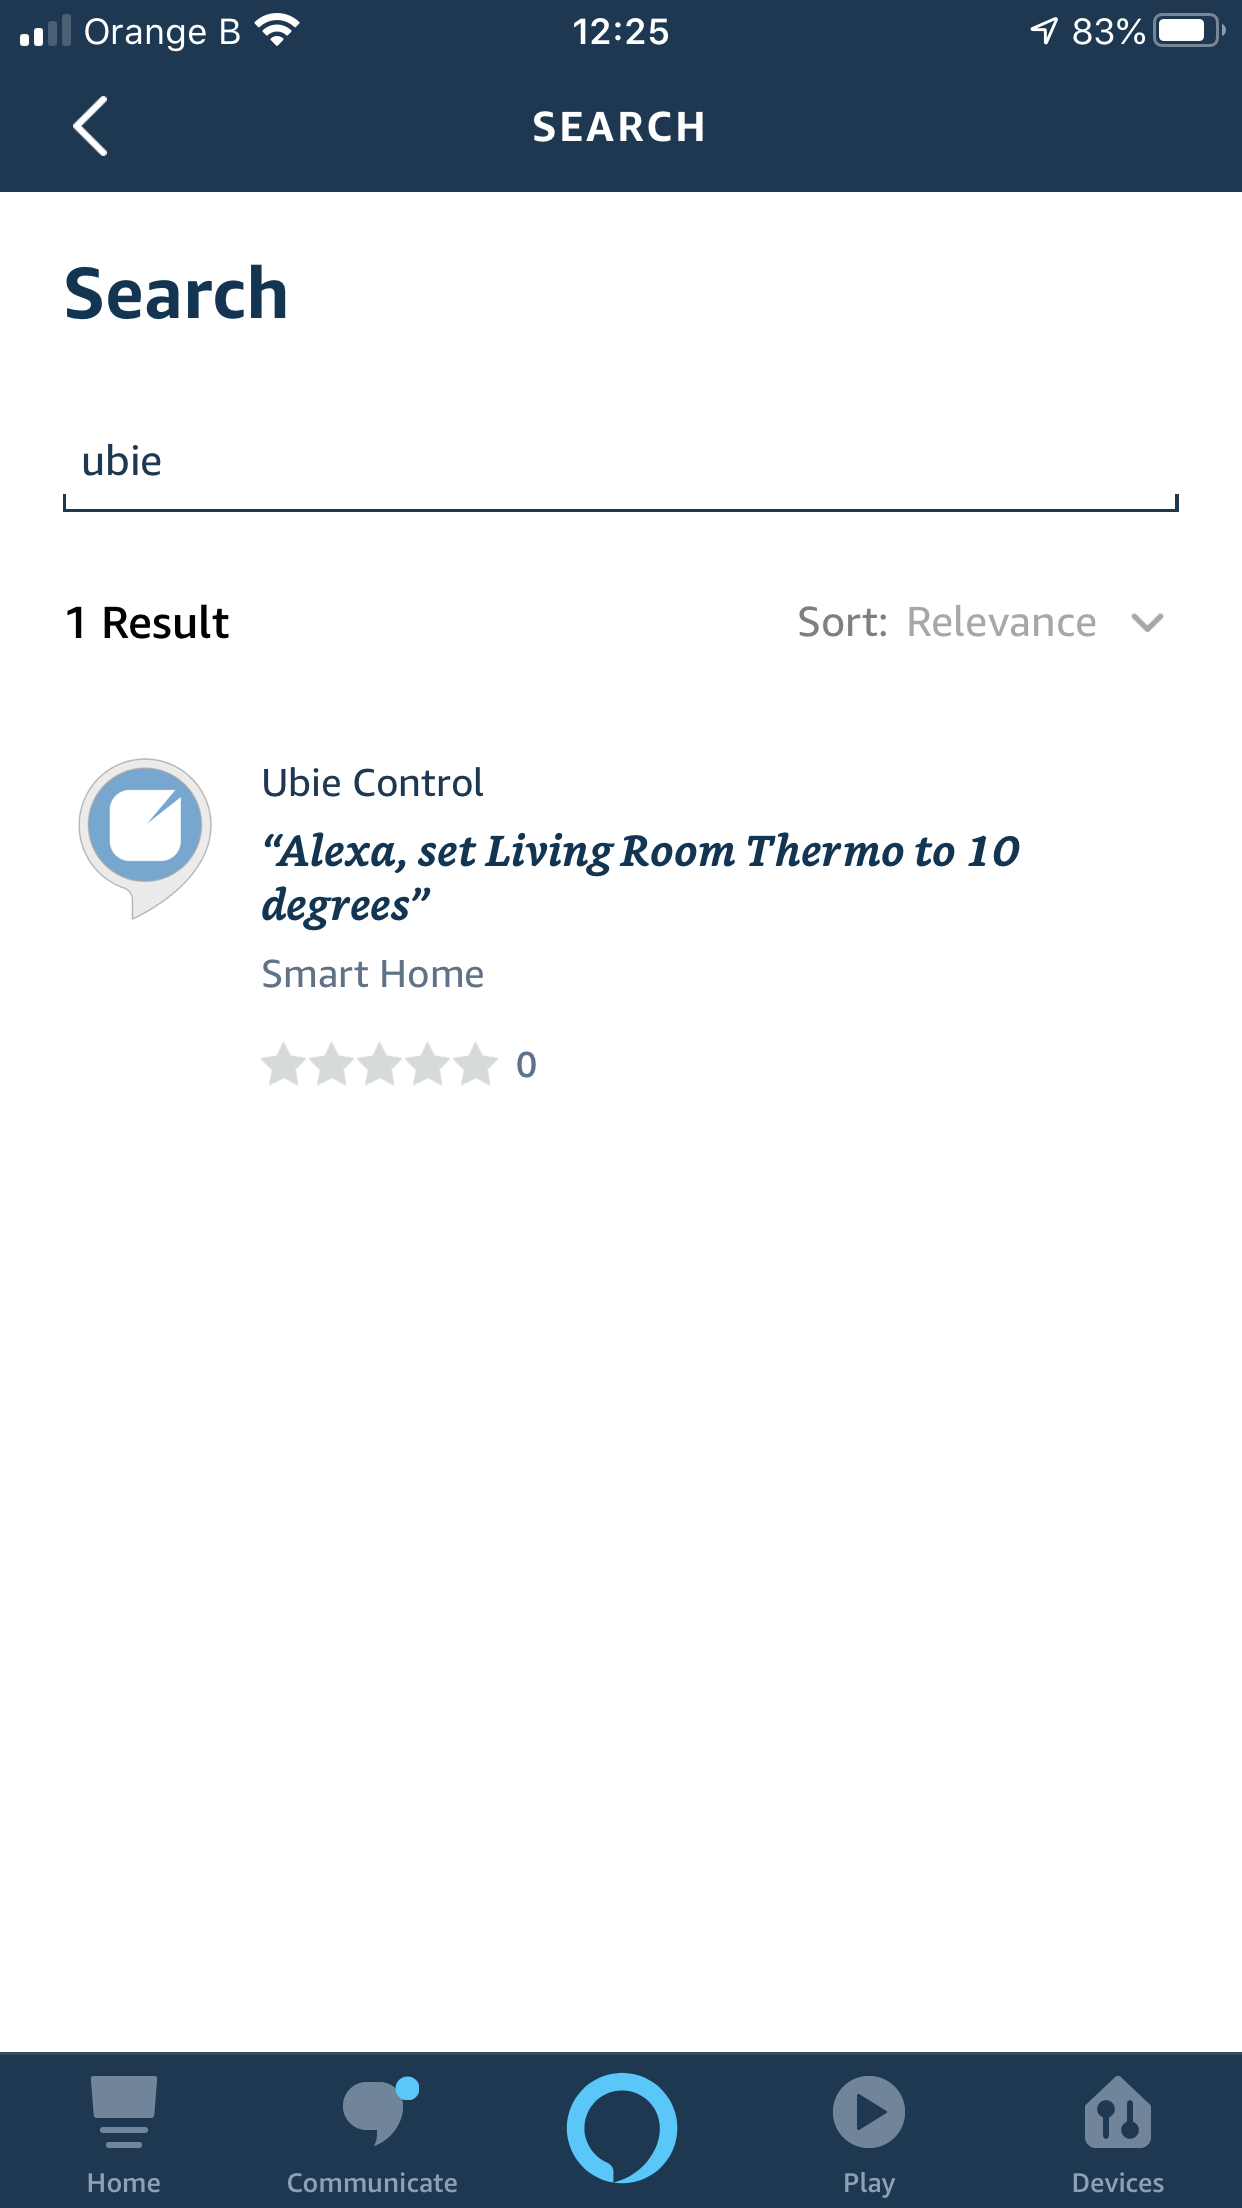
Click on the search field and type ubie. You will find the skill Ubie Control in the search results
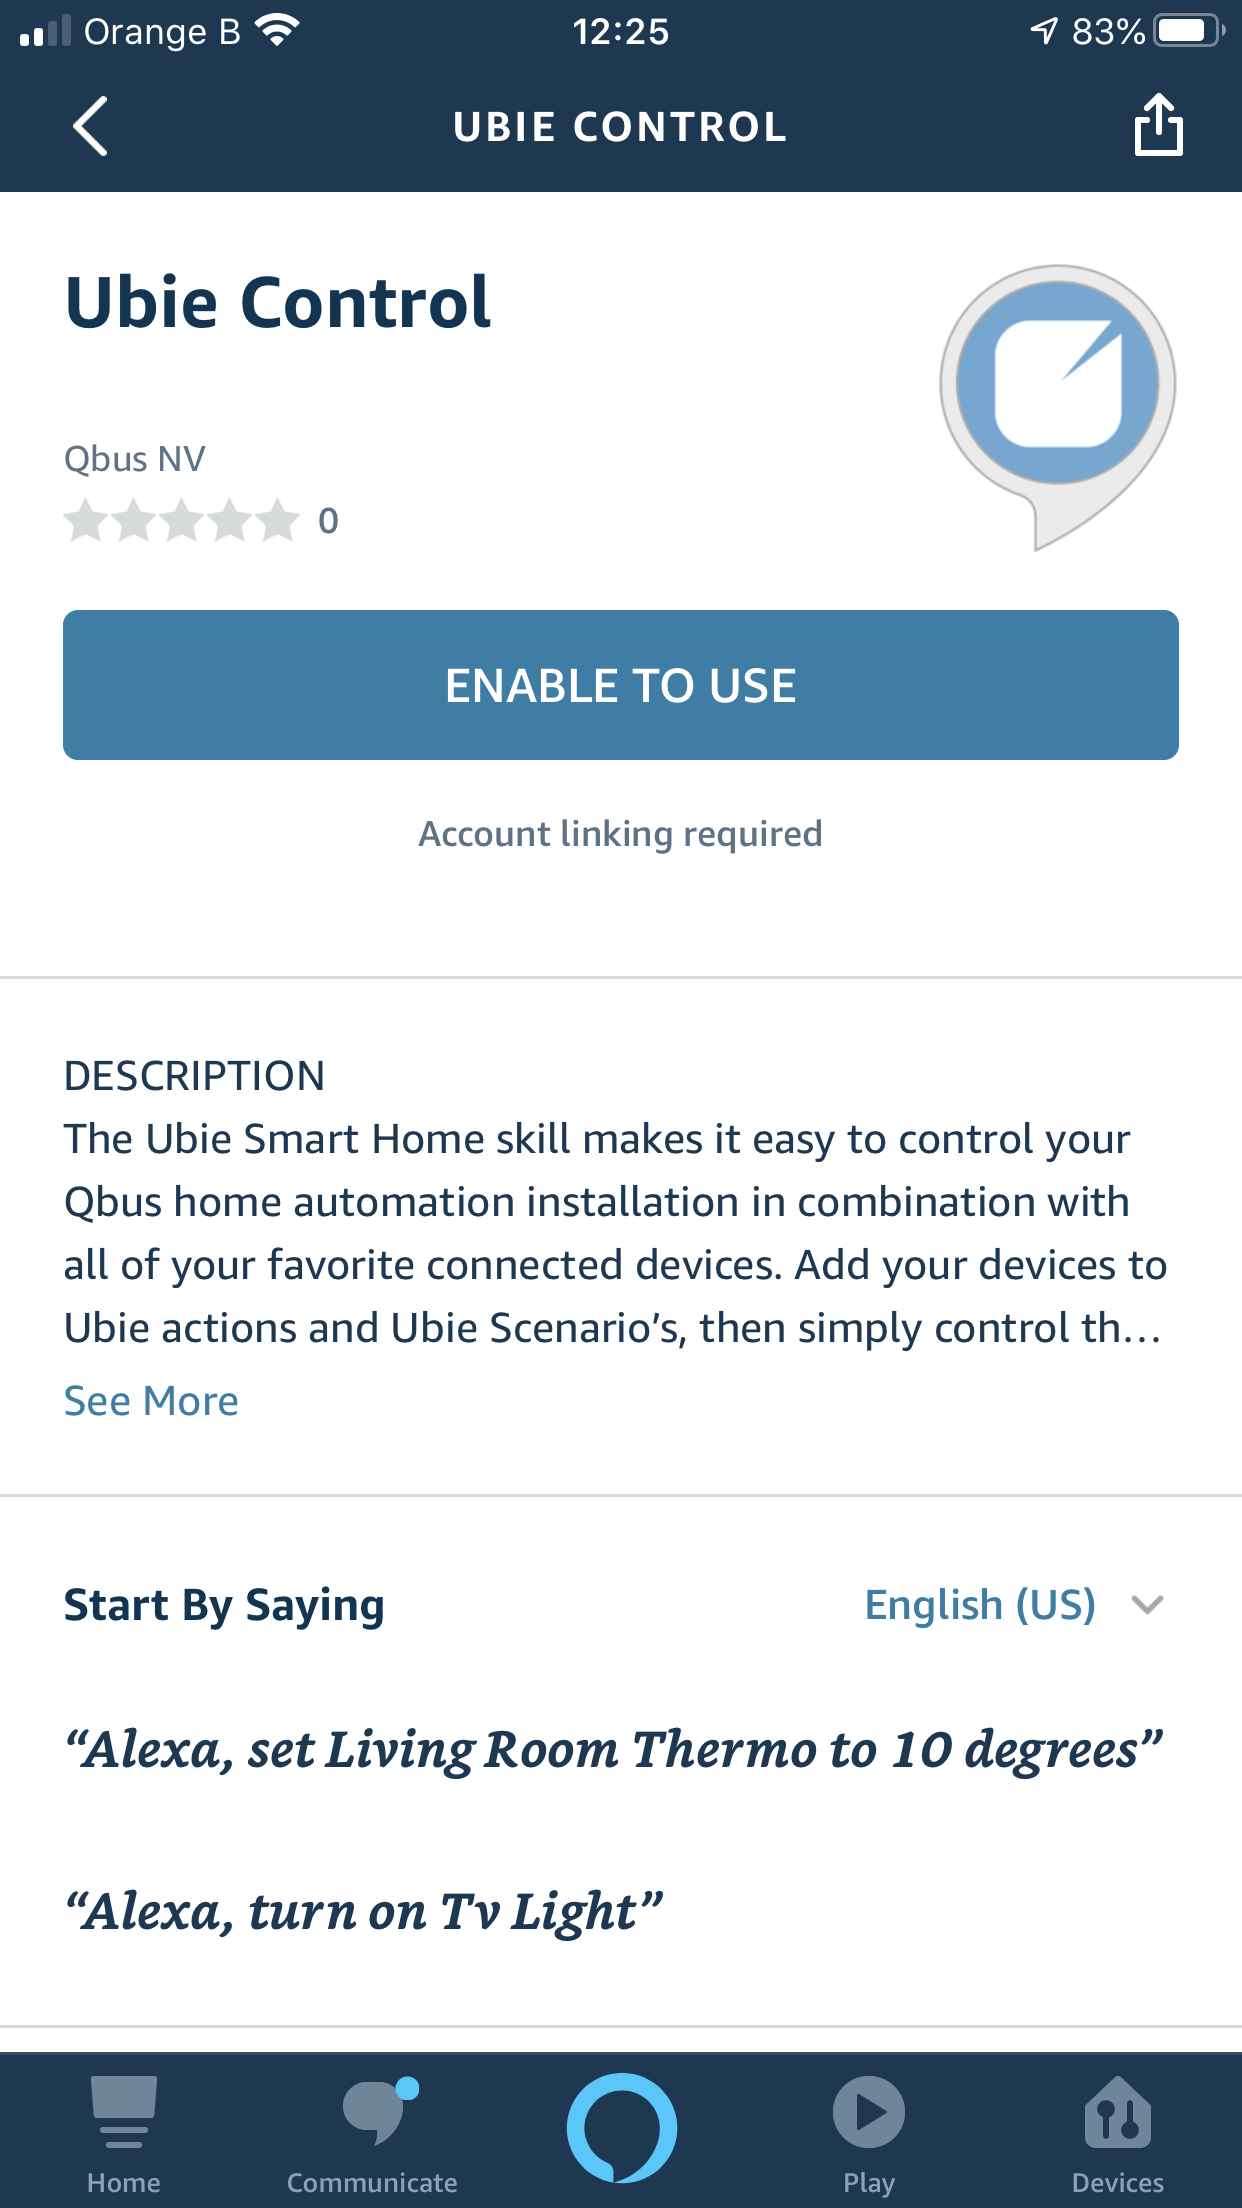
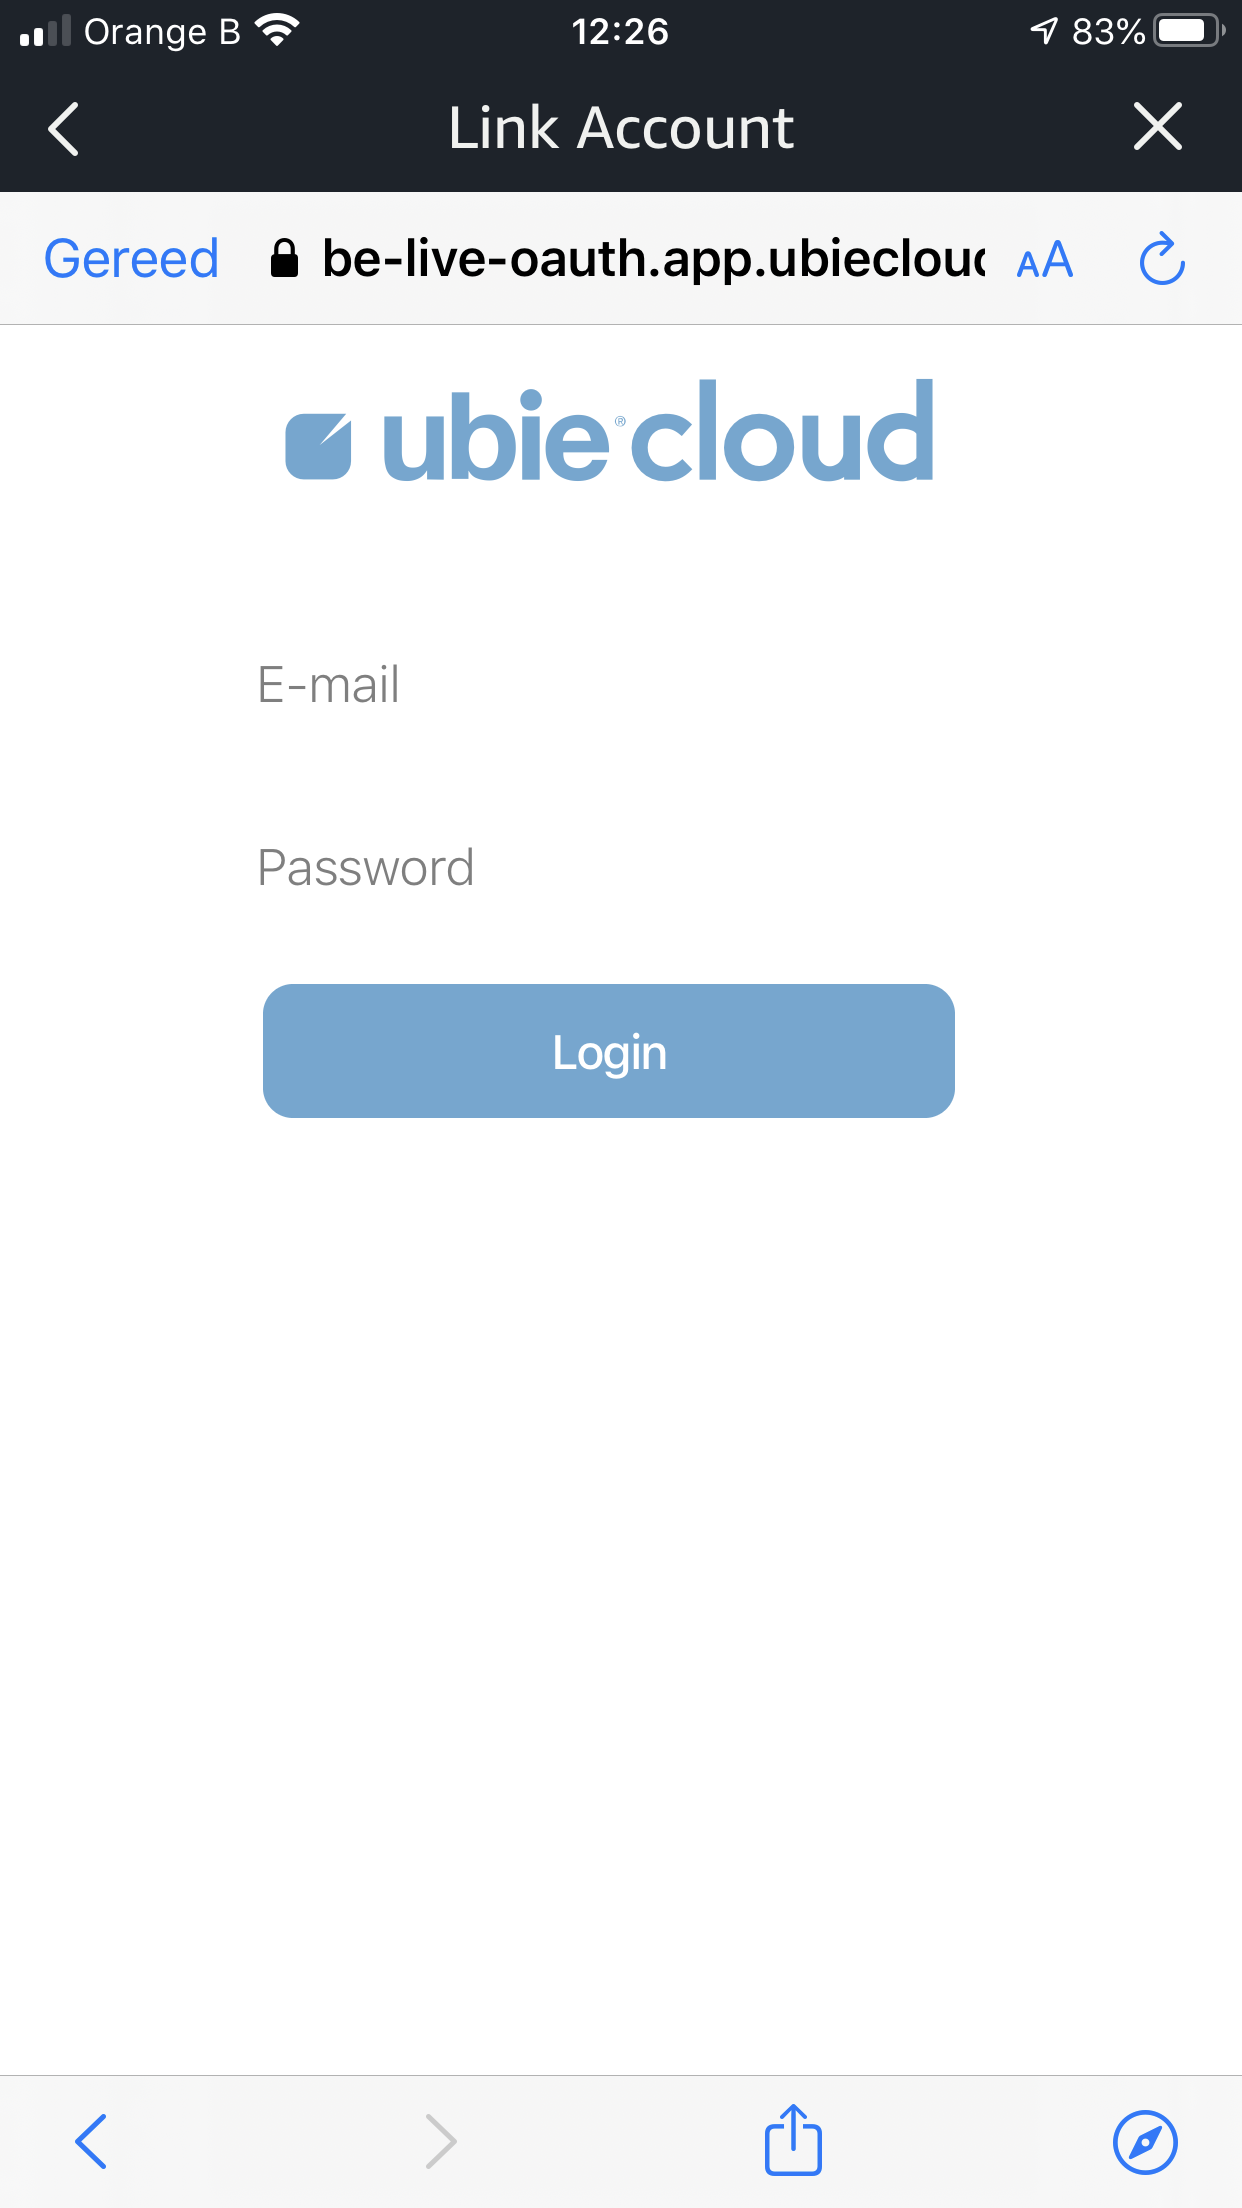
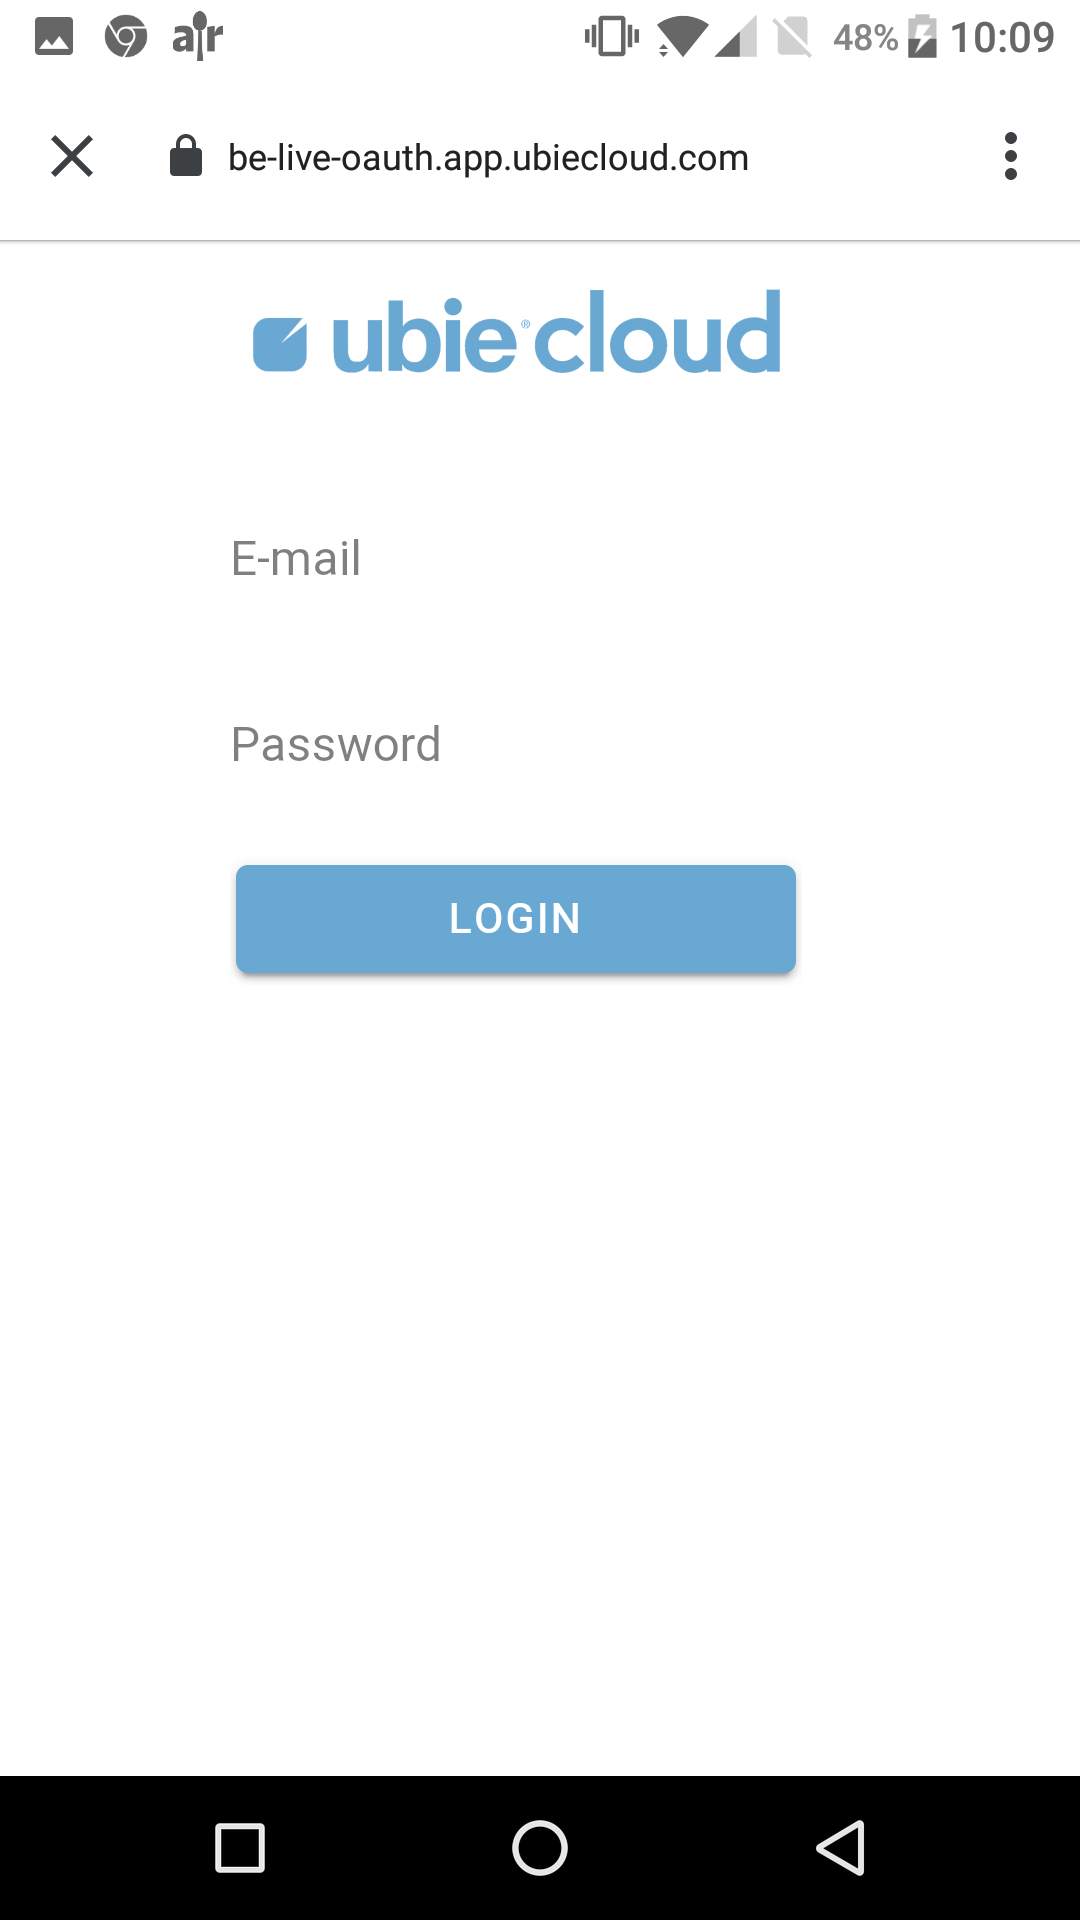
Click on the Ubie Control skill and then click Enable to use. You will be presented with a login screen from Ubiecloud where you need to sign in with your Ubiecloud account.
After logging in, Alexa will have access to your Qbus Control account and you can use Alexa to control your outputs by voice.

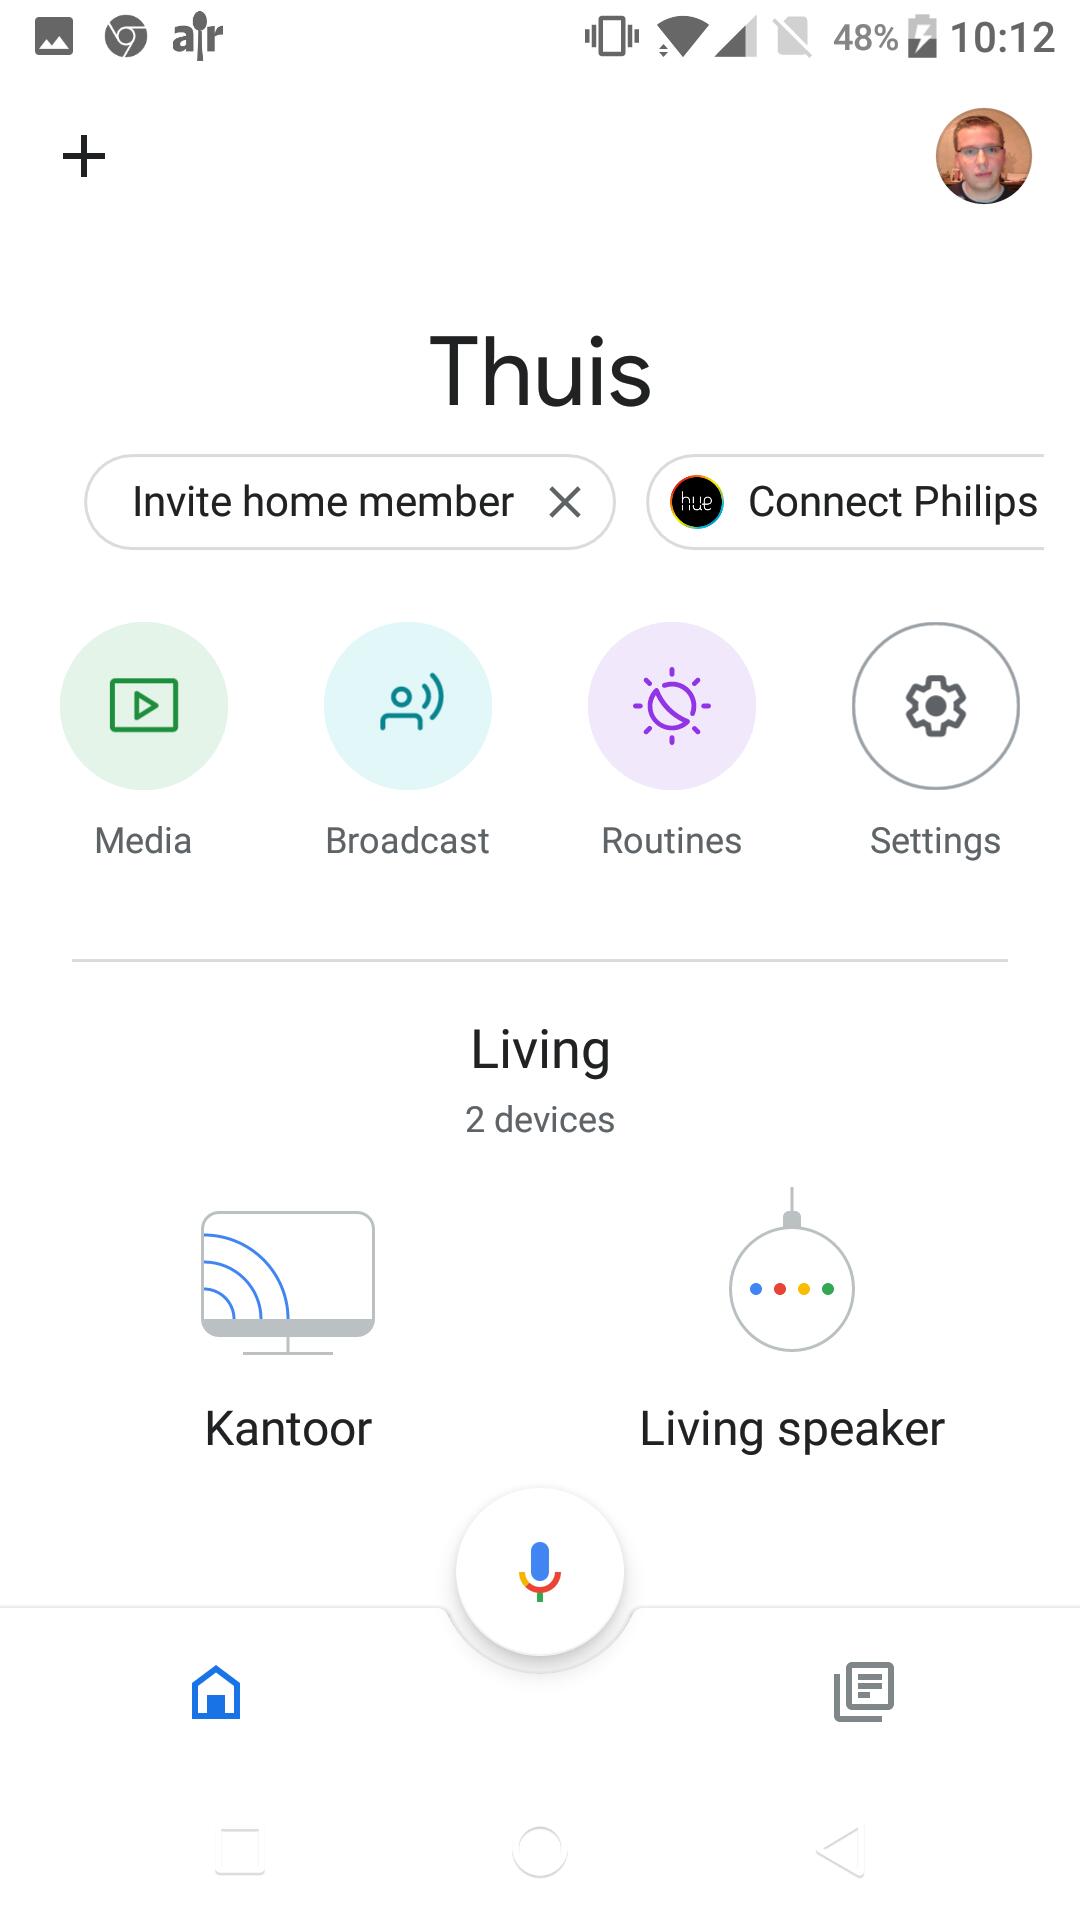
¶ Google-Home
To use Google Home, the Google Home app must be installed on your smartphone. If not, go to the App store or Google Play on your smartphone to install the Google Home app.
To connect Google Home to your Ubie setup, follow all the steps in the Google Home app.
Attention, it is not possible to activate Alexa and Google Home together on 1 account!
Open the Google Home app and click the + icon in the top-left corner of your app.
In the "Add and manage" window, click on the "Set up device" menu item

In the next window, under the Works with Google section, click on the link **Is anything already set?
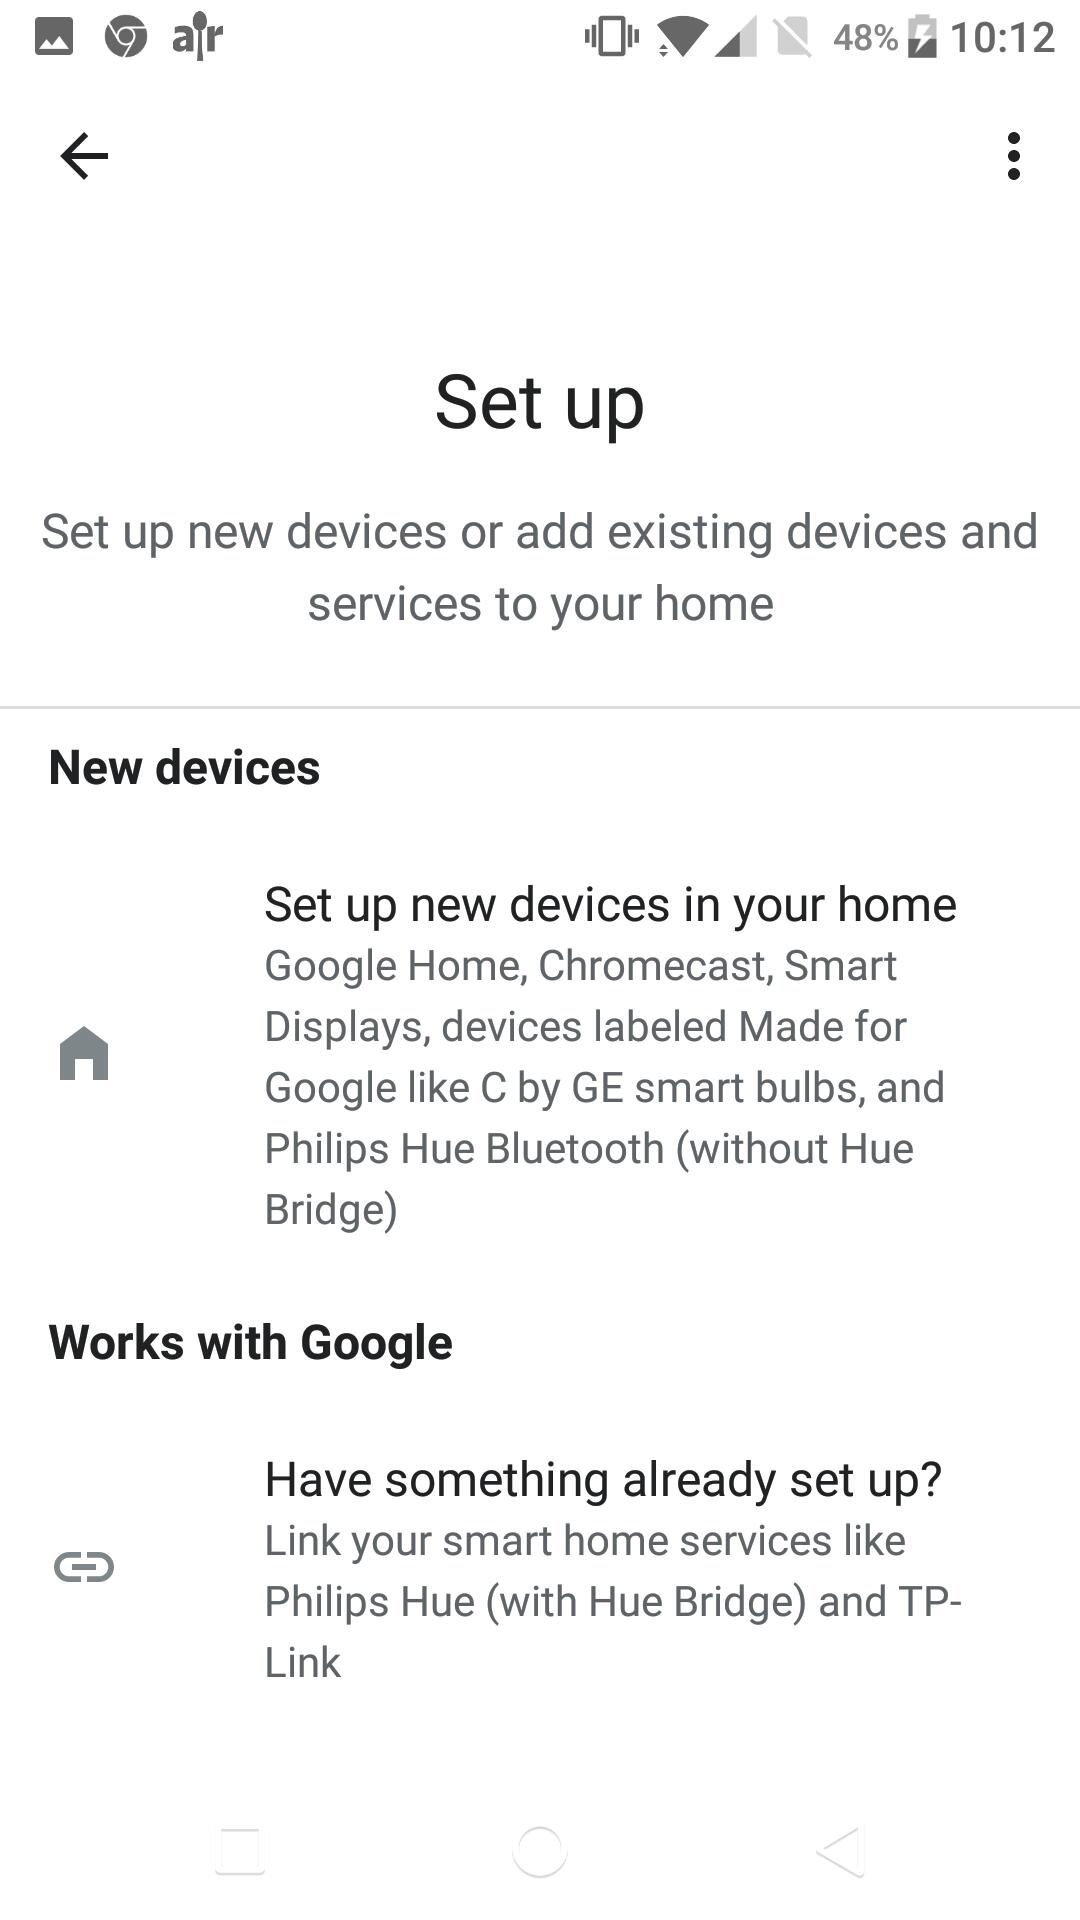
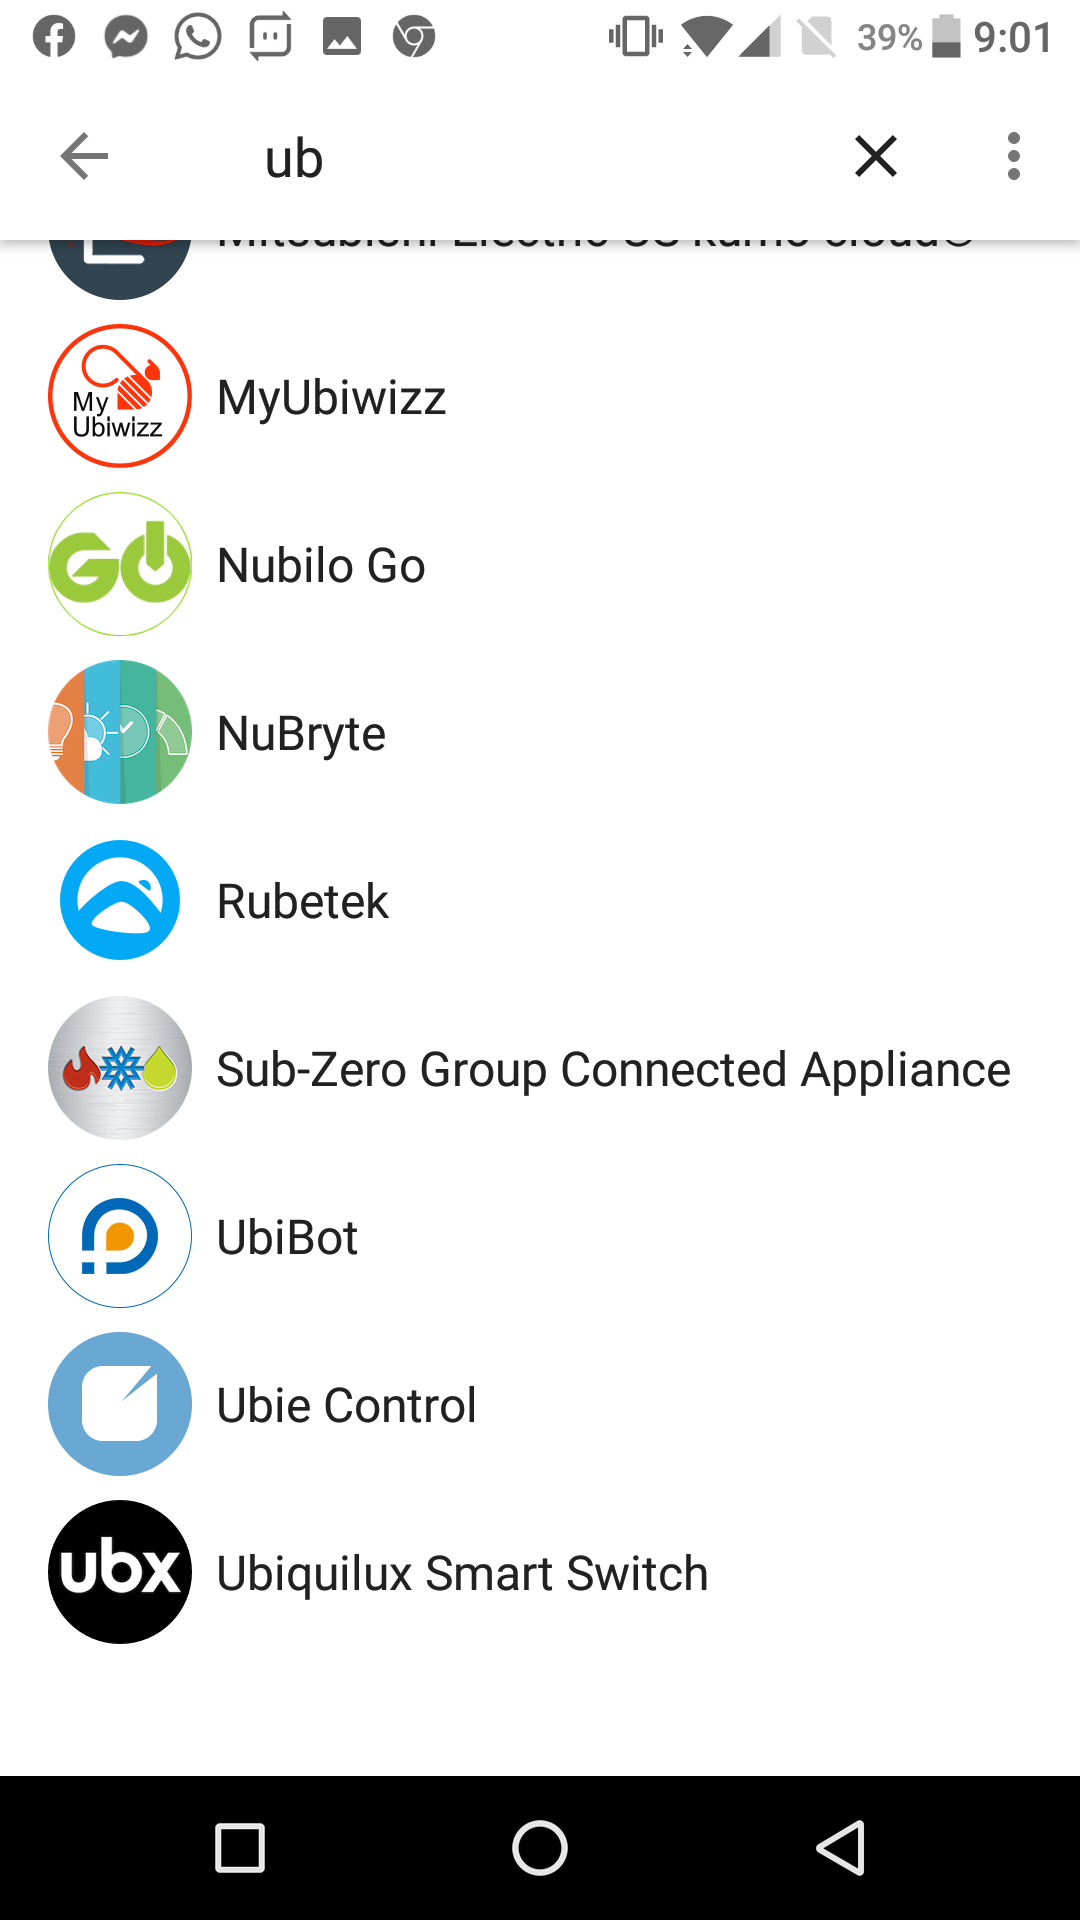
Search for Ubie Control
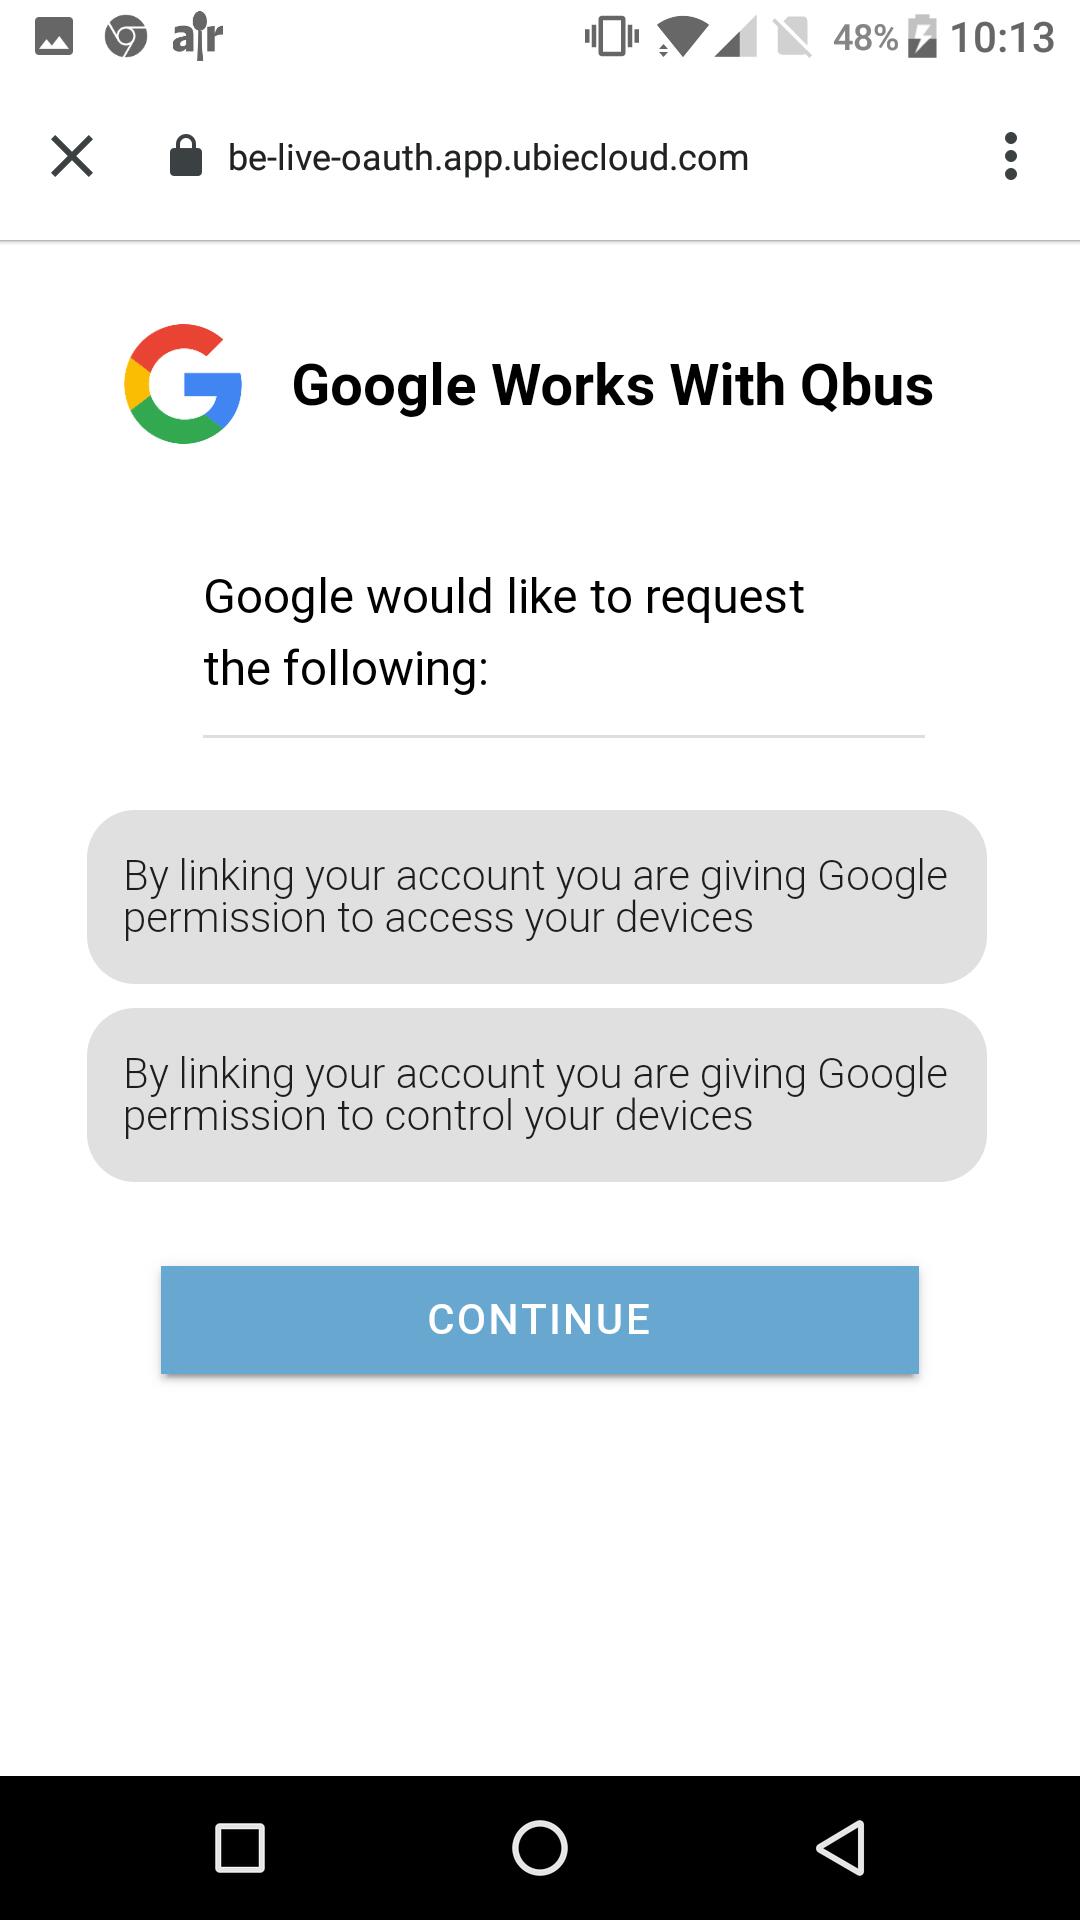
A login window from Ubiecloud appears. Log in with your Qbus Control account.
A window appears where you give Google the rights to manage your Ubie installation.
The Ubie outputs now appear in a list. Select the outputs you want to control. After this, you can use Google voice recognition to control your Ubie outputs.