¶ Introduction
With a clock time you can
- Control a Qbus output at a set time. For example, you can have the shutters closed at 20:00 or when it is time to get up the light in your bedroom goes to a dimmed position or ...
- Perform a control on an Ubie device, e.g. play a Sonos speaker at 8:00 a.m.
- Send a text message with the status of an output at a certain time.
- Send an e-mail with the status of an output at a given time.
- Send a notification with the status of an output at a certain time.
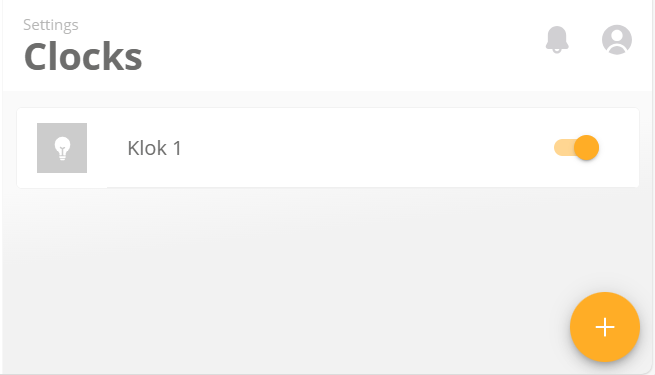
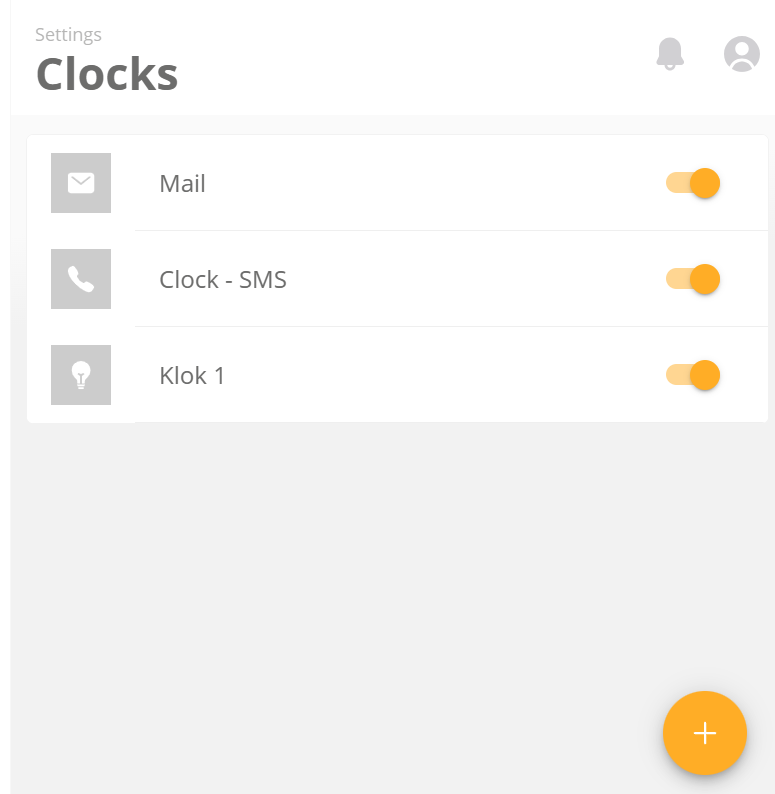
To create a clock go to Settings - Clocks (1)
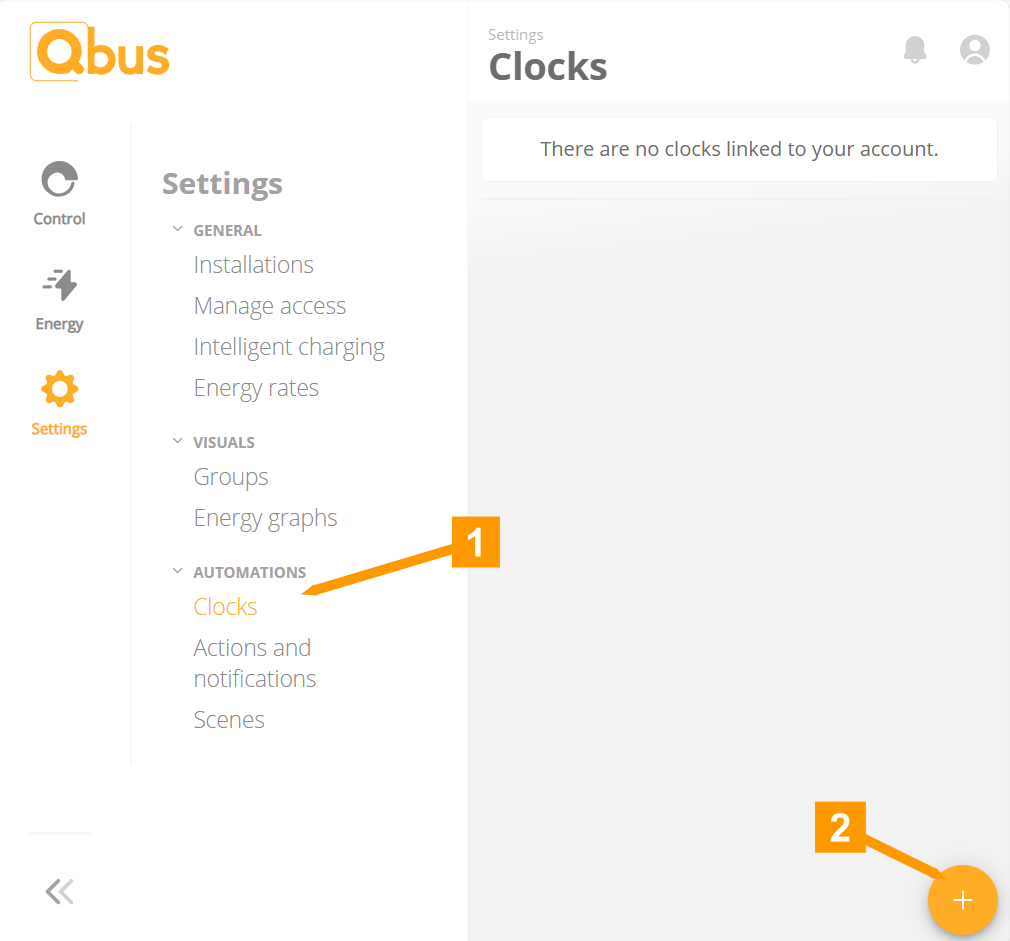
Click on the + sign (2) to create a clock.
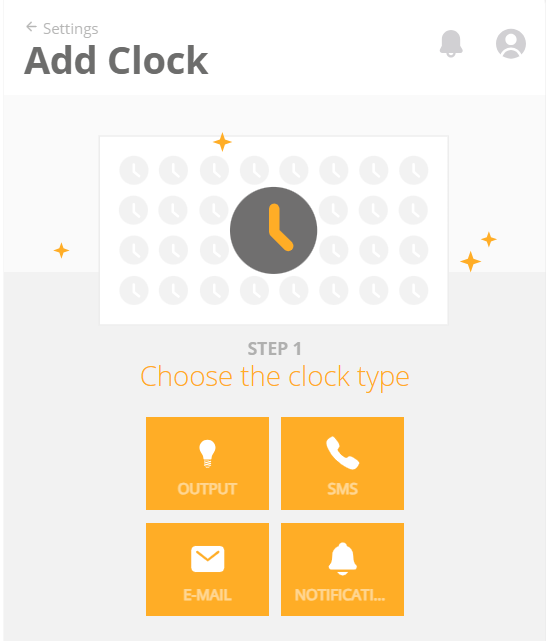
Choose which type of 'clock' you want to create.
¶ General
Every clock has the first steps in common. Below we first describe those steps.
When you create a clock time we first give it a name:
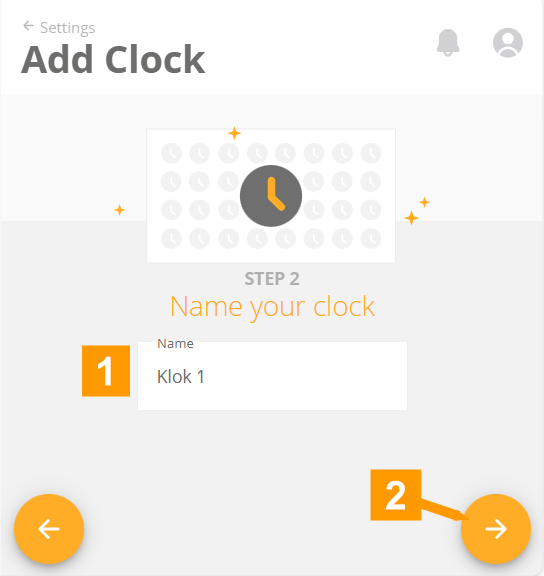
- Give a clear name to this clock.
- Click on the arrow to continue.
We can now set the time at which our clock should perform an action:
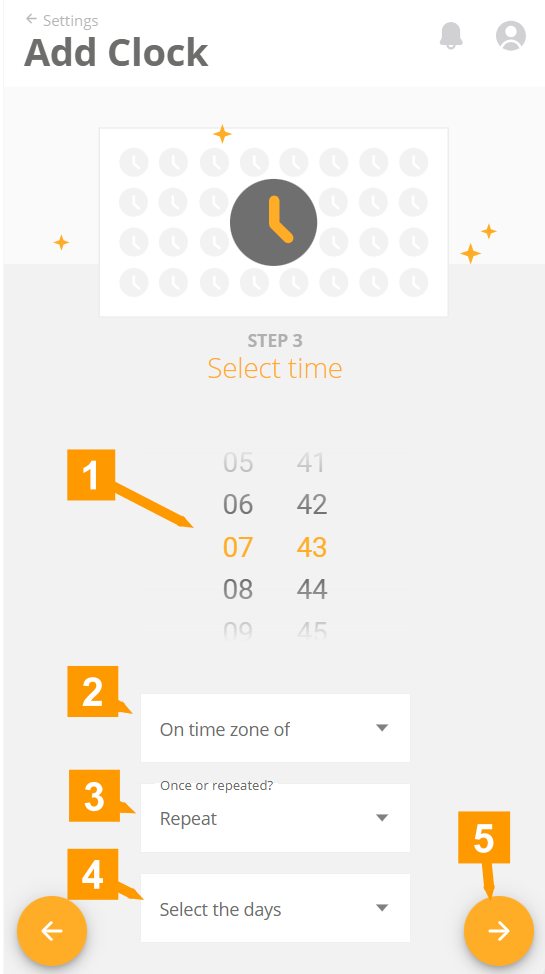
- Here you can set the hour and minutes. Click on a field above or below the highlighted time to adjust the time, you can also use the scroll wheel of your mouse.
- Qbus Control allows us to have devices in multiple homes. These homes may be in different time zones. Therefore, it is important here to choose the time zone of the correct device.
- We can have a clock action performed once or have it performed multiple times. Here you can set this. Make your choice (1) and confirm (2).

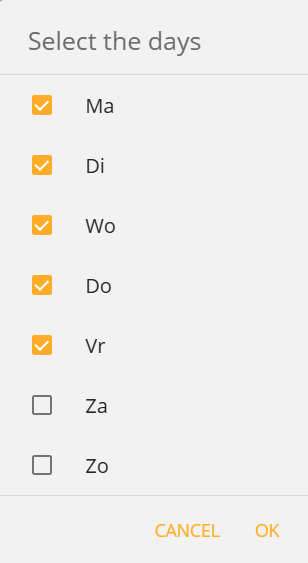
- For a clock action we want to repeat, you can set the days here. Select the desired days (1) and confirm (2).
- Go to the next step.
The following steps will be different for each type:
¶ Output
You can make an output go to a certain state at a set time.
In this step, we determine which output.
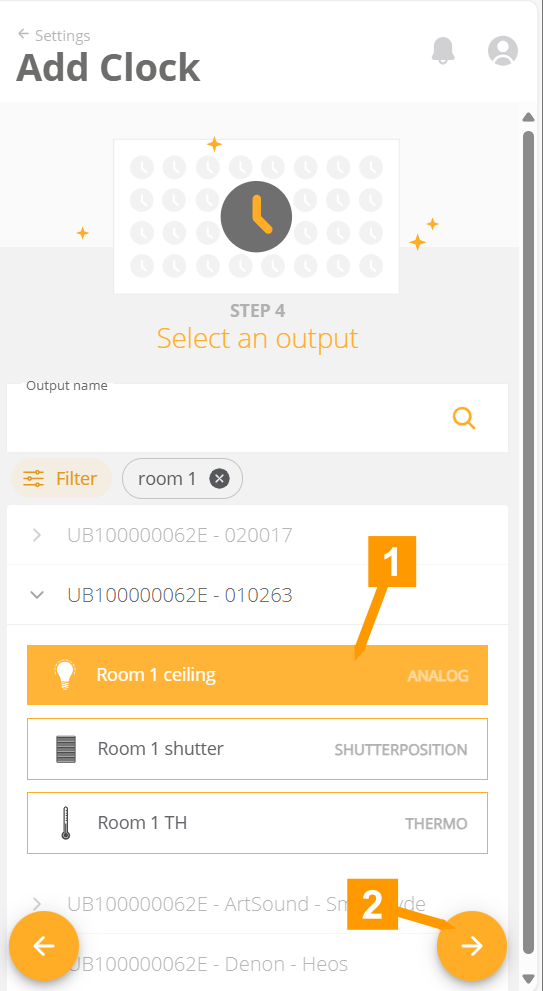
- Select 1 or more outputs.
- Confirm to continue.
In this step we determine which state the output should go to.
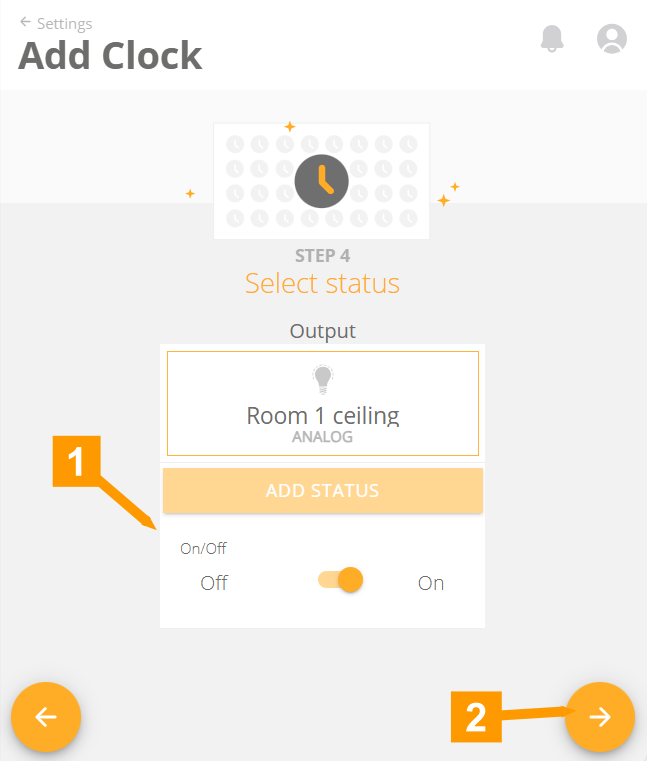
- Select your output.
- Set the status.
- Confirm to continue.
As a final step, we need to confirm our clock.
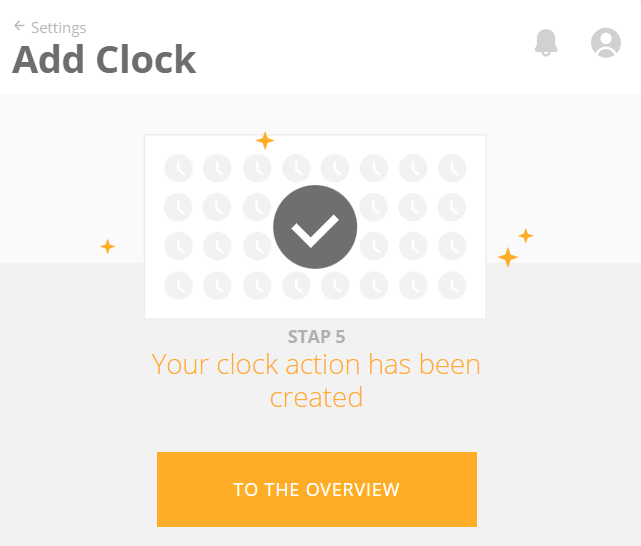
Finally, we return to the Settings page where we have an overview of our clock times.
¶ SMS
This clock allows you to have an SMS sent at a specific time. You can include the status of an output in the text message.
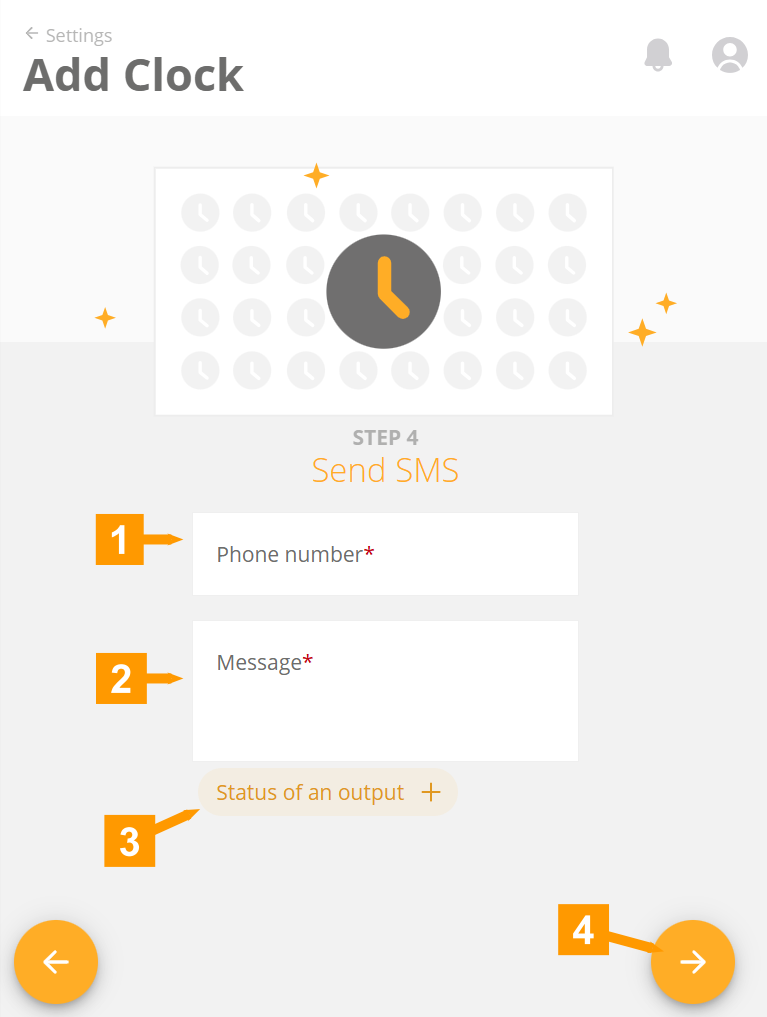
- Enter the phone number to which an SMS should be sent.
- Here you can set up the message the recipient will receive. With the selection menu (4) you can choose an output. The name of the output and its status will be shown in the message.
- Clock on the arrow to confirm.
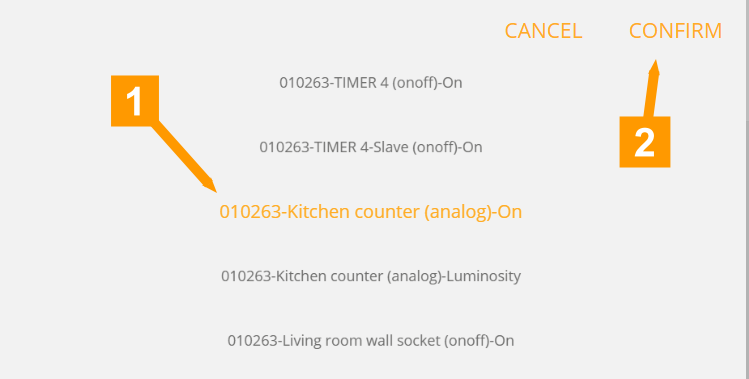
- Select an output.
- Confirm the output with CONFIRM.
The last step is to confirm our clock.
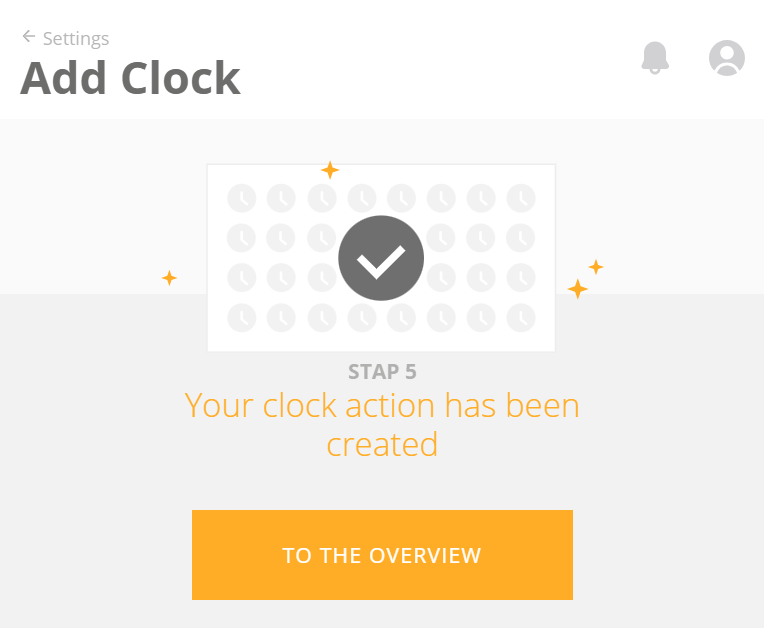
Finally, we return to the Settings page where we have an overview of our clock times.
This clock allows you to have an email sent at a specific time. You can include the status of an output in the message of the e-mail.
In this step we set the data for the e-mail.
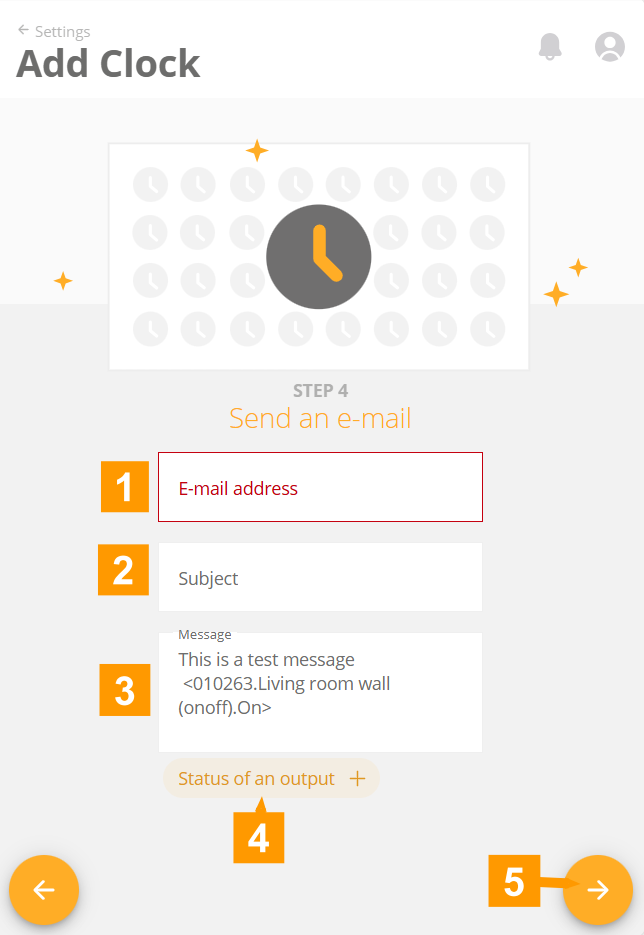
- Specify an e-mail address for the recipient.
- Enter a subject.
- Here you can set up the message the recipient will receive. With the drop down menu (4) you can select an output. The name of the output and its status will be shown in the message.
- Clock on the arrow to confirm.
- Select an output.
- Confirm the output with CONFIRM.
The last step is to confirm our clock.
Finally, we return to the Settings page where we have an overview of our clock times.
¶ Notification
This clock allows you to have a push notification sent at a specific time to a phone. You can include the status of an output in the message of the notification.
In this step we set the data for the notification.

- Specify a subject.
- Here you can set up the message the recipient will receive. With the drop down menu (3) you can select an output. The name of the output and its status will be shown in the message.
- Click on the arrow to confirm.
The last step is to confirm our clock.