Through the automation Actions you can have your system take action.
- Through the Calendar action, you can have an operation performed in your system. You can set an appointment in your calendar and this appointment will take an action. For example 1h before a meeting starts you can change the heating from NIGHT to COMFORT.
- With the actions SMS, MAIL and Notification you can receive a notification when something happens in your system. For example, you can receive a text message when a motion detector has detected something.
- The Link action can create links in your system. Suppose you have a building with several controllers and you want to activate an All off atmosphere with a button that is on controller 1. With a Link action you can send a signal to the 2nd controller that it should also activate an All off atmosphere.
- The actions Month peak notification, overconsumption and overproduction help you to keep your energy bill under control.
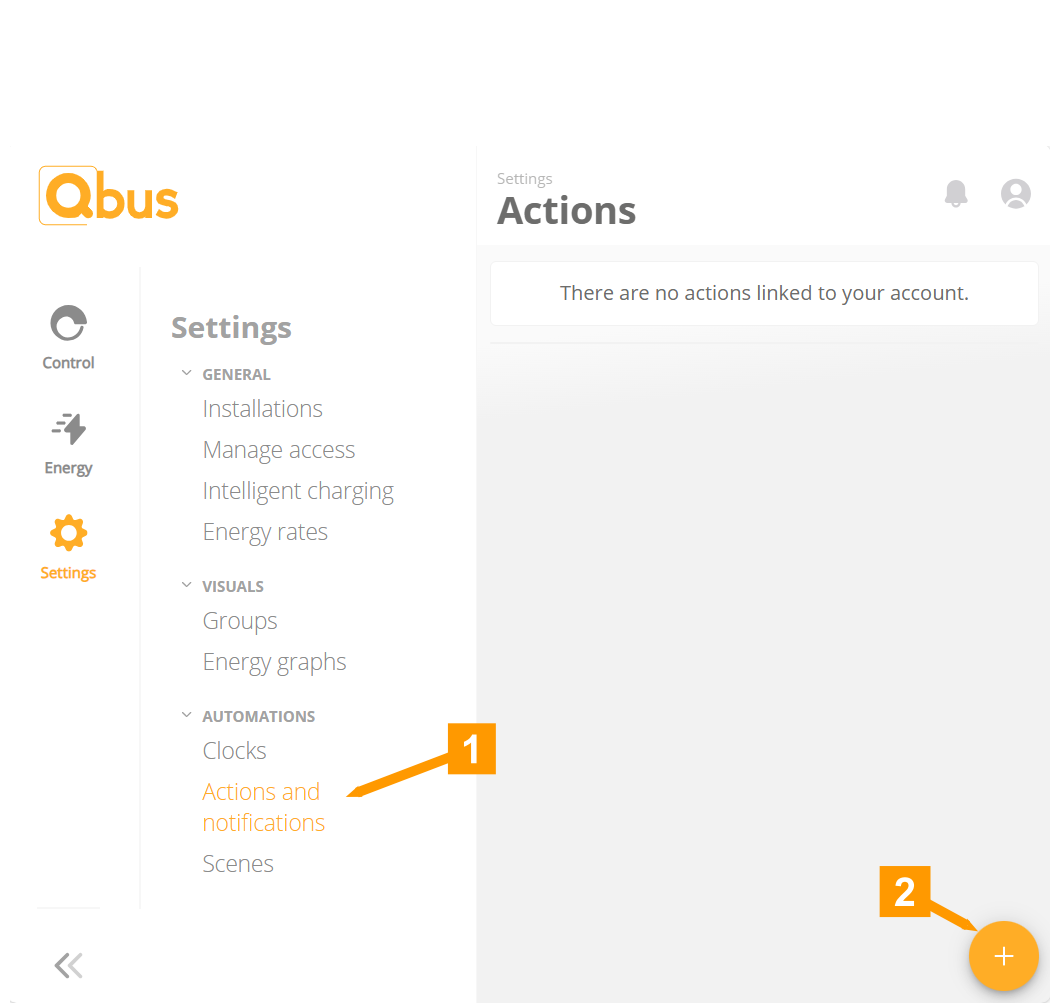
- Go to Actions and notifications.
- Click '+' to add a new action.
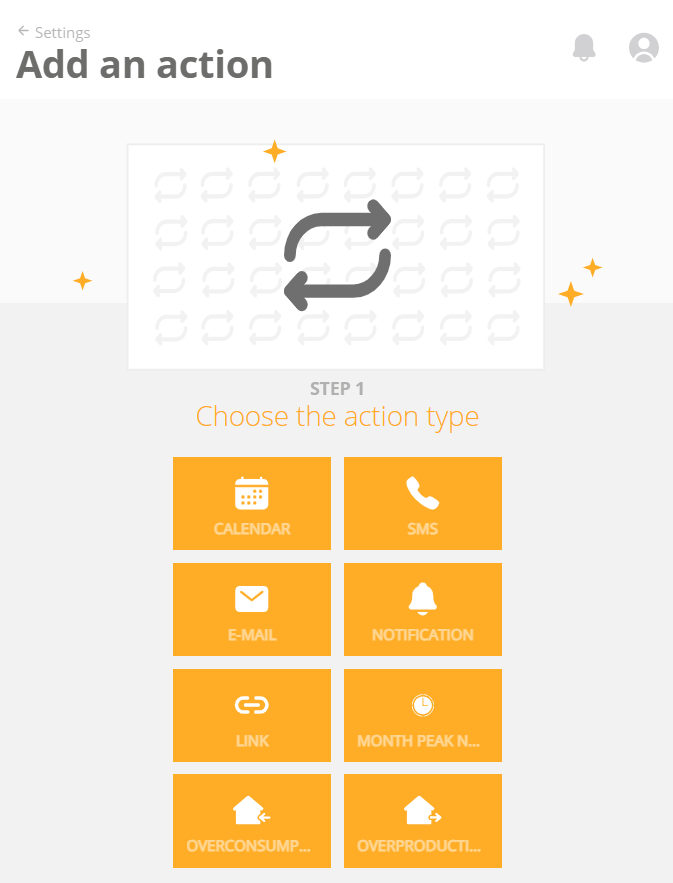
Click on the action you wish to use.
¶ Calendar
To use the calendar action, we first need to give our online calendars access to Qbus Control.
The first time we want to create an action, Qbus Control will redirect you to the login page of the respective calendar.
¶ Activate Office
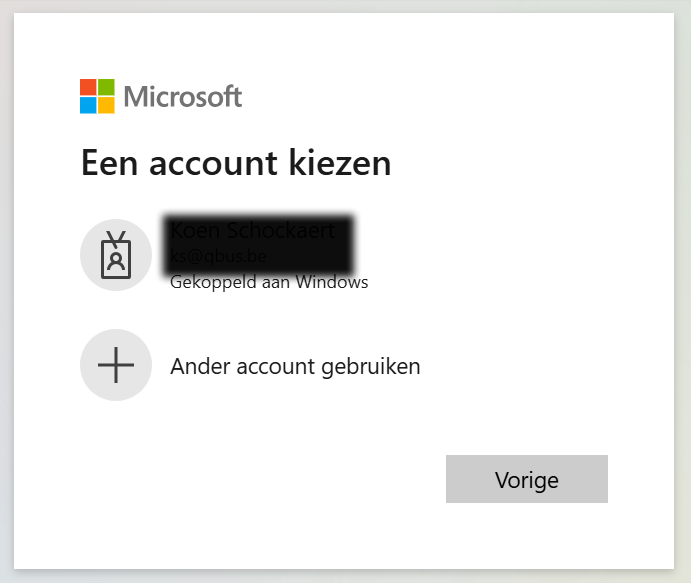
Log in with the Office account you want to link to your Qbus Control account.
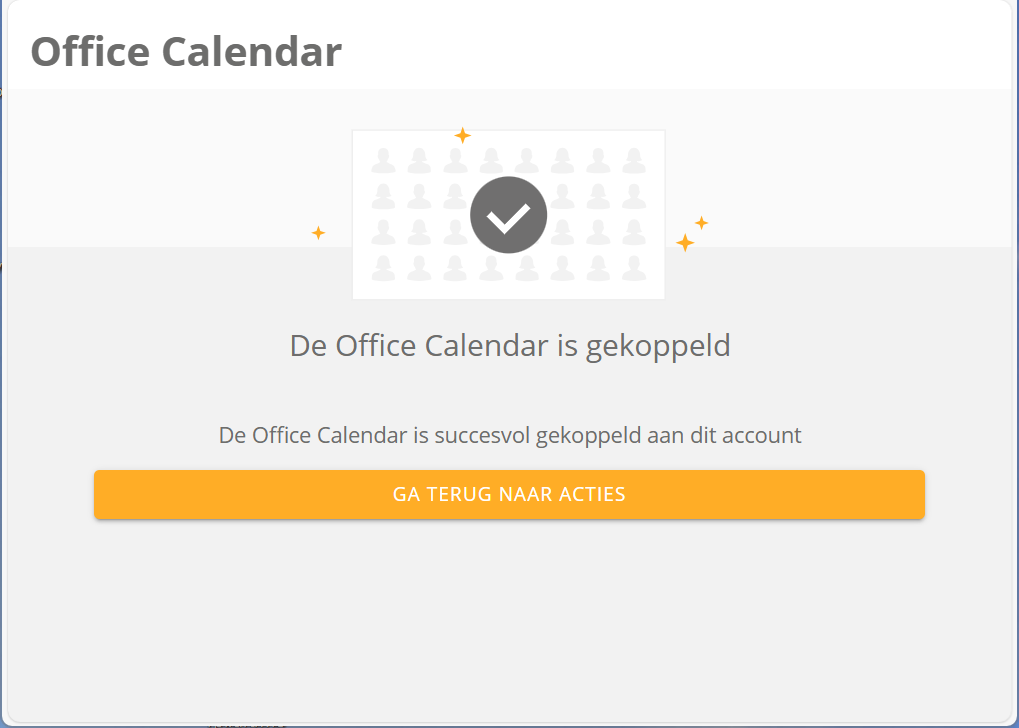
Successful, return to the overview to create an action.
¶ Activate Google
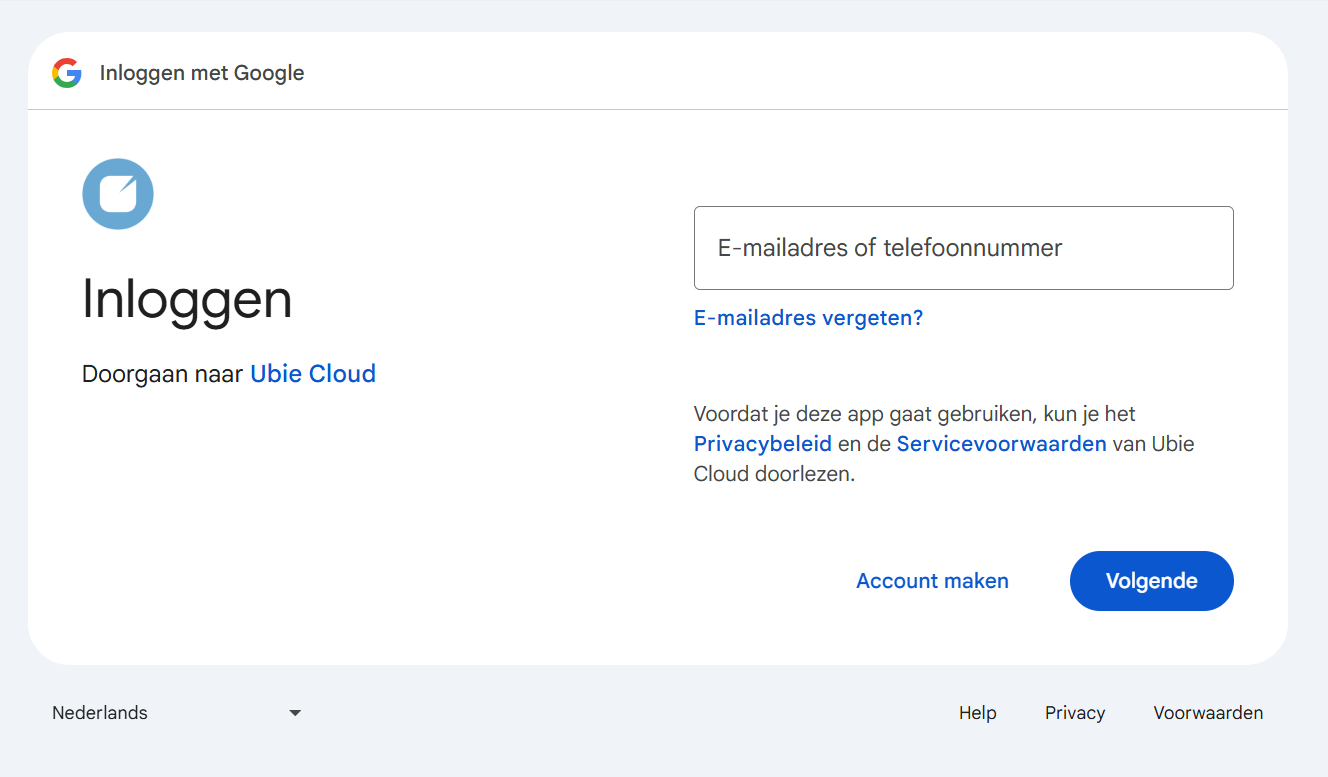
Log in with the Google account you want to link to your Qbus Control account.
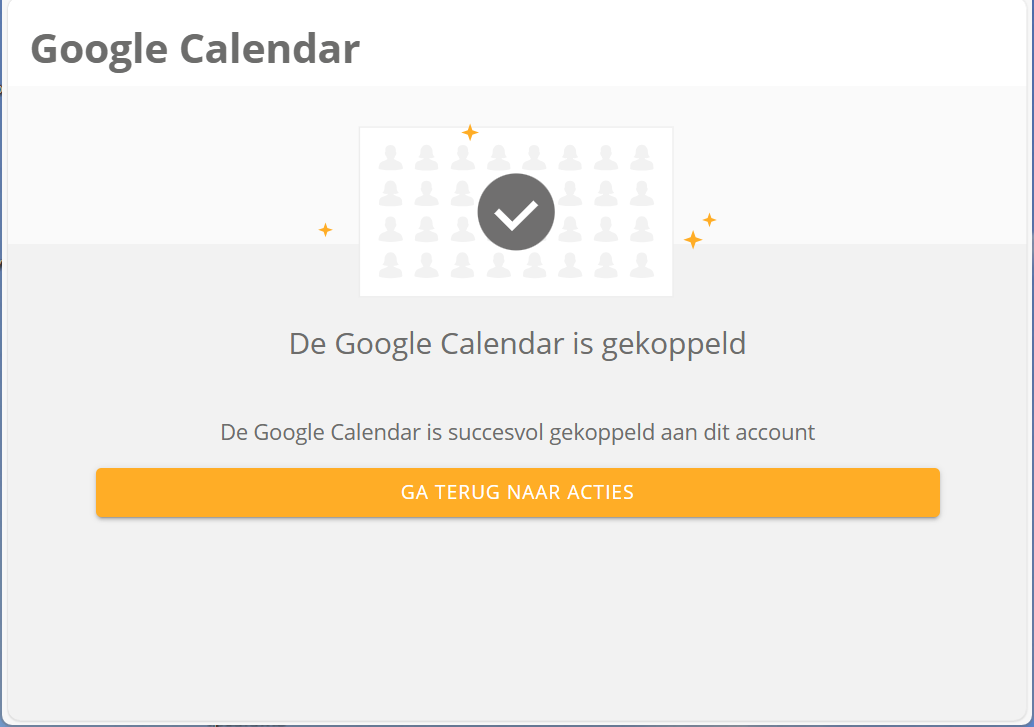
Successful, return to the overview to create an action.
¶ Create calendar action
By linking an action to a calendar, we can switch an output at the start and end of an appointment in the calendar.
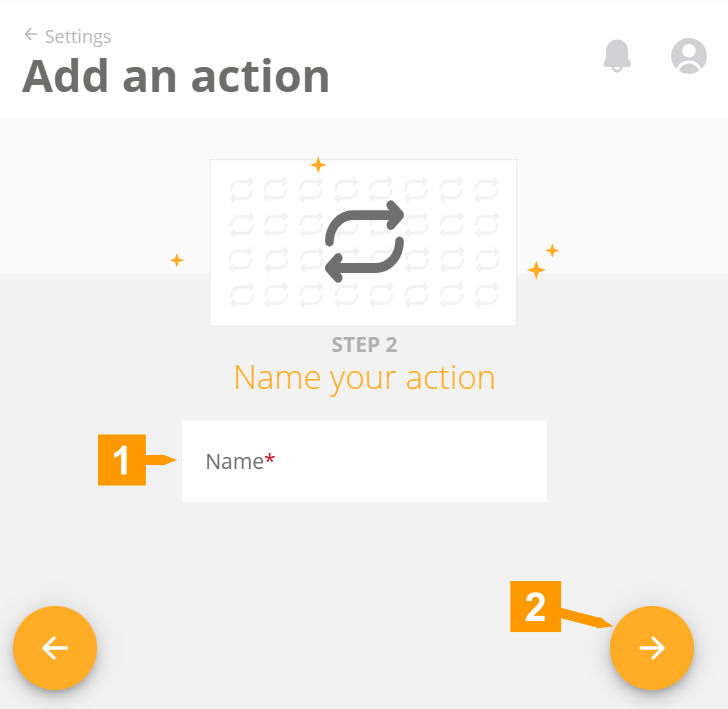
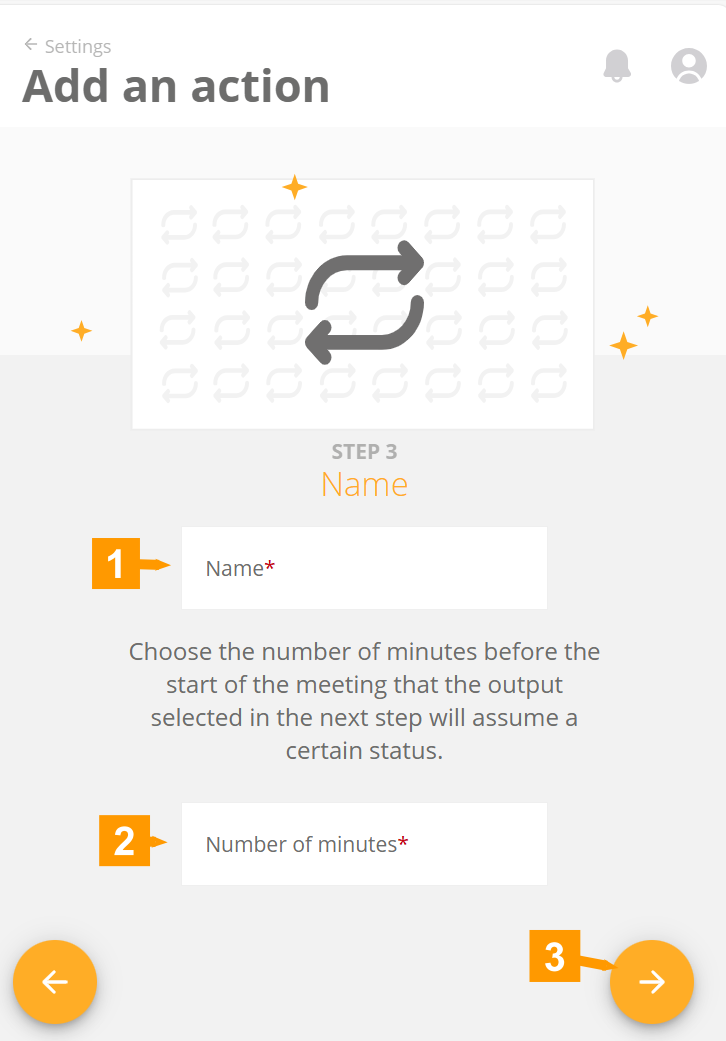
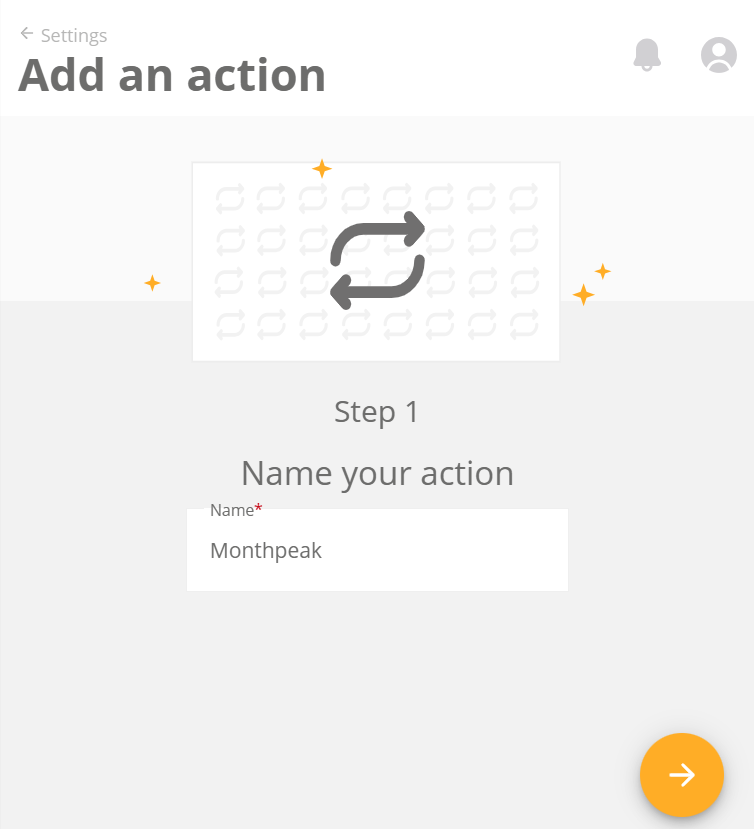
- Give a name to your calendar action.
- Click the arrow to proceed to the next step.
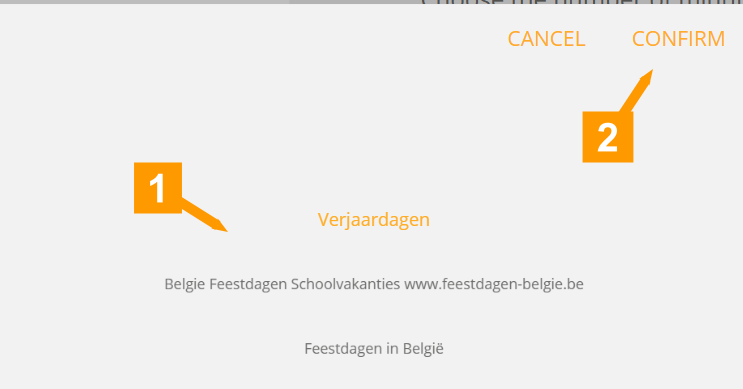
- Select the calendar you want to use.
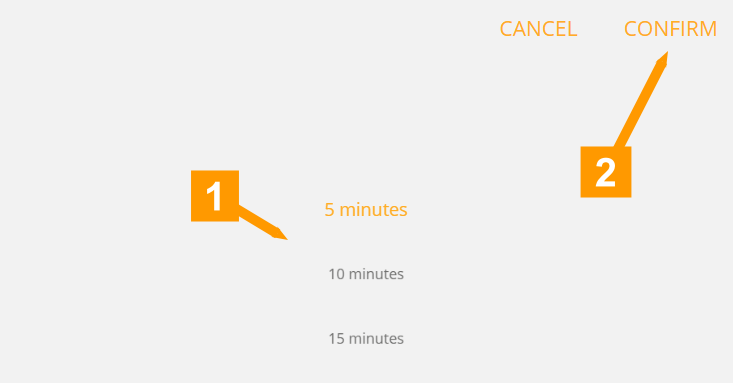
- Set the number of minutes in advance the output should be activated.
- Choose the calendar you want to use.
- Set the number of minutes by which the output should be controlled in advance.
- Set the number of minutes by which the output should be controlled in advance here.
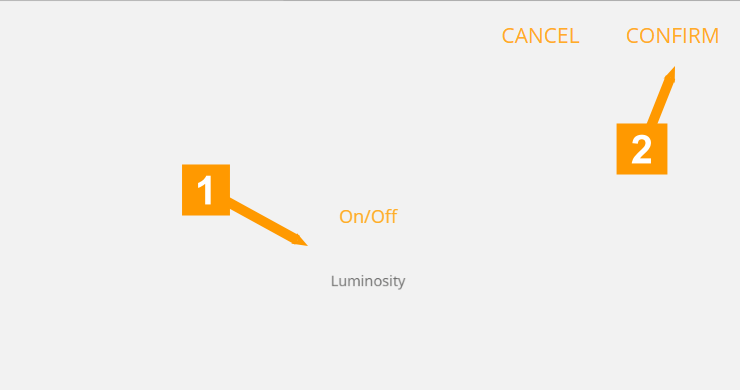
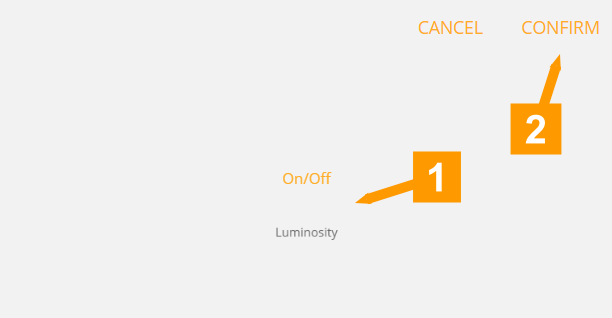
- Confirm with confirm.
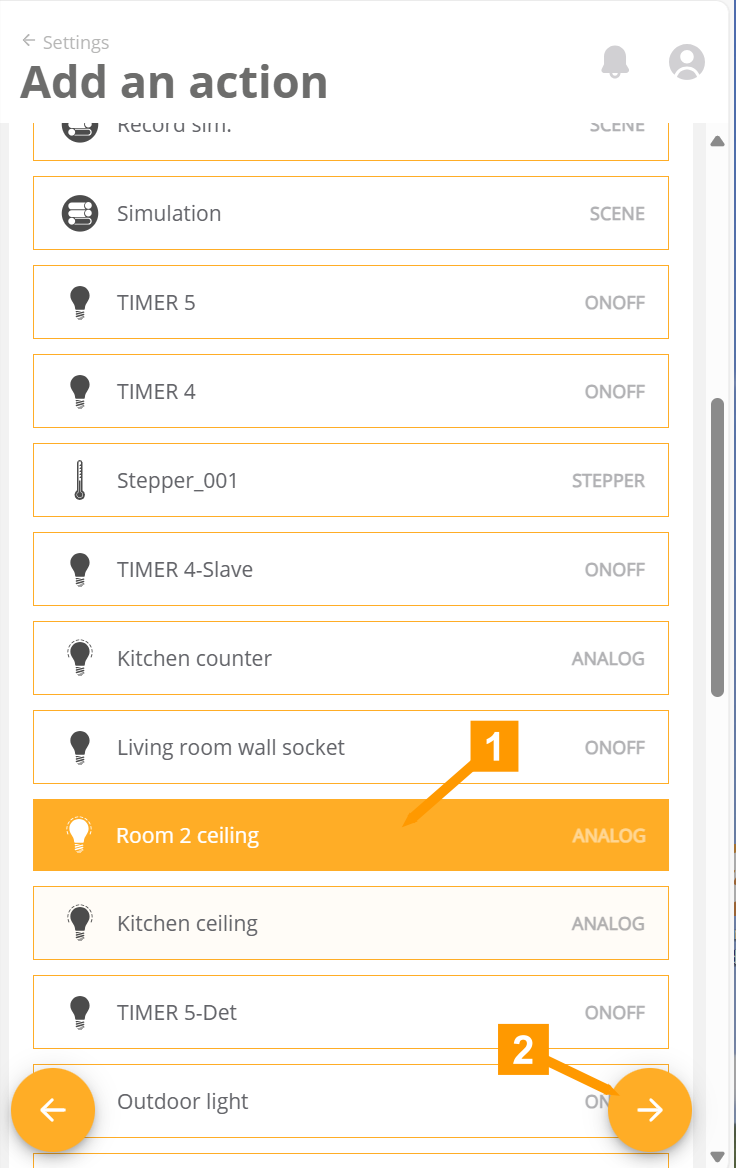
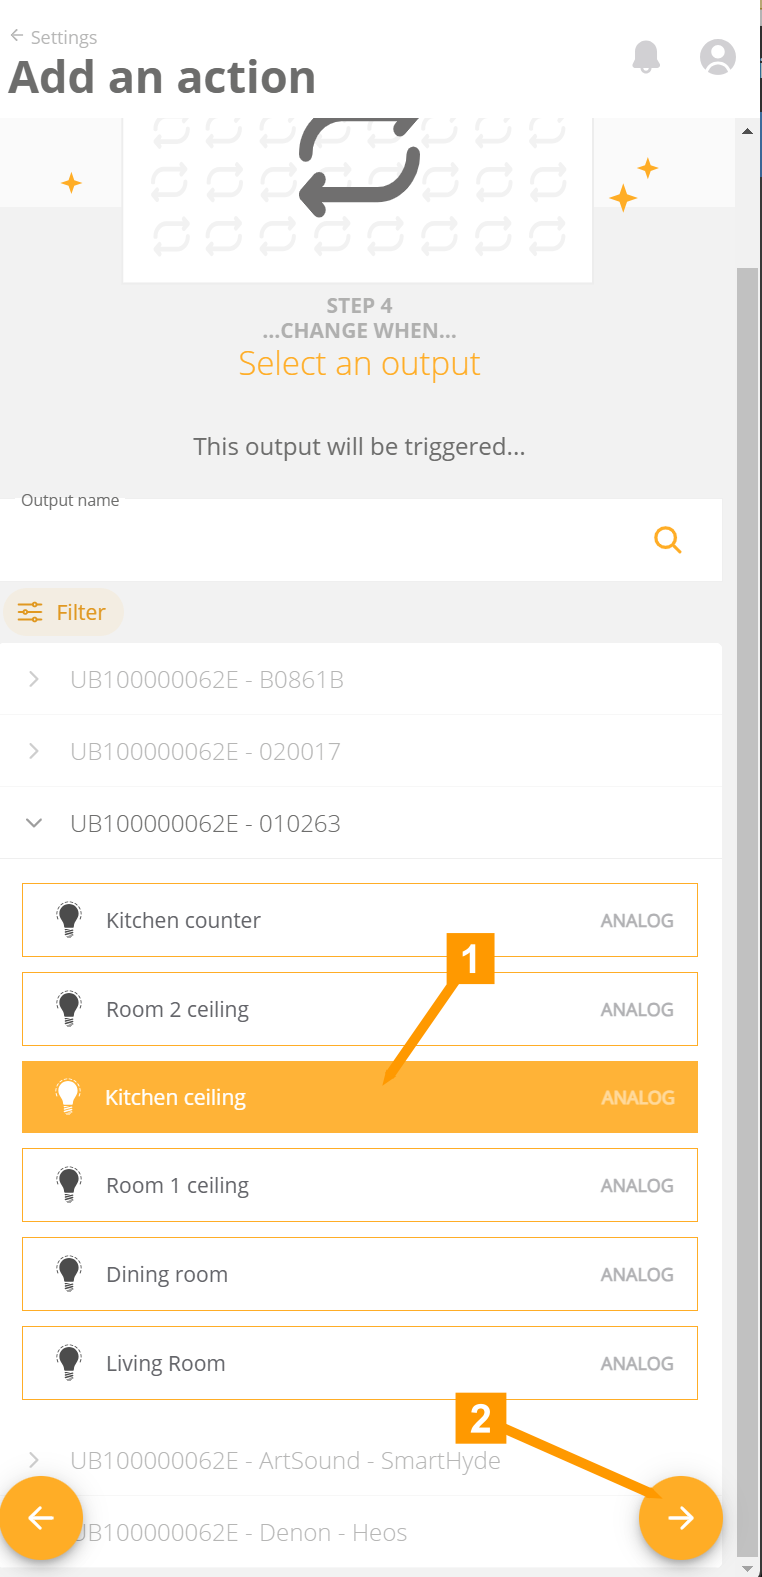
- Select the output whose staus is to be changed x number of minutes (previous step) before the start of the appointment.
- Click the arrow to proceed to the next step.
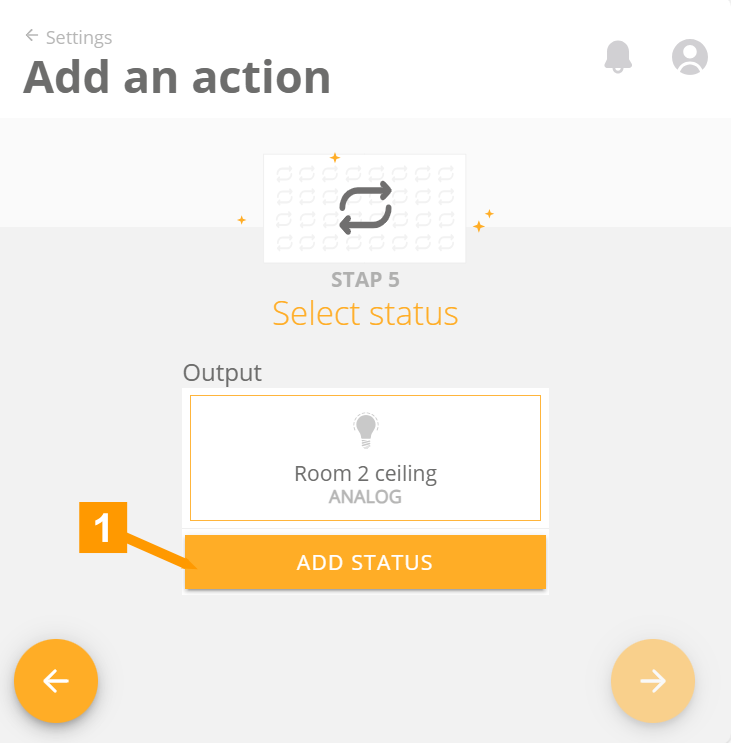
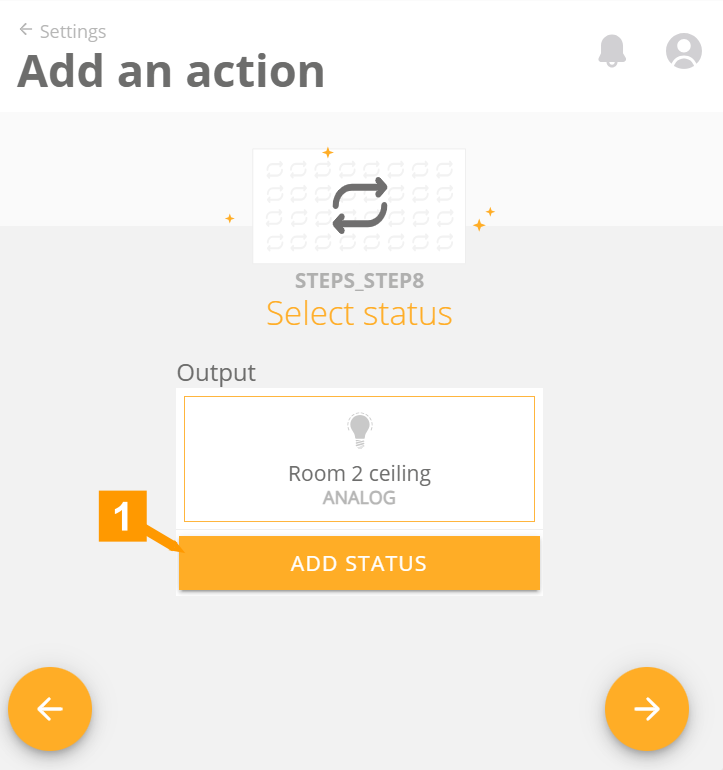
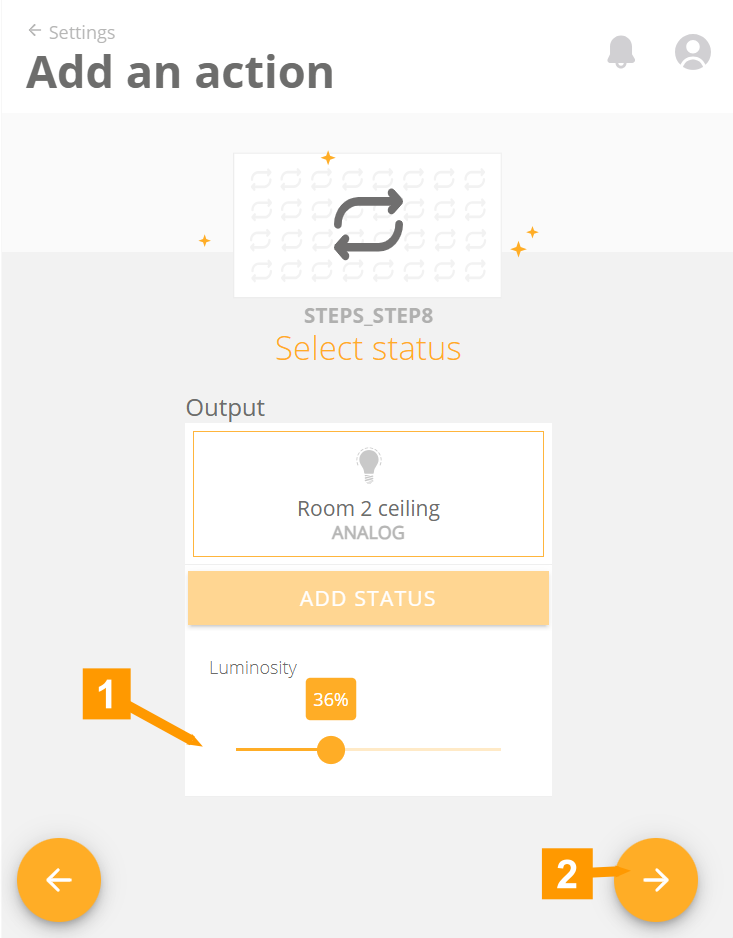
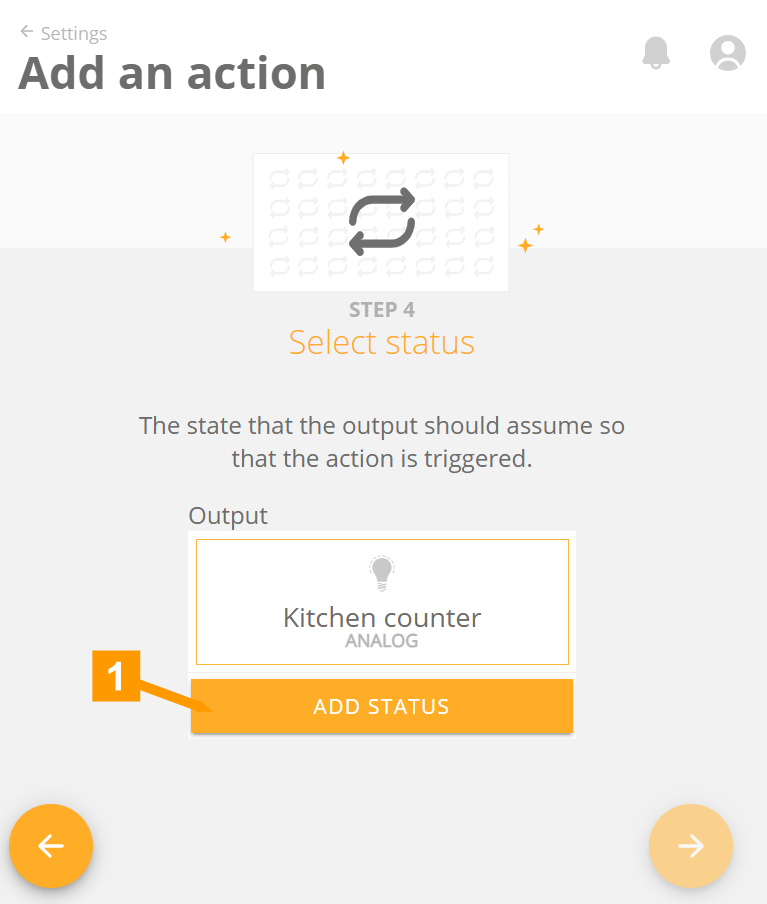
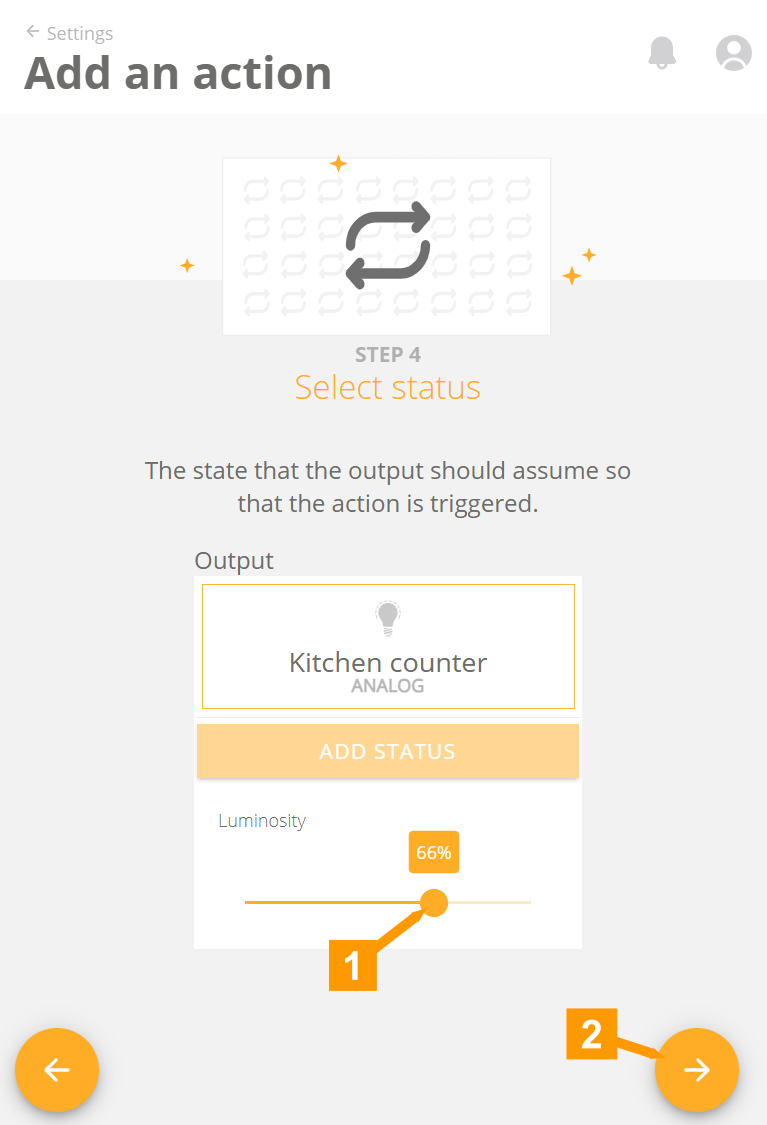
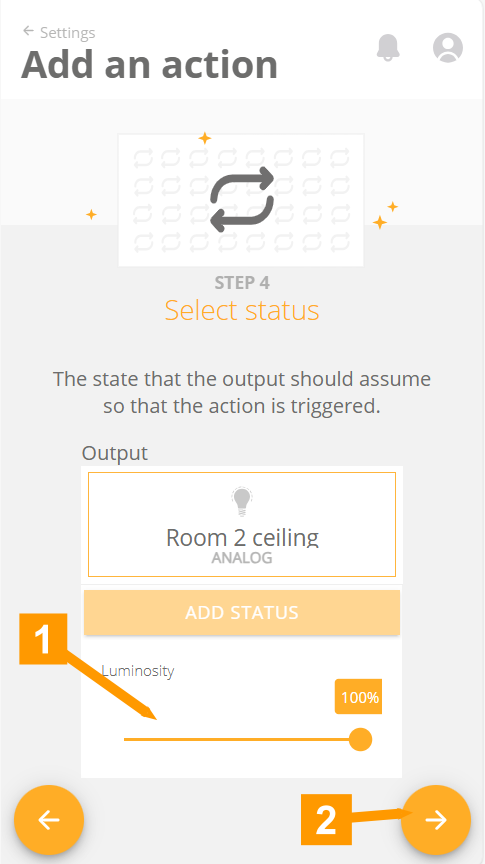
- Click Add status.
If an output has multiple staus fields, you can select the correct one here.
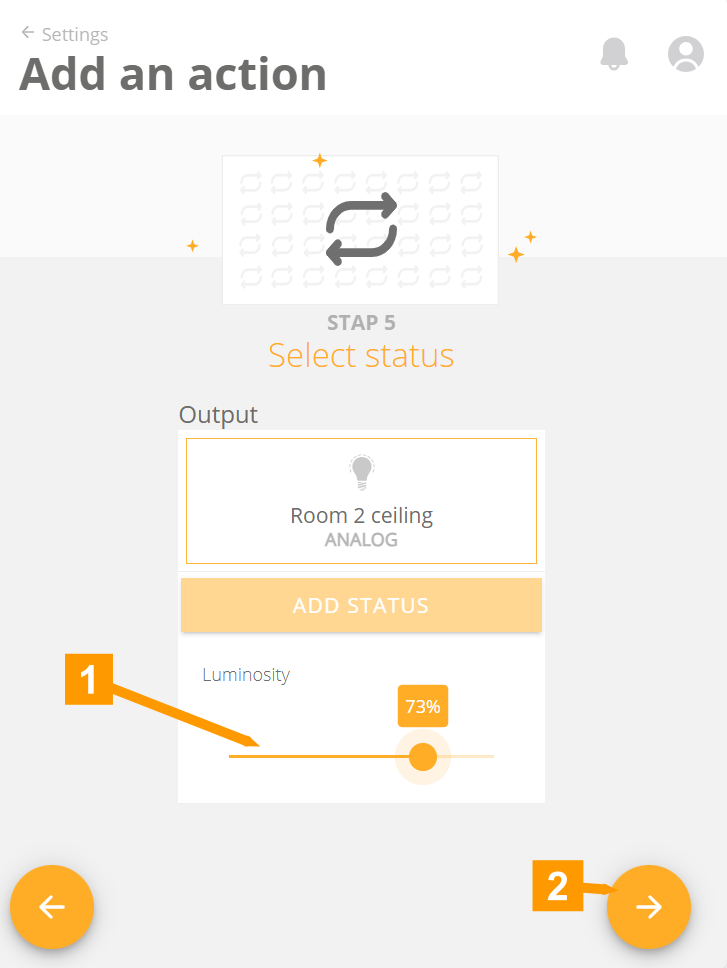
- Set the status of the output.
- Click the arrow to proceed to the next step.
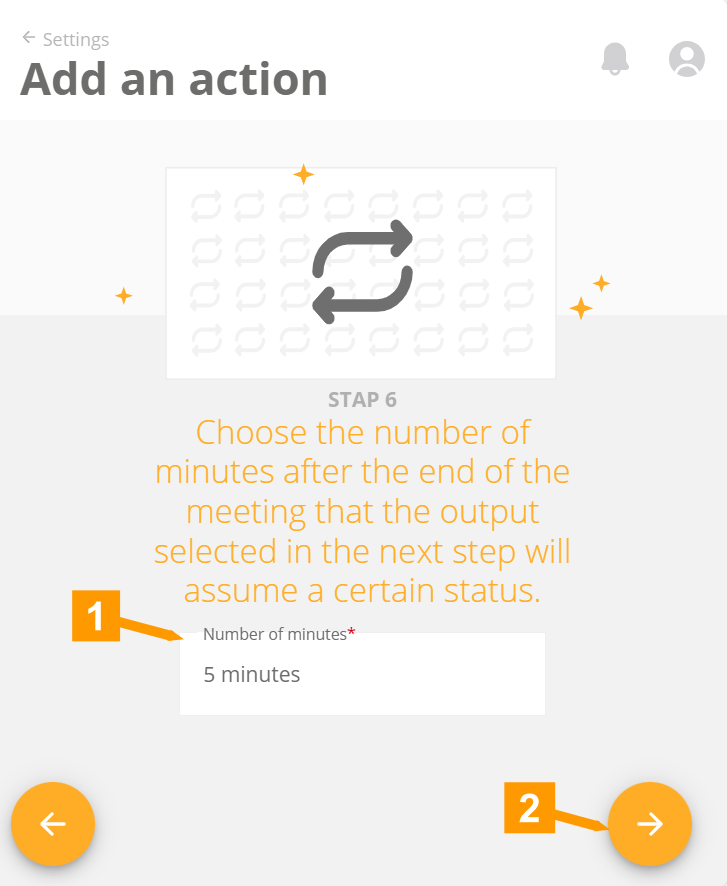
- Here you can set a time duration. After the expiration of the appointment, this time will be waited to activate the output of the next step.
- Click the arrow to proceed to the next step.
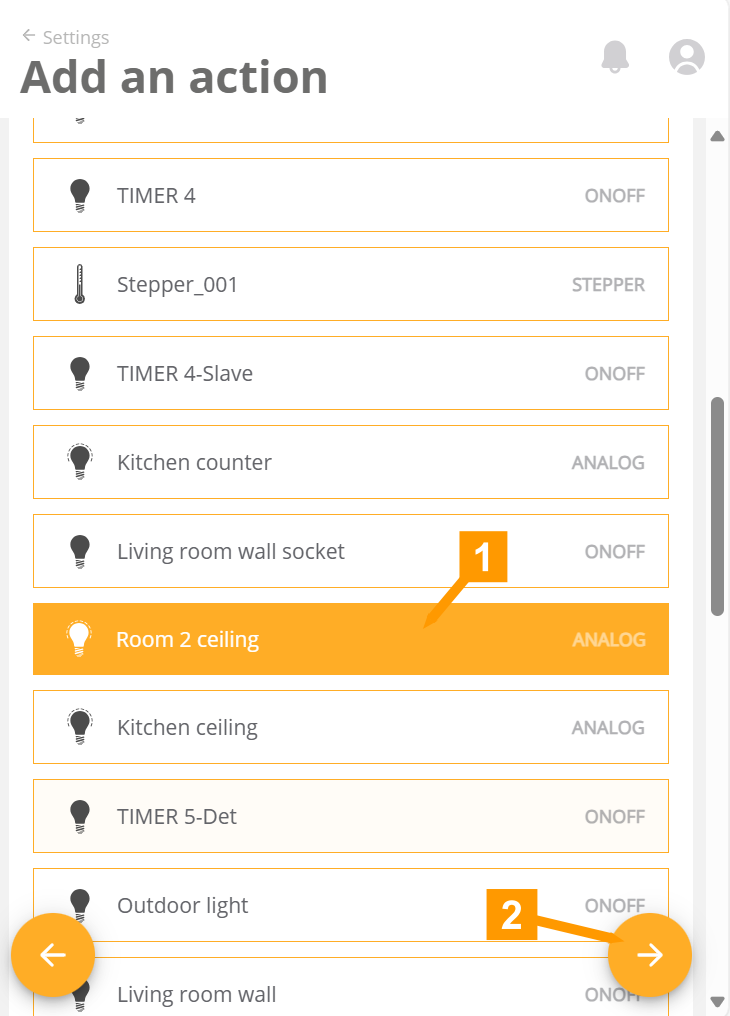
- Select the output whose staus is to be changed x number of minutes (previous step) after the start of the appointment.
- Click the arrow to continue to the next step.
- Click Add status.
- Set the status of the output.
- Click the arrow to proceed to the next step.

Click To Overview.
¶ SMS
The SMS action allows you to receive a text message when an exit goes to a certain status.
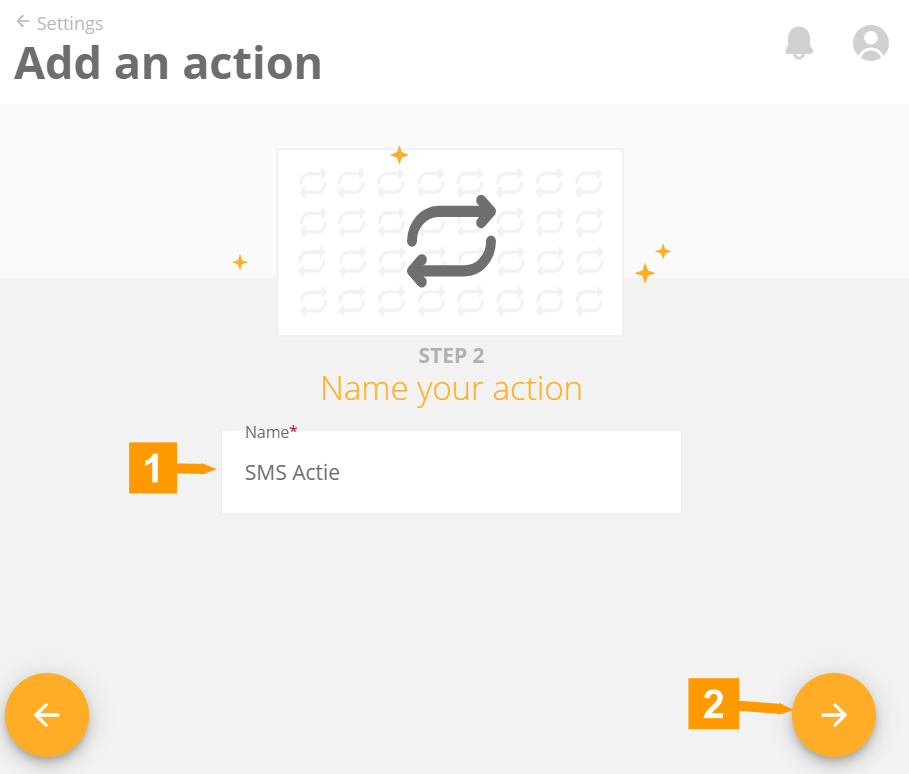
- Give a clear name to your action.
- Click the arrow to proceed to the next step.
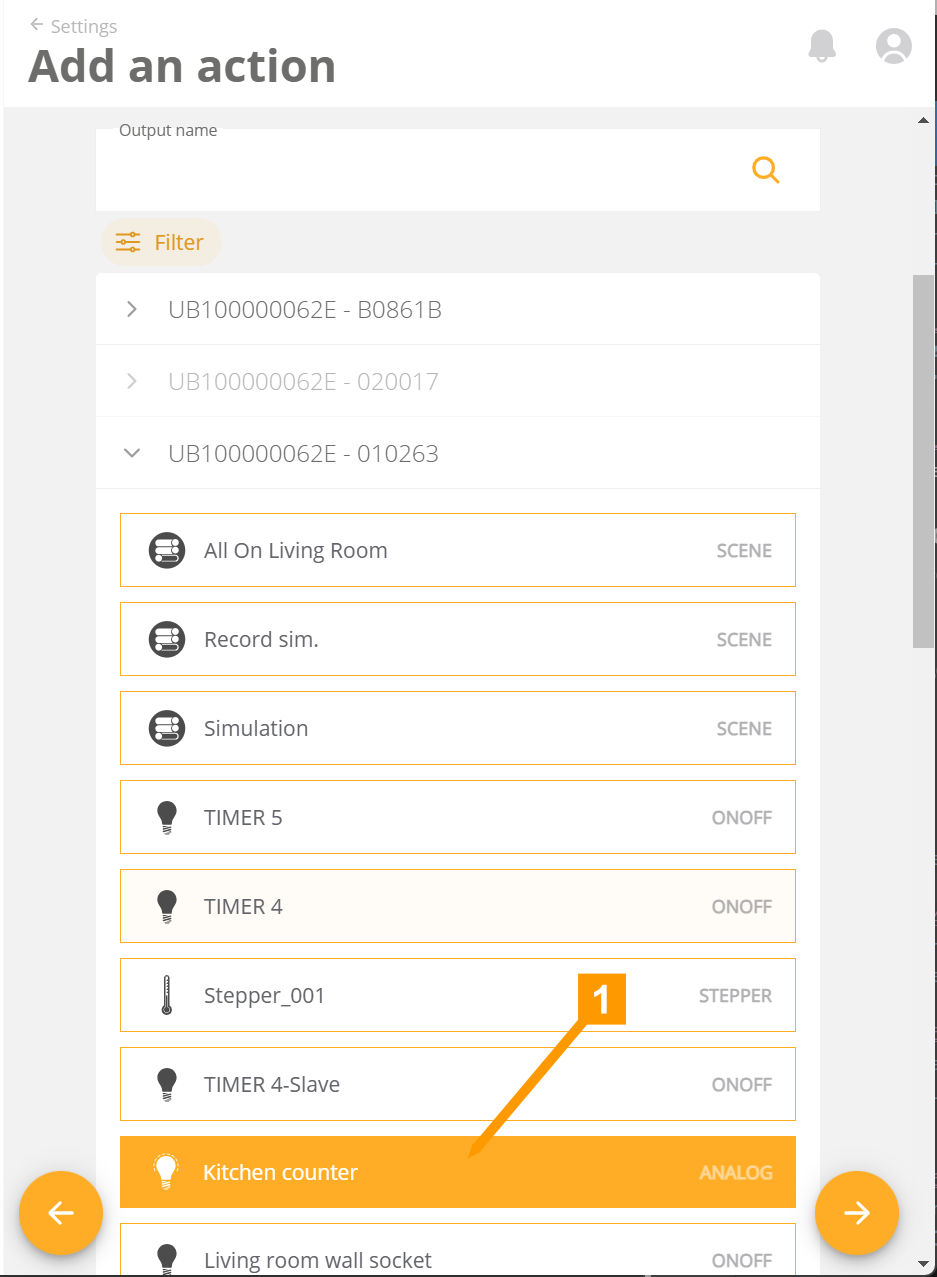
- Select the output you want to monitor.
- Click the arrow to proceed to the next step.
- If you have selected an output that can have more than 1 status field (a dimmer can be on or off but can also have a value) click here to determine which type of status you want to use.
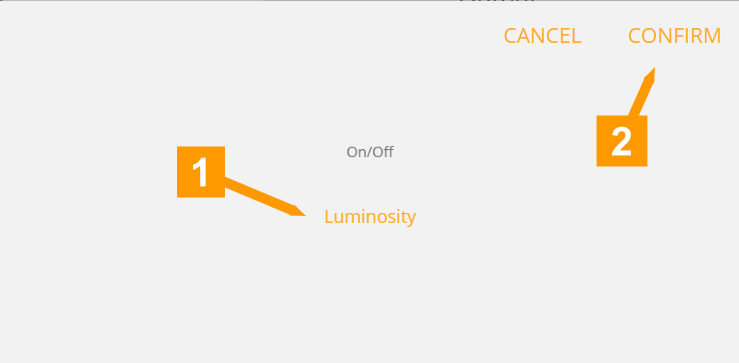
- Select from the list of available statuses.
- Click Confirm to confirm.
- Adjust the status (you will be notified if the selected output changes to this value).
- Click the arrow to proceed to the next step.
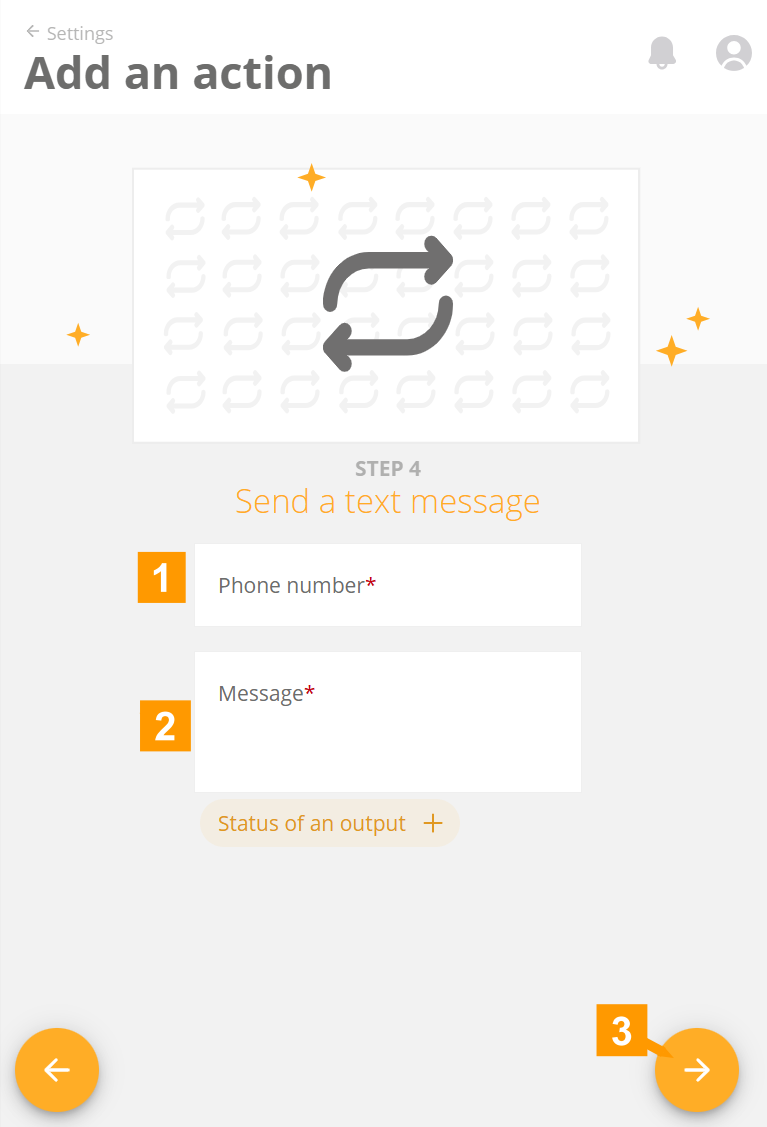
- Enter the phone number to where the text message should be sent.
- Enter the message for the text message here.
Through the field Status of an output you can choose an output. This can be any output whose status you want to add to the message and is independent of the output chosen in the previous step. - Click the arrow to proceed to the next step.
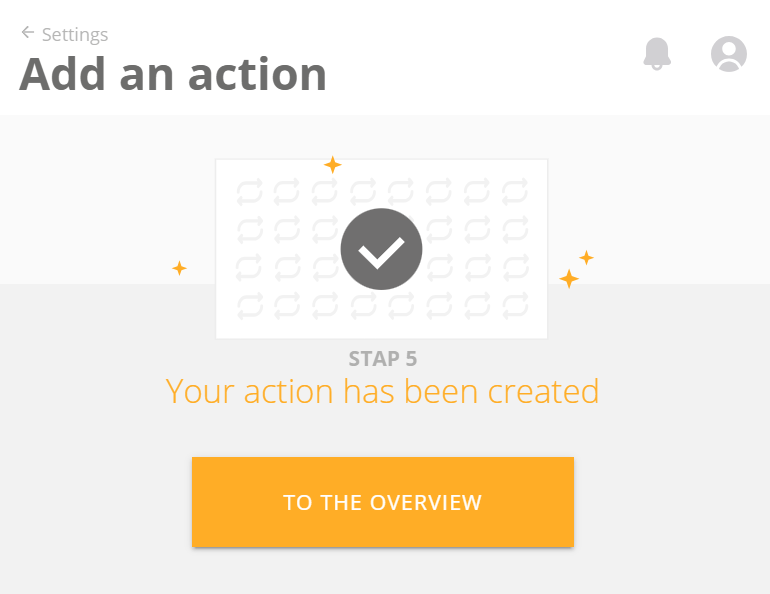
Your action has been created. Click To overview to return to the overview.
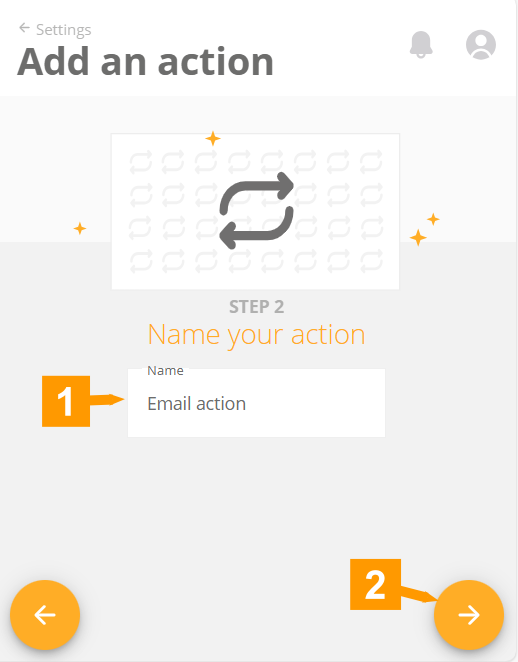
- Give a clear name to your action.
- Click the arrow to proceed to the next step.
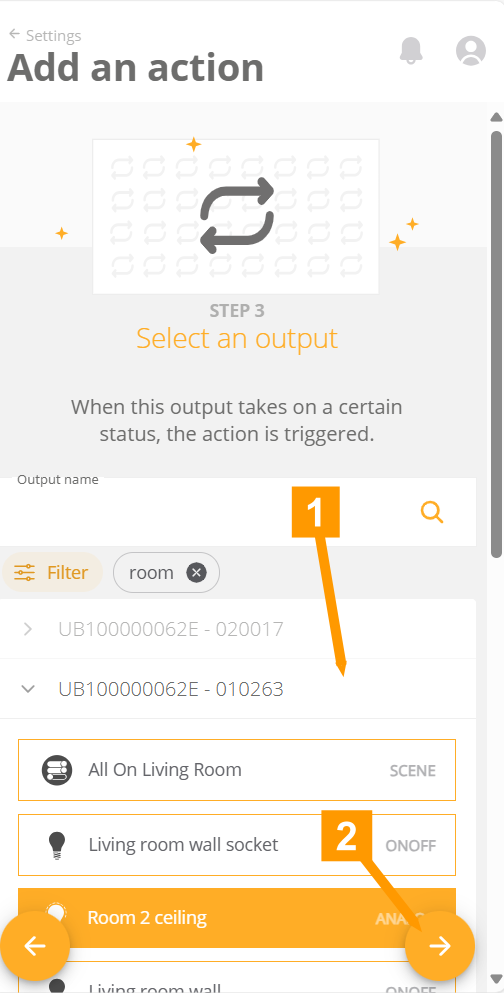
- Select the output you want to monitor.
- Click the arrow to proceed to the next step.
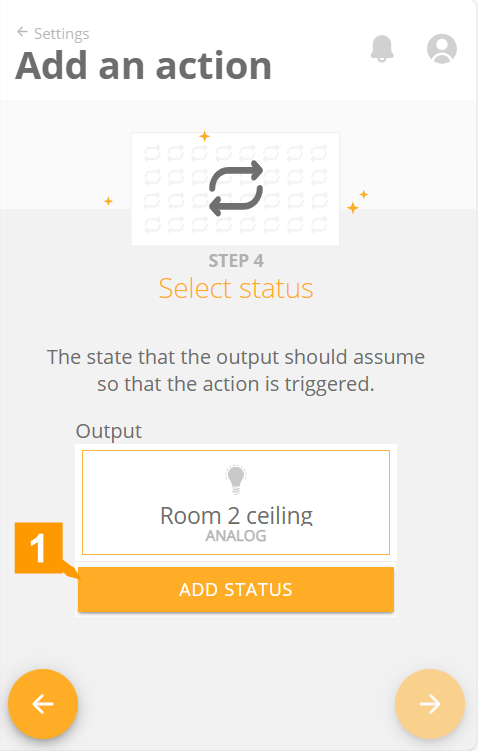
- If you have selected an output that can have more than 1 status field (a dimmer can be on or off but can also have a value) click here to determine which type of status you want to use.
- Select from the list of available statuses.
- Click Confirm to confirm.
- Adjust the status (you will be notified if the selected output changes to this value).
- Click the arrow to proceed to the next step.
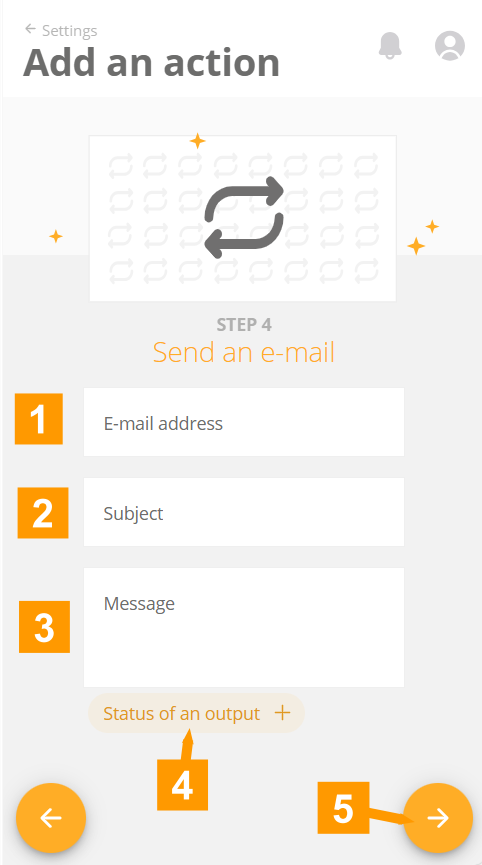
- Enter an e-mail address of the recipient.
- Enter a subject for the e-mail.
- Enter the message for the email here.
- The Status of an output field allows you to choose an output. This can be any output whose status you want to add to the message and is independent of the output chosen in the previous step.
- Click the arrow to proceed to the next step.
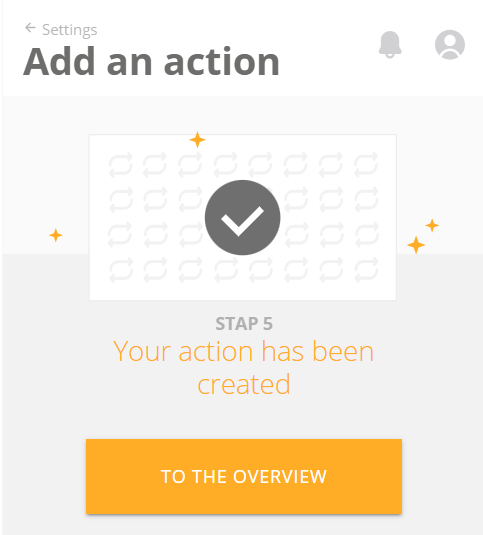
Your action has been created. Click To overview to return to the overview.
¶ Notification
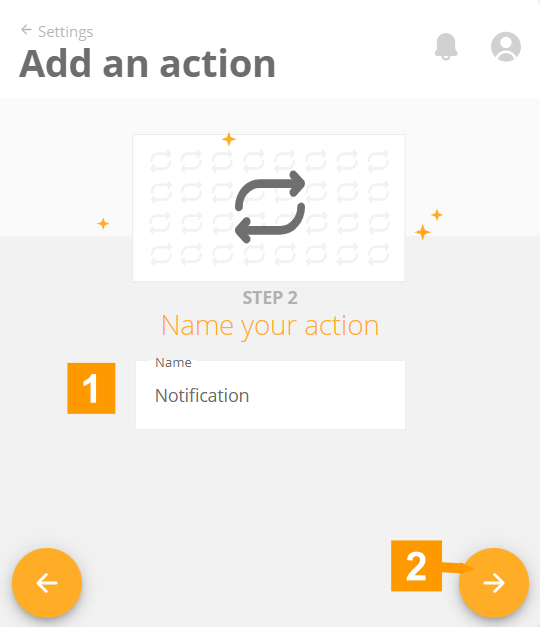
- Give a clear name to your action.
- Click the arrow to proceed to the next step.
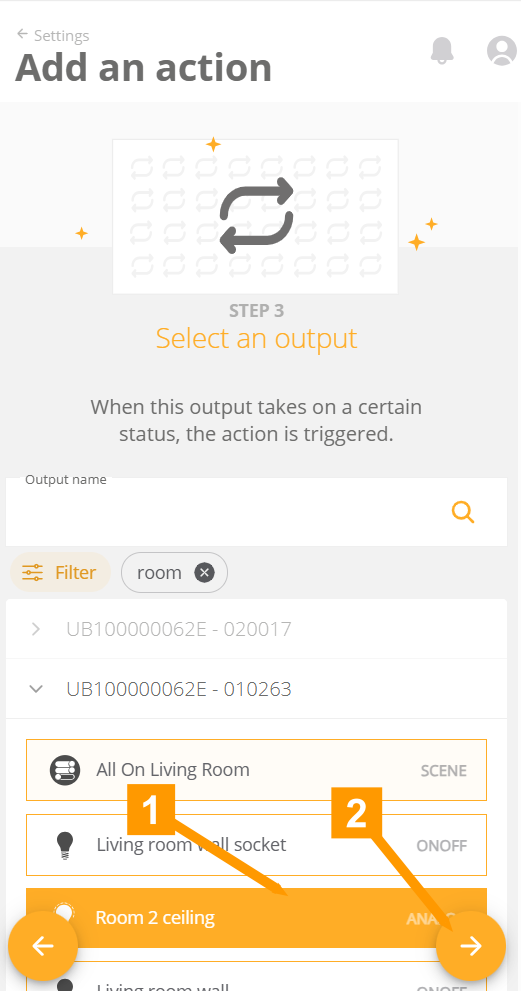
- Select the output you want to monitor.
- Click the arrow to proceed to the next step.

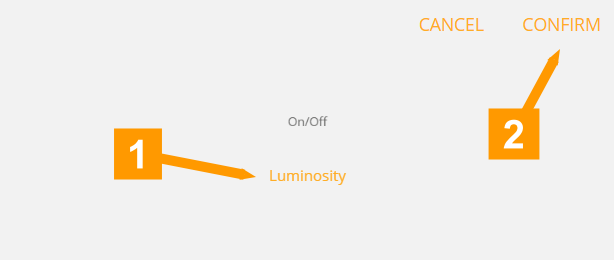
- If you have selected an output that can have more than 1 status field (a dimmer can be on or off but can also have a value) click here to determine which type of status you want to use.
- Select from the list of available statuses.
- Click Confirm to confirm.
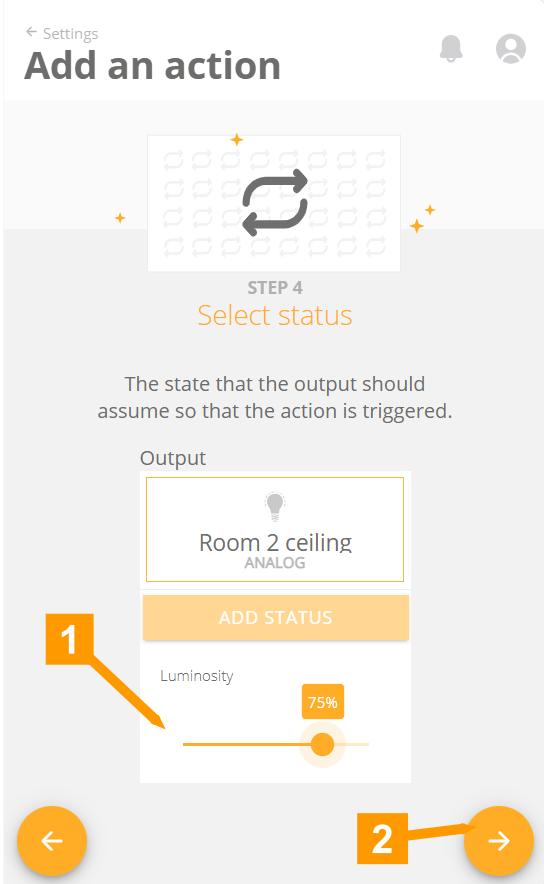
- Adjust the status (you will be notified if the selected output changes to this value).
- Click the arrow to proceed to the next step.
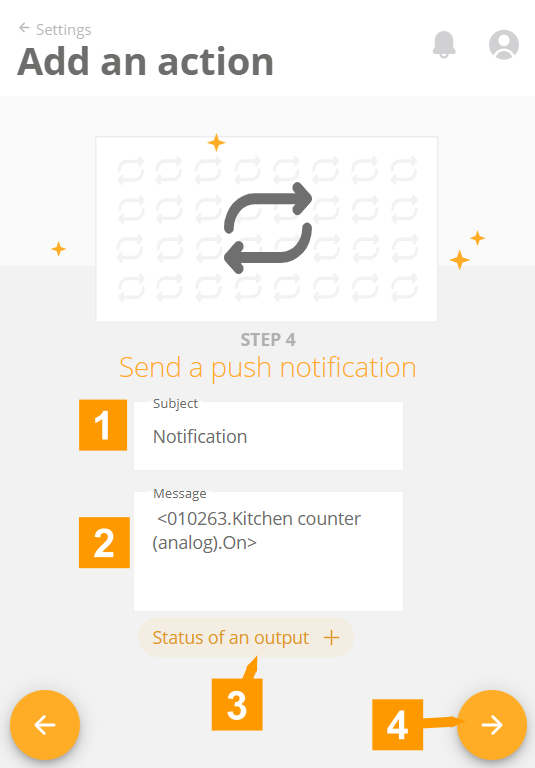
- Provide a subject for the notification.
- Enter the message for the notification here.
- The Status of an output field allows you to choose an output. This can be any output whose status you want to add to the message and is independent of the output chosen in the previous step.
- Click the arrow to proceed to the next step.
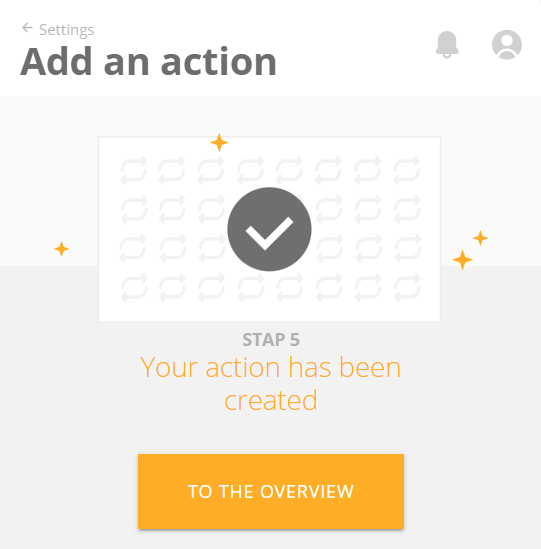
Your action has been created. Click To overview to return to the overview.
¶ Link
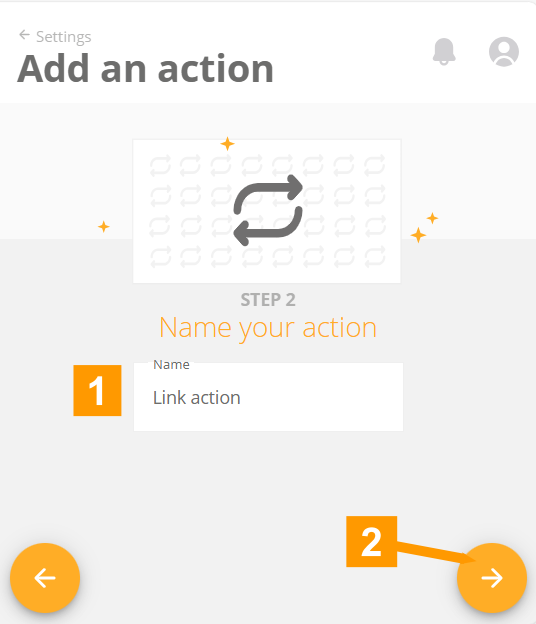
- Give a clear name to your action.
- Click the arrow to proceed to the next step.
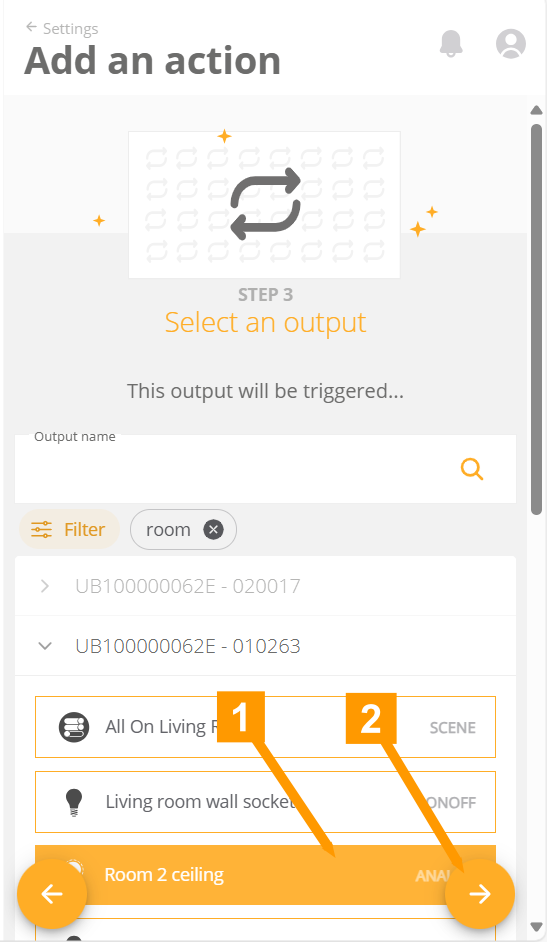
- Choose an output that will track the status of the output we will choose in the next step.
- Click the arrow to proceed to the next step.
- Choose an output that will send a signal to the output from the previous step.
- Click the arrow to proceed to the next step.
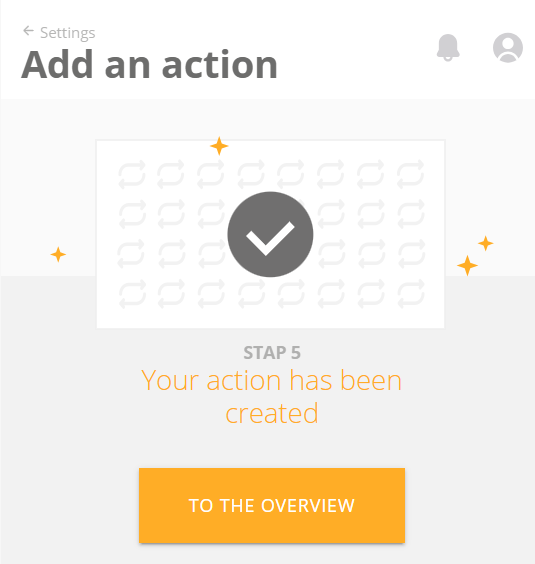
Your action has been created. Click To overview to return to the overview.
¶ Monthly peak
Luqas can help you not exceed your monthly peak....
The Luqas accurately tracks your energy consumption. With the implementation of the quarter peak, this is an important value to keep an eye on in order not to have surprises on your energy bill.
By activating this action, you will be notified if your monthly peak threatens to exceed a set value.
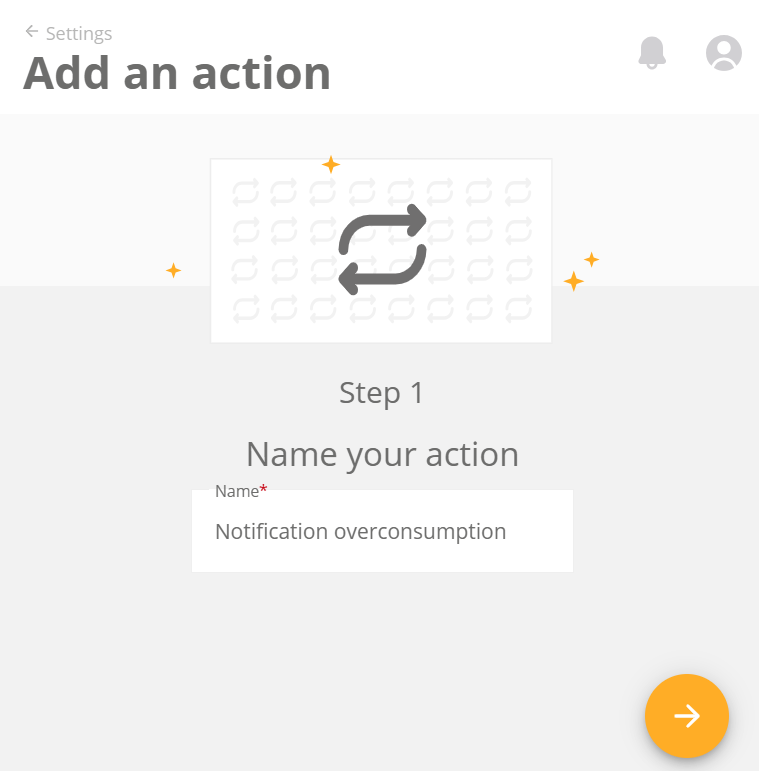
Provide a name for your action and click the arrow to proceed
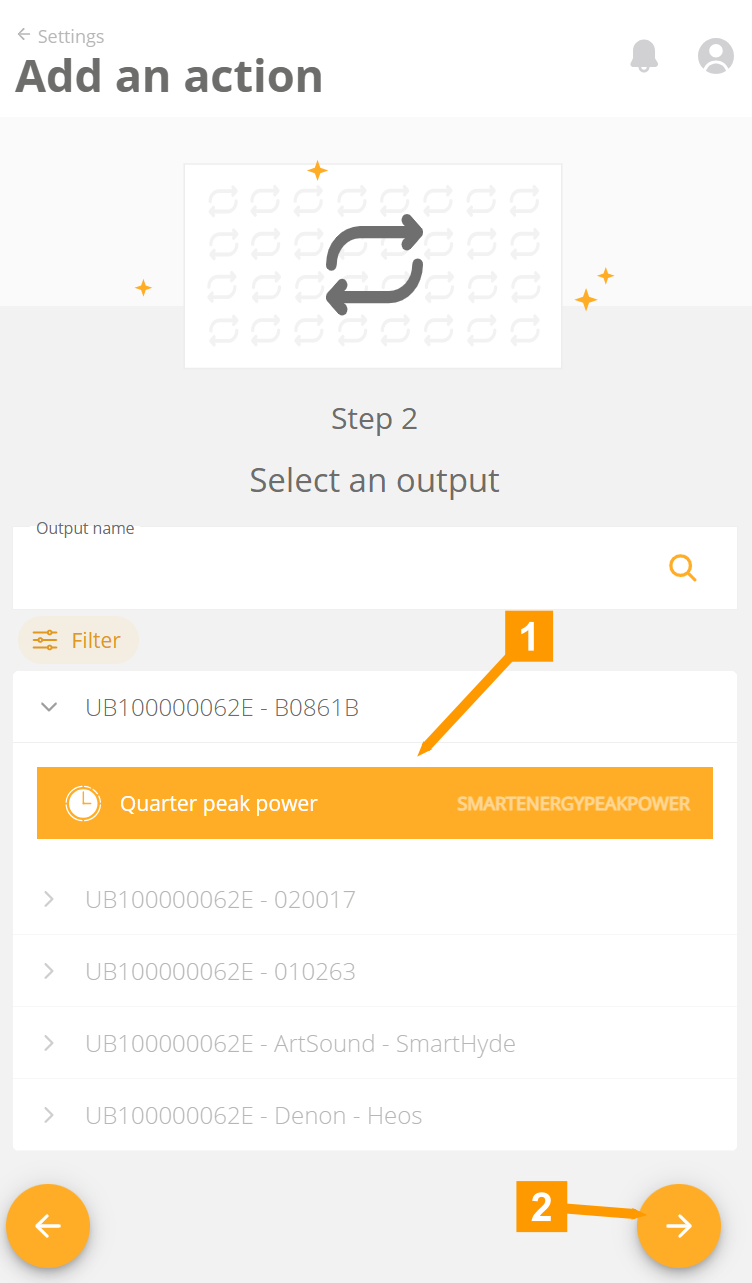
- Select the quarter-hour peak measurement of your Luqas.
- Click the arrow to proceed.
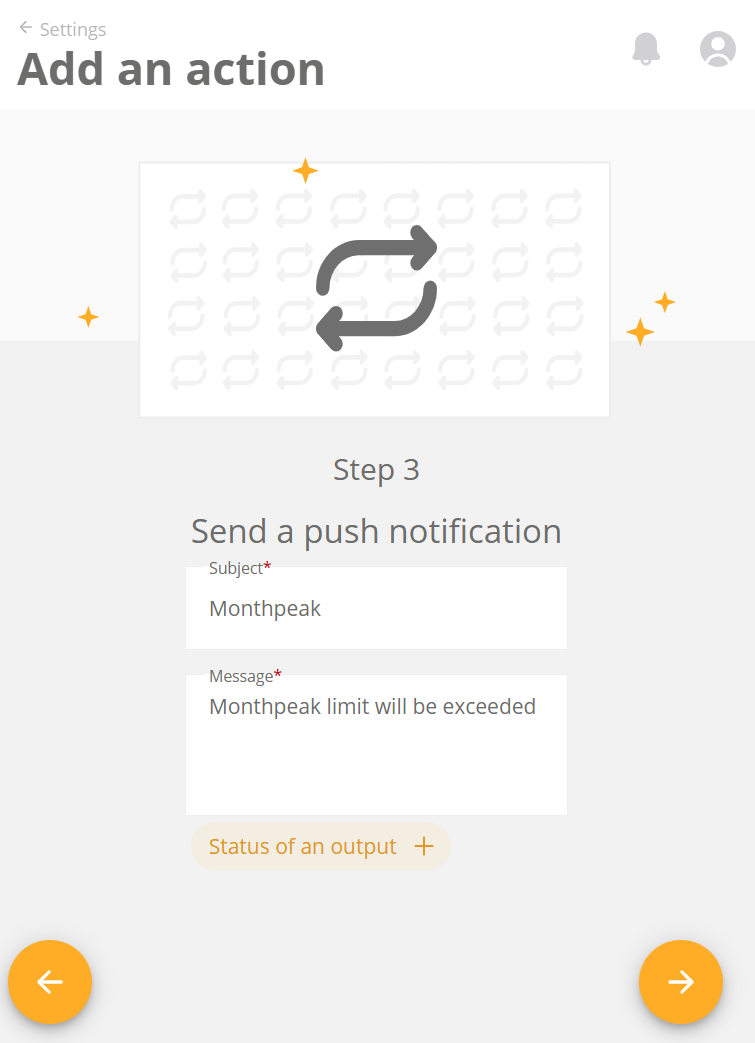
Enter a subject (1) and a message (2) possibly adding the status of 1 or more measurements (3).
Click on the arrow (4) to proceed to the next step.
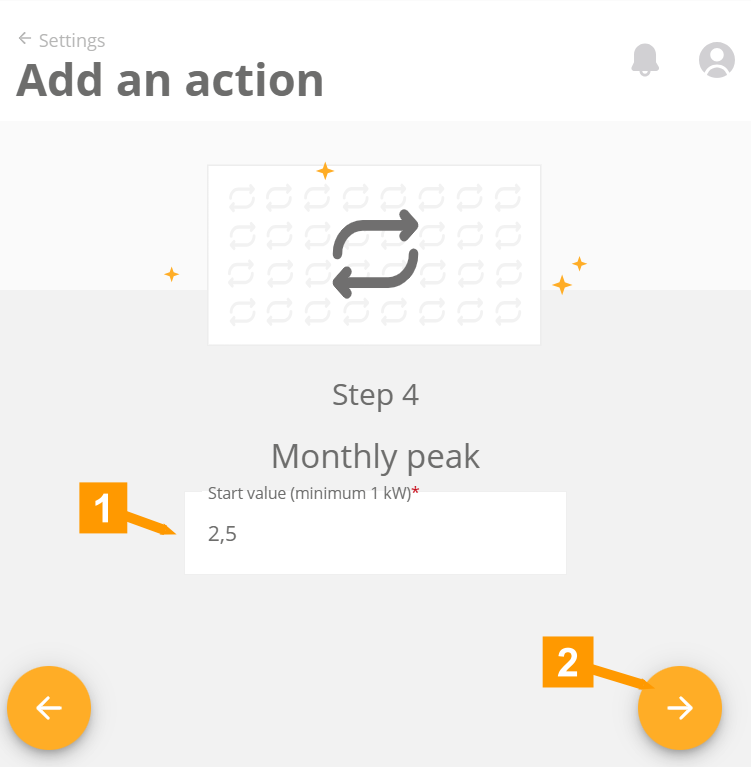
- Set a value for the maximum quarter peak here.
Normal quarter peak values are:
- For an installation with single solar panels and no trolley: 2.5 KW.
- For an installation with a hybrid cart: 3 KW.
- For an installation with a full electric cart: 5 KW.
- Click the arrow to proceed.
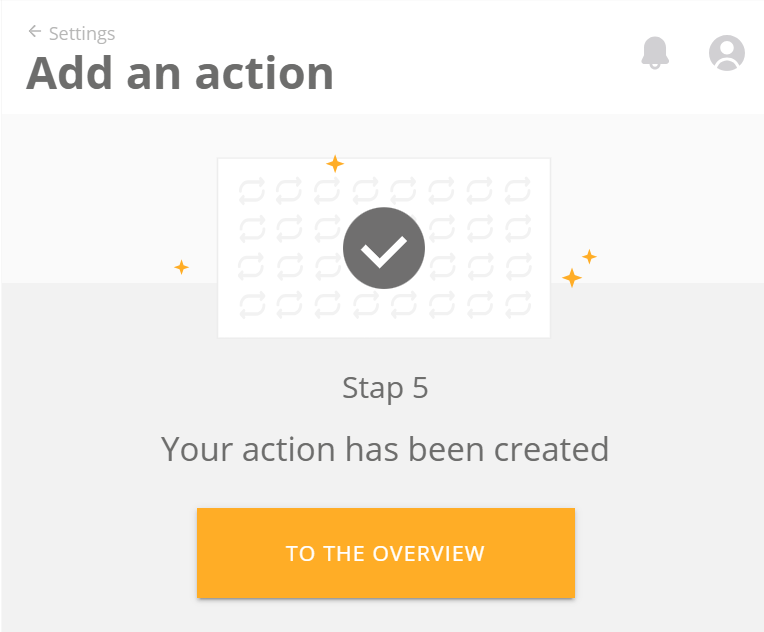
Your action has been created. Click To Overview to return to the overview.
¶ Overconsumption
Only if you have a Luqas.
- Provide a name for your action and click the arrow to proceed.
- Click the arrow to proceed.
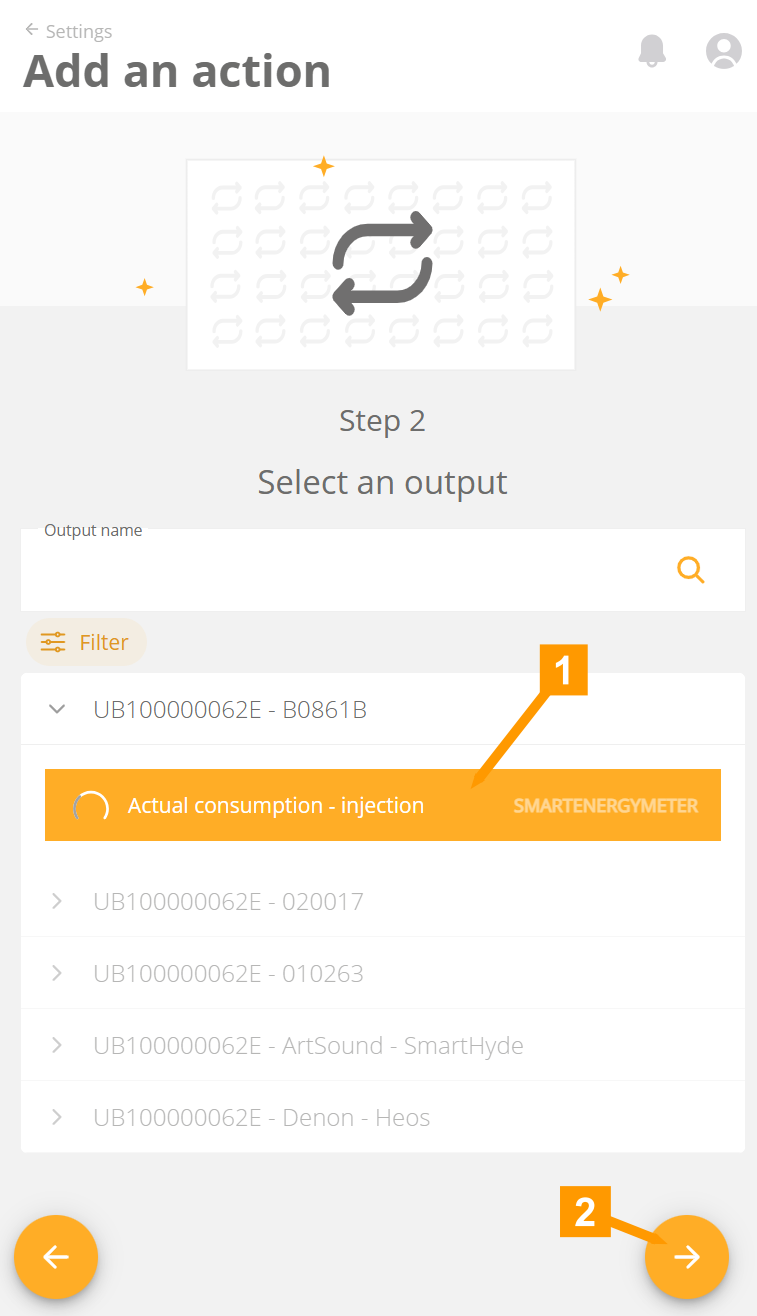
Select the Actual offtake/injection (Smart Energy Meter) measurement of your Luqas.
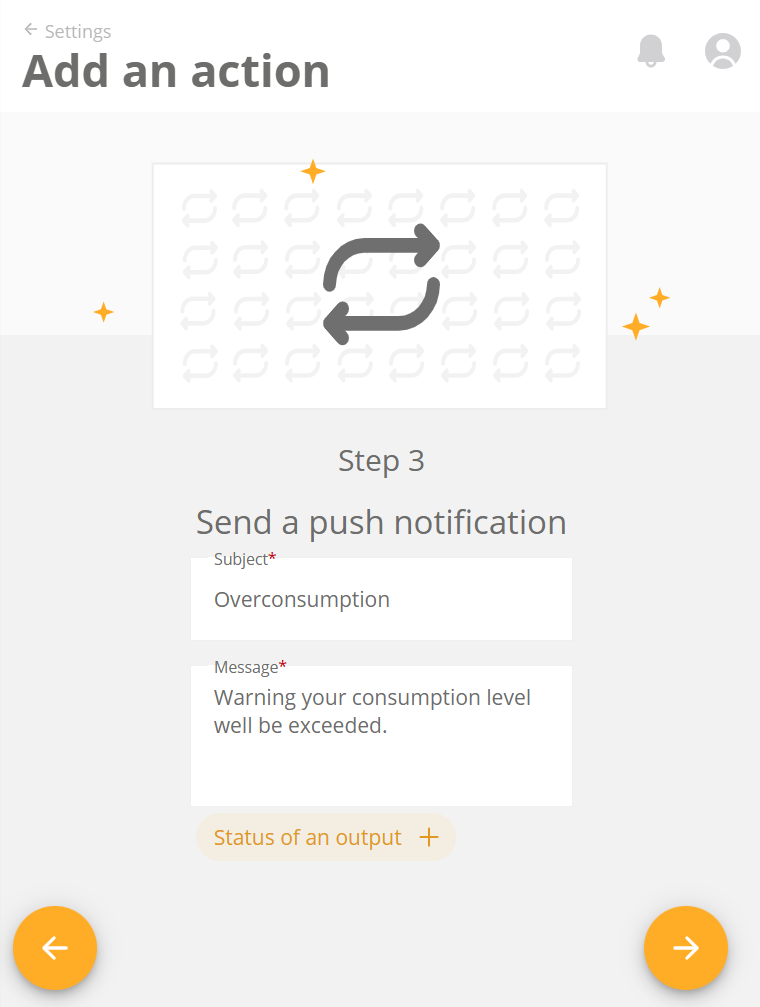
Enter a subject (1) and a message (2) possibly adding the status of 1 or more measurements (3).
Click on the arrow (4) to proceed to the next step.
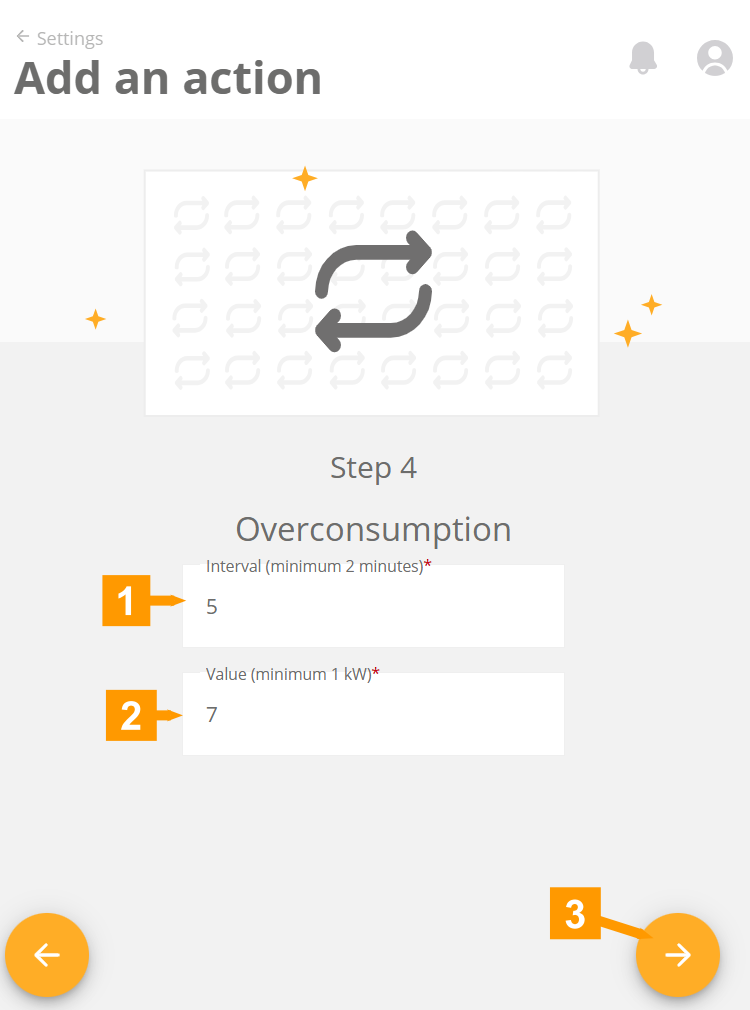
- Set an interval here. The value below will be checked every this set time.
- Set a value here, that if it is exceeded, a notification should be given.
- Click on the arrow to continue to the next step.

Your action has been created. Click To Overview to return to the overview.
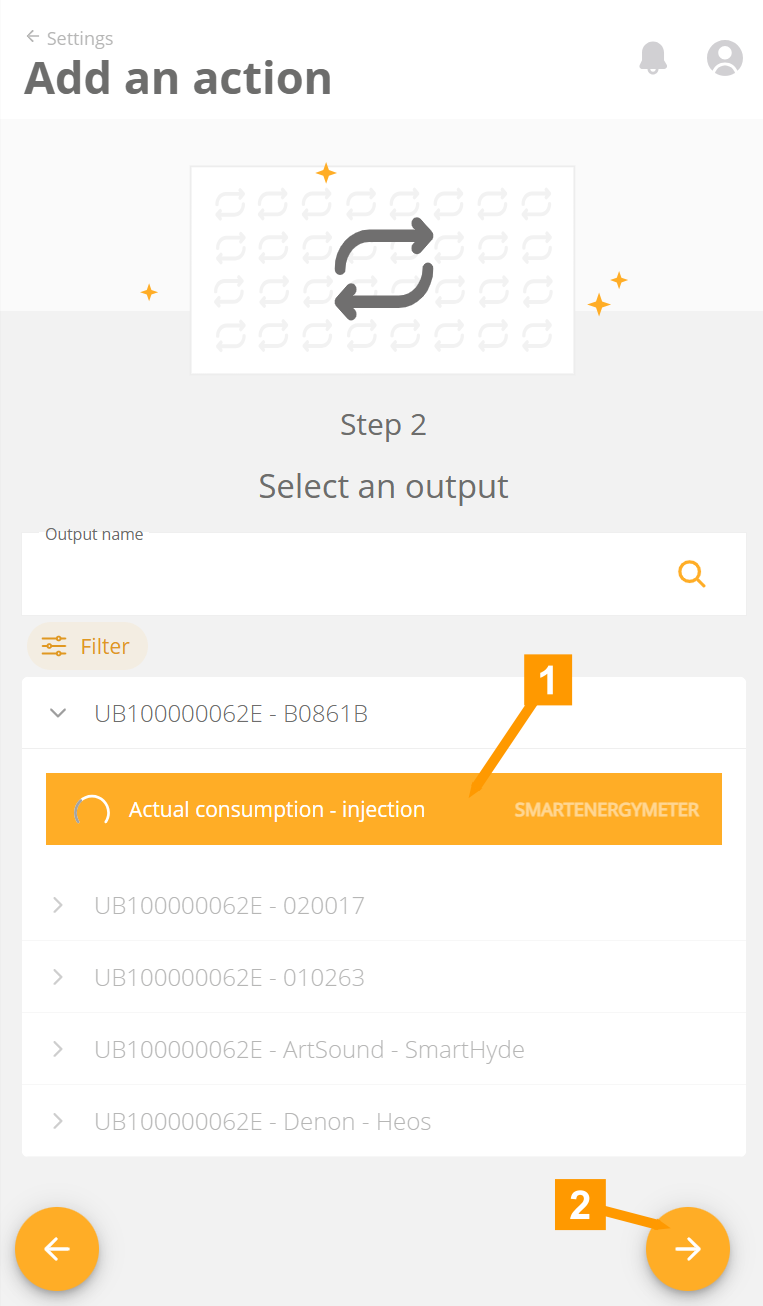
¶ Overproduction
Only if you have a Luqas.
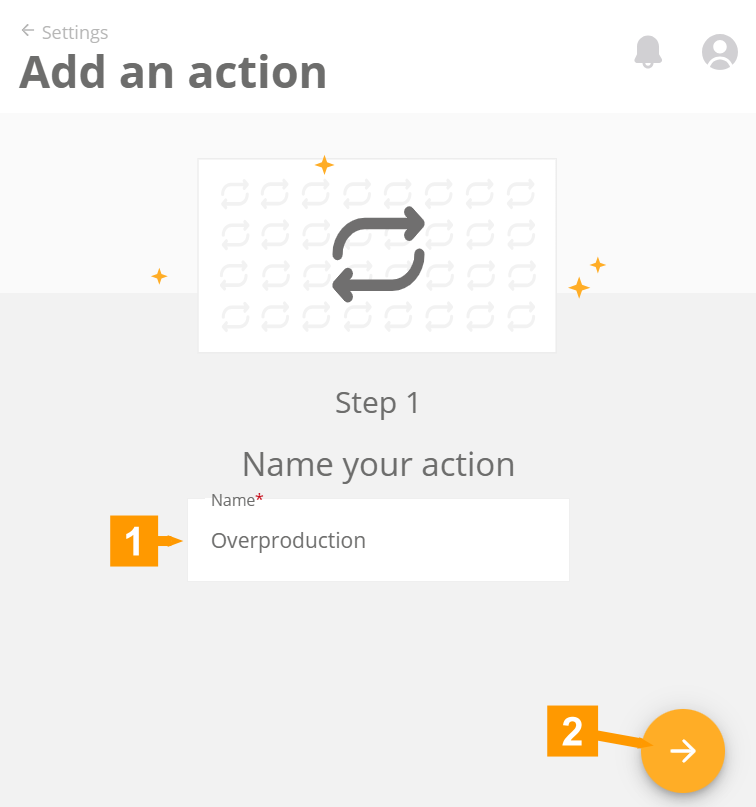
Provide a name for your action and click the arrow to proceed.
- Provide a name for your action and click the arrow to proceed.
- Click the arrow to proceed.
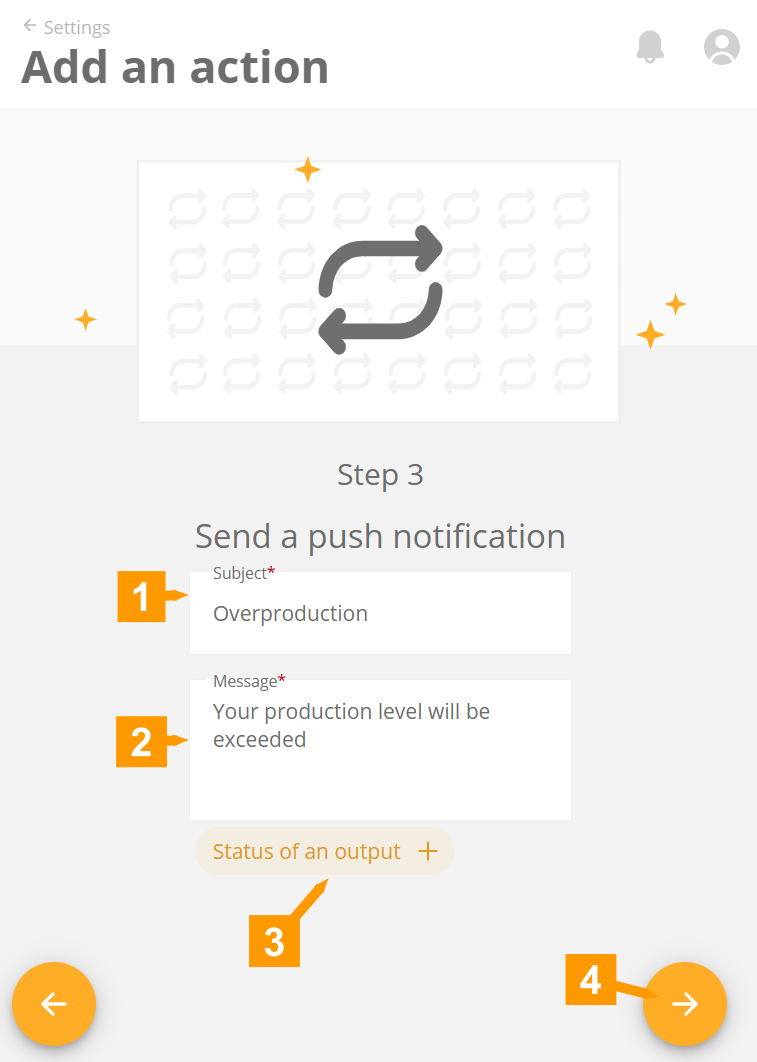
Enter a subject (1) and a message (2) possibly adding the status of 1 or more measurements (3).
Click on the arrow (4) to proceed to the next step.
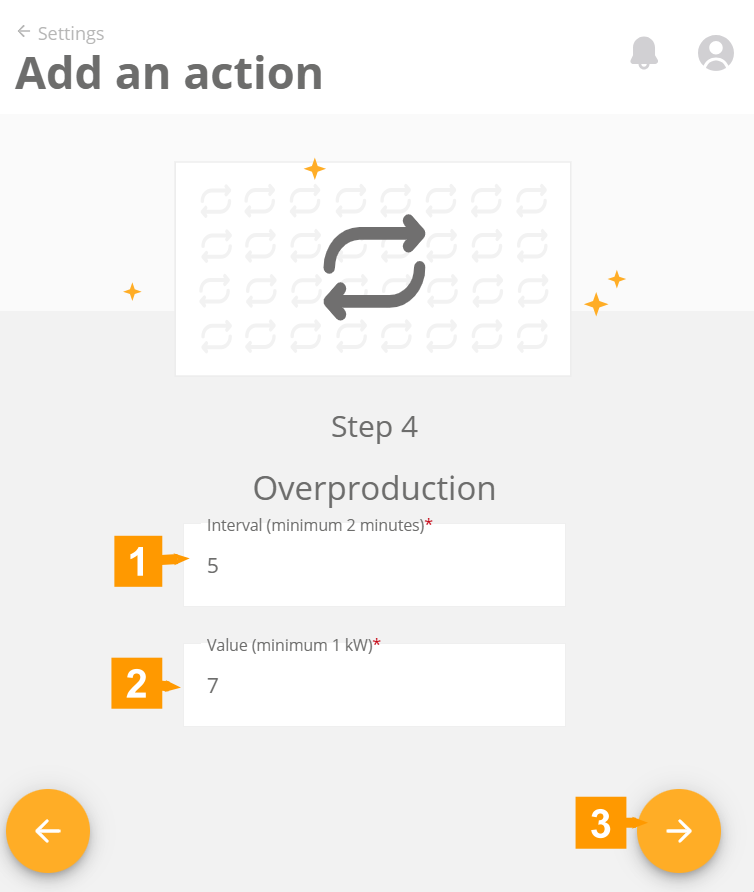
- Set an interval here. The value below will be checked every this set time.
- Set a value here, that if it is exceeded, a notification should be given.
- Click on the arrow to continue to the next step.